How To Create A Discord Bot In 5 Minutes?
Table Of Contents
Bots have become increasingly popular in recent years because they make it possible to automate many things that previously had to be done manually by humans.
This way, we can save an enormous amount of time and focus on the most important tasks instead of doing routine work.
Today we are going to create a skeleton for a Discord bot that can respond to a specific user message.
#1 - Create Discord Application
To begin with, we need a Discord Application.
Navigate to https://discord.com/developers/applications (log in or sign up if you have not already) and click on the "New Application" button on top right:

Enter the name and you will be taken to the application's dashboard page.
Click on the "Bot" menu item on the left and then click "Add Bot" on the right:

After you add a bot, you will be redirected to the bot's dashboard page.
Locate "TOKEN" section and click the "Copy" button to copy the token that will be needed later for integration with the Discord API:
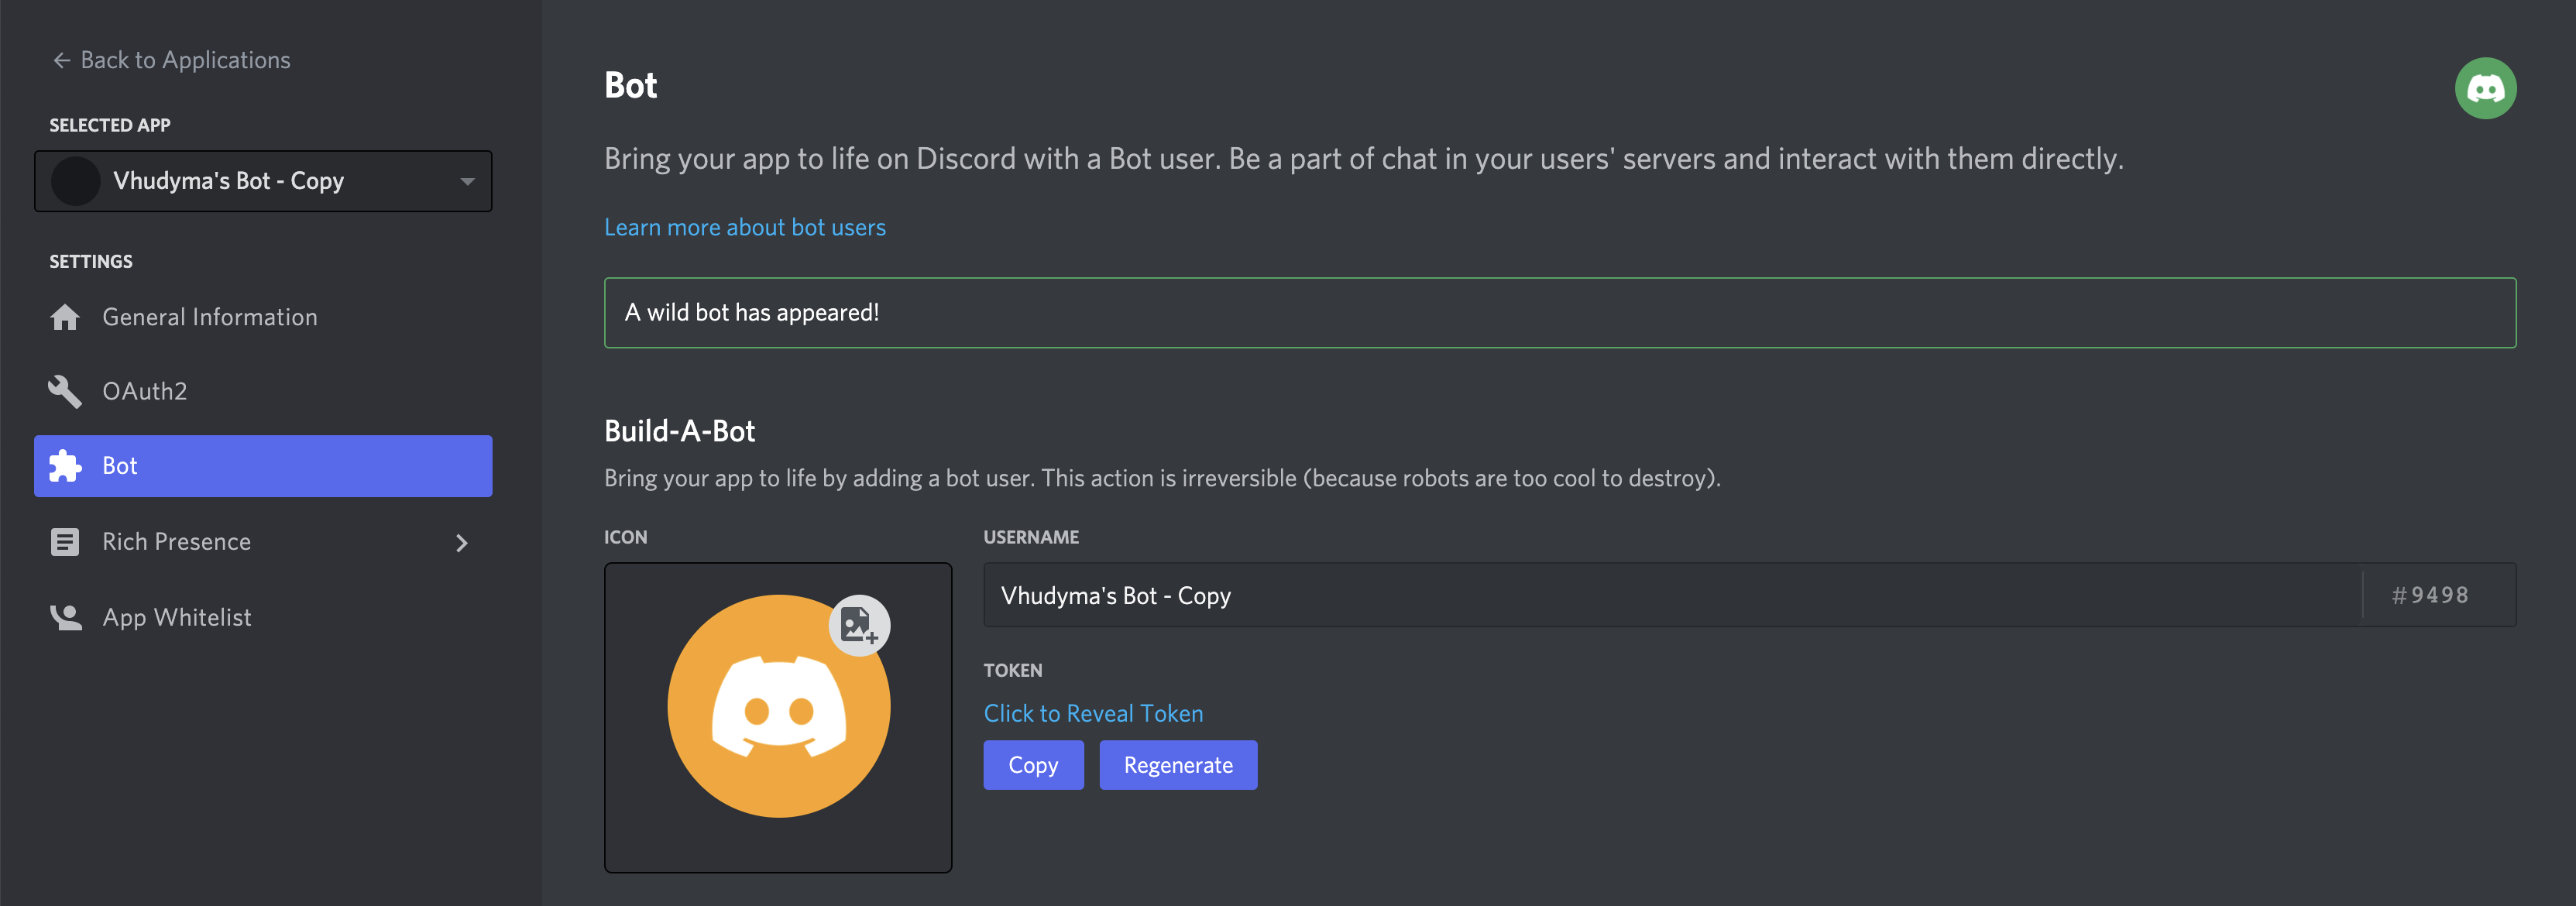
Important Note: Do not share this token with others. If you accidentally do, it may be regenerated.
#2 - Add Bot To Server
To add a bot to server, you must first create it.
#2.1 - Create Discord Server
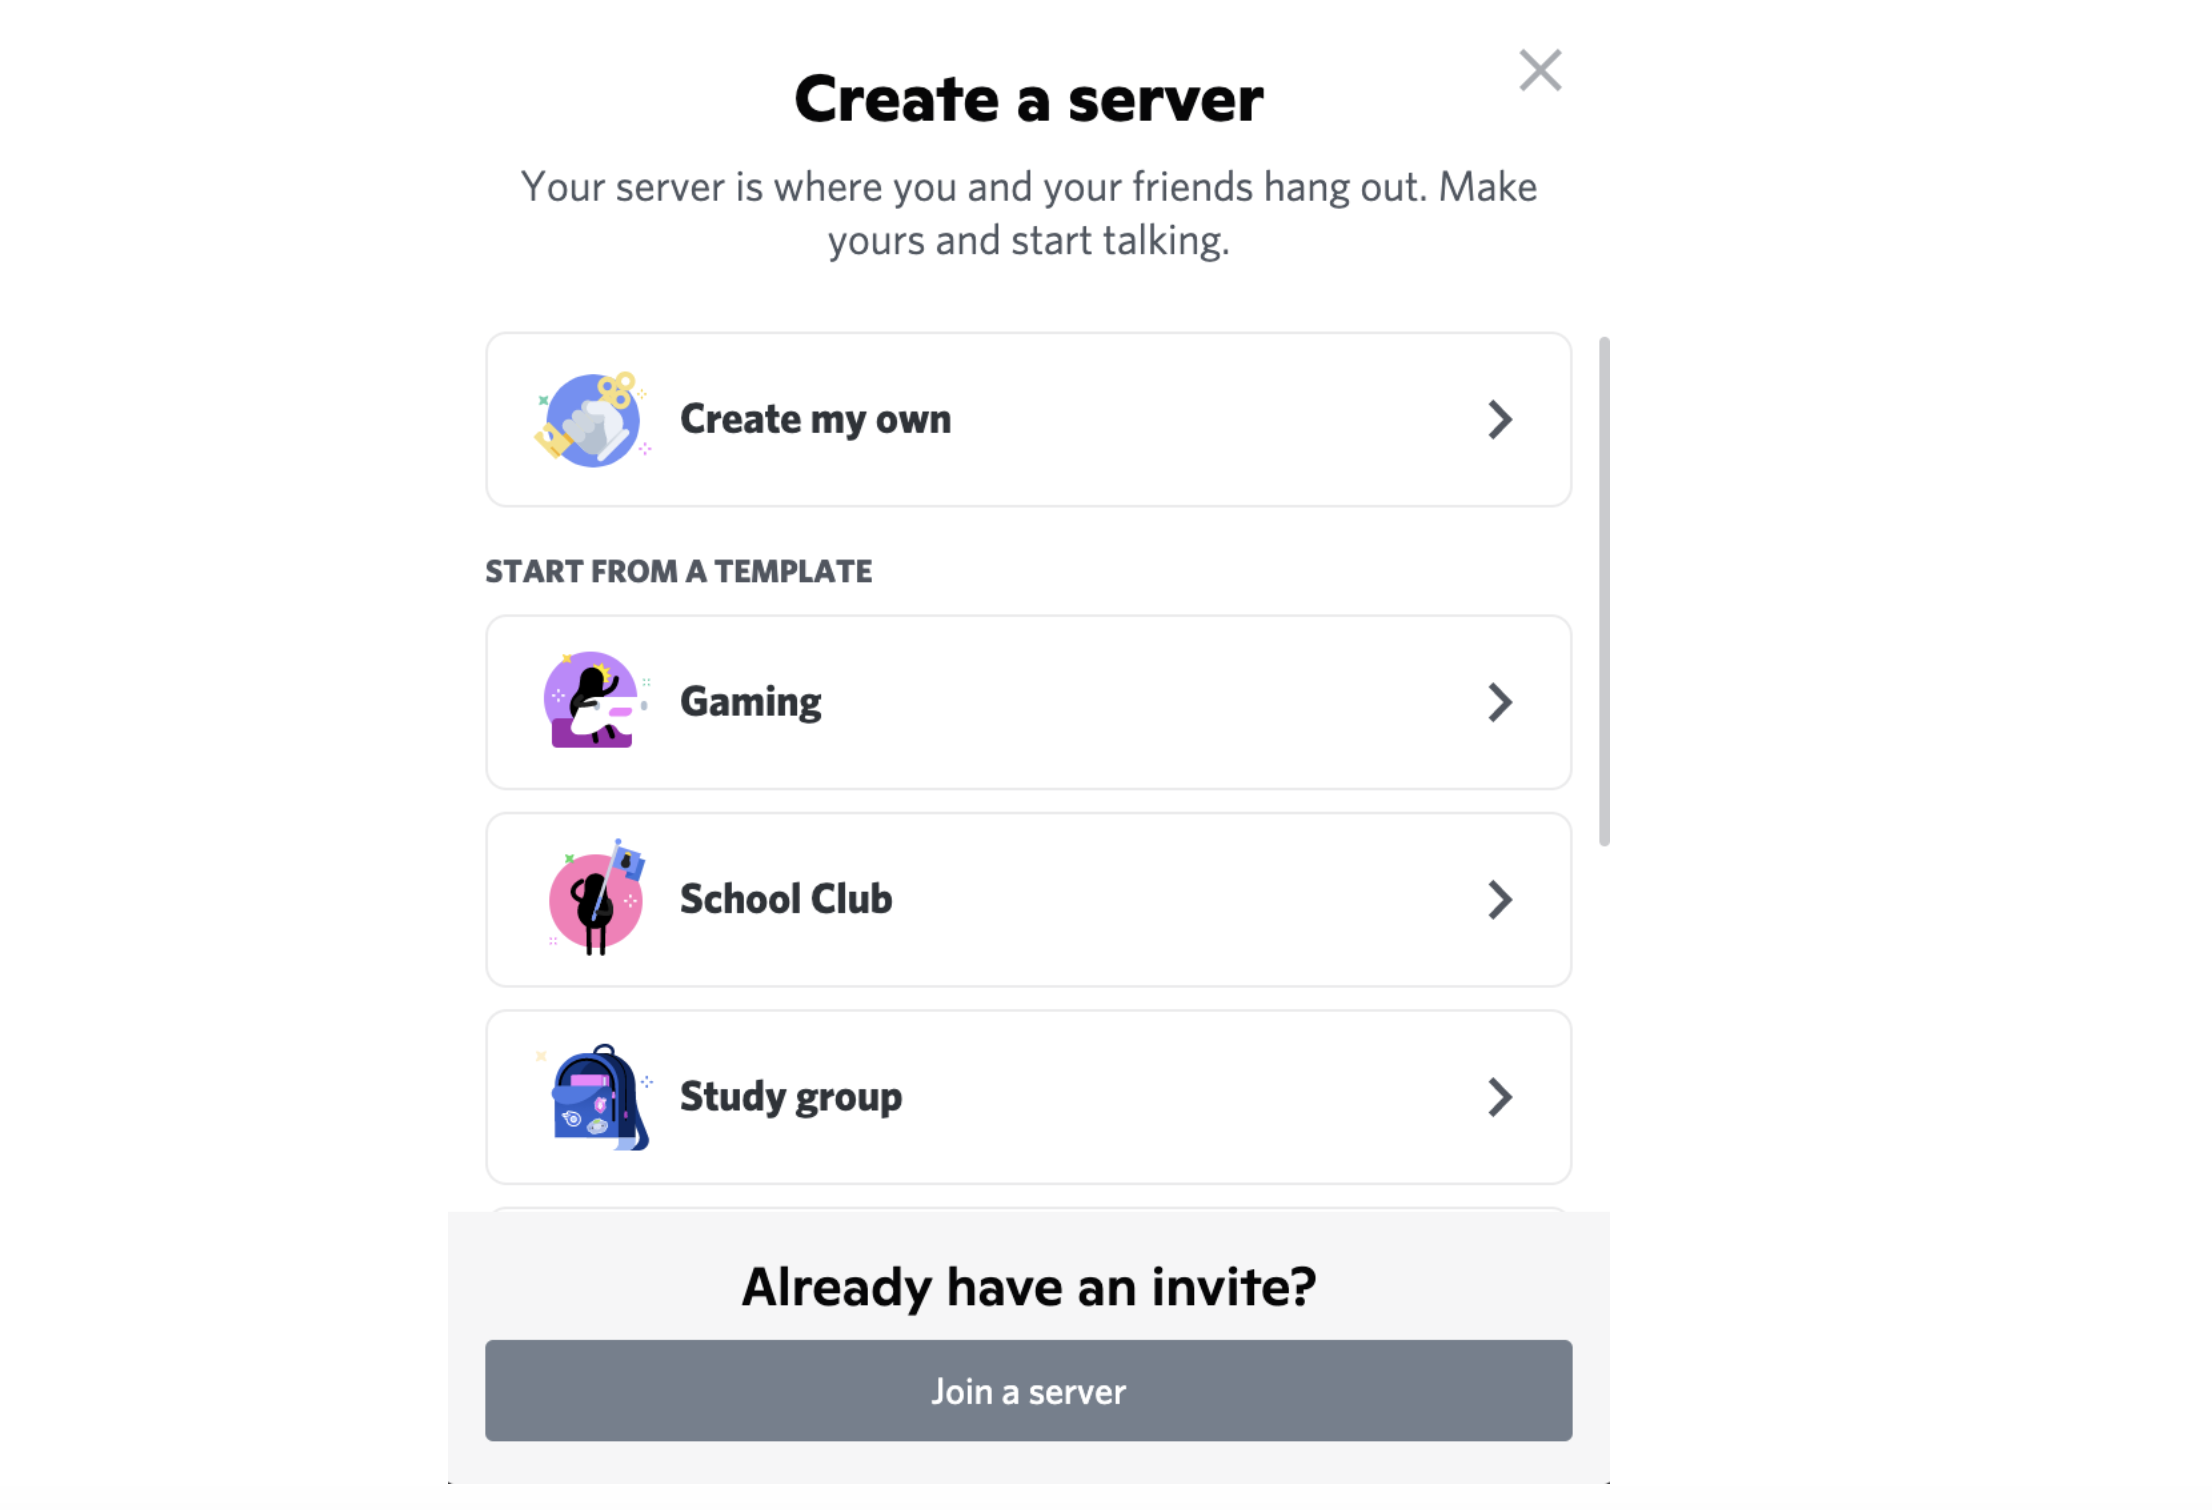
Navigate to the Discord application and click on the "plus" icon on the left side of the page (if you hover over this item, you will see a tooltip "Add a server").
After clicking on it, you will be prompted to choose a template for the server, but let's click on "Create my own":
The next step is to tell Discord whether this server is just for you and your friends or for a larger community:
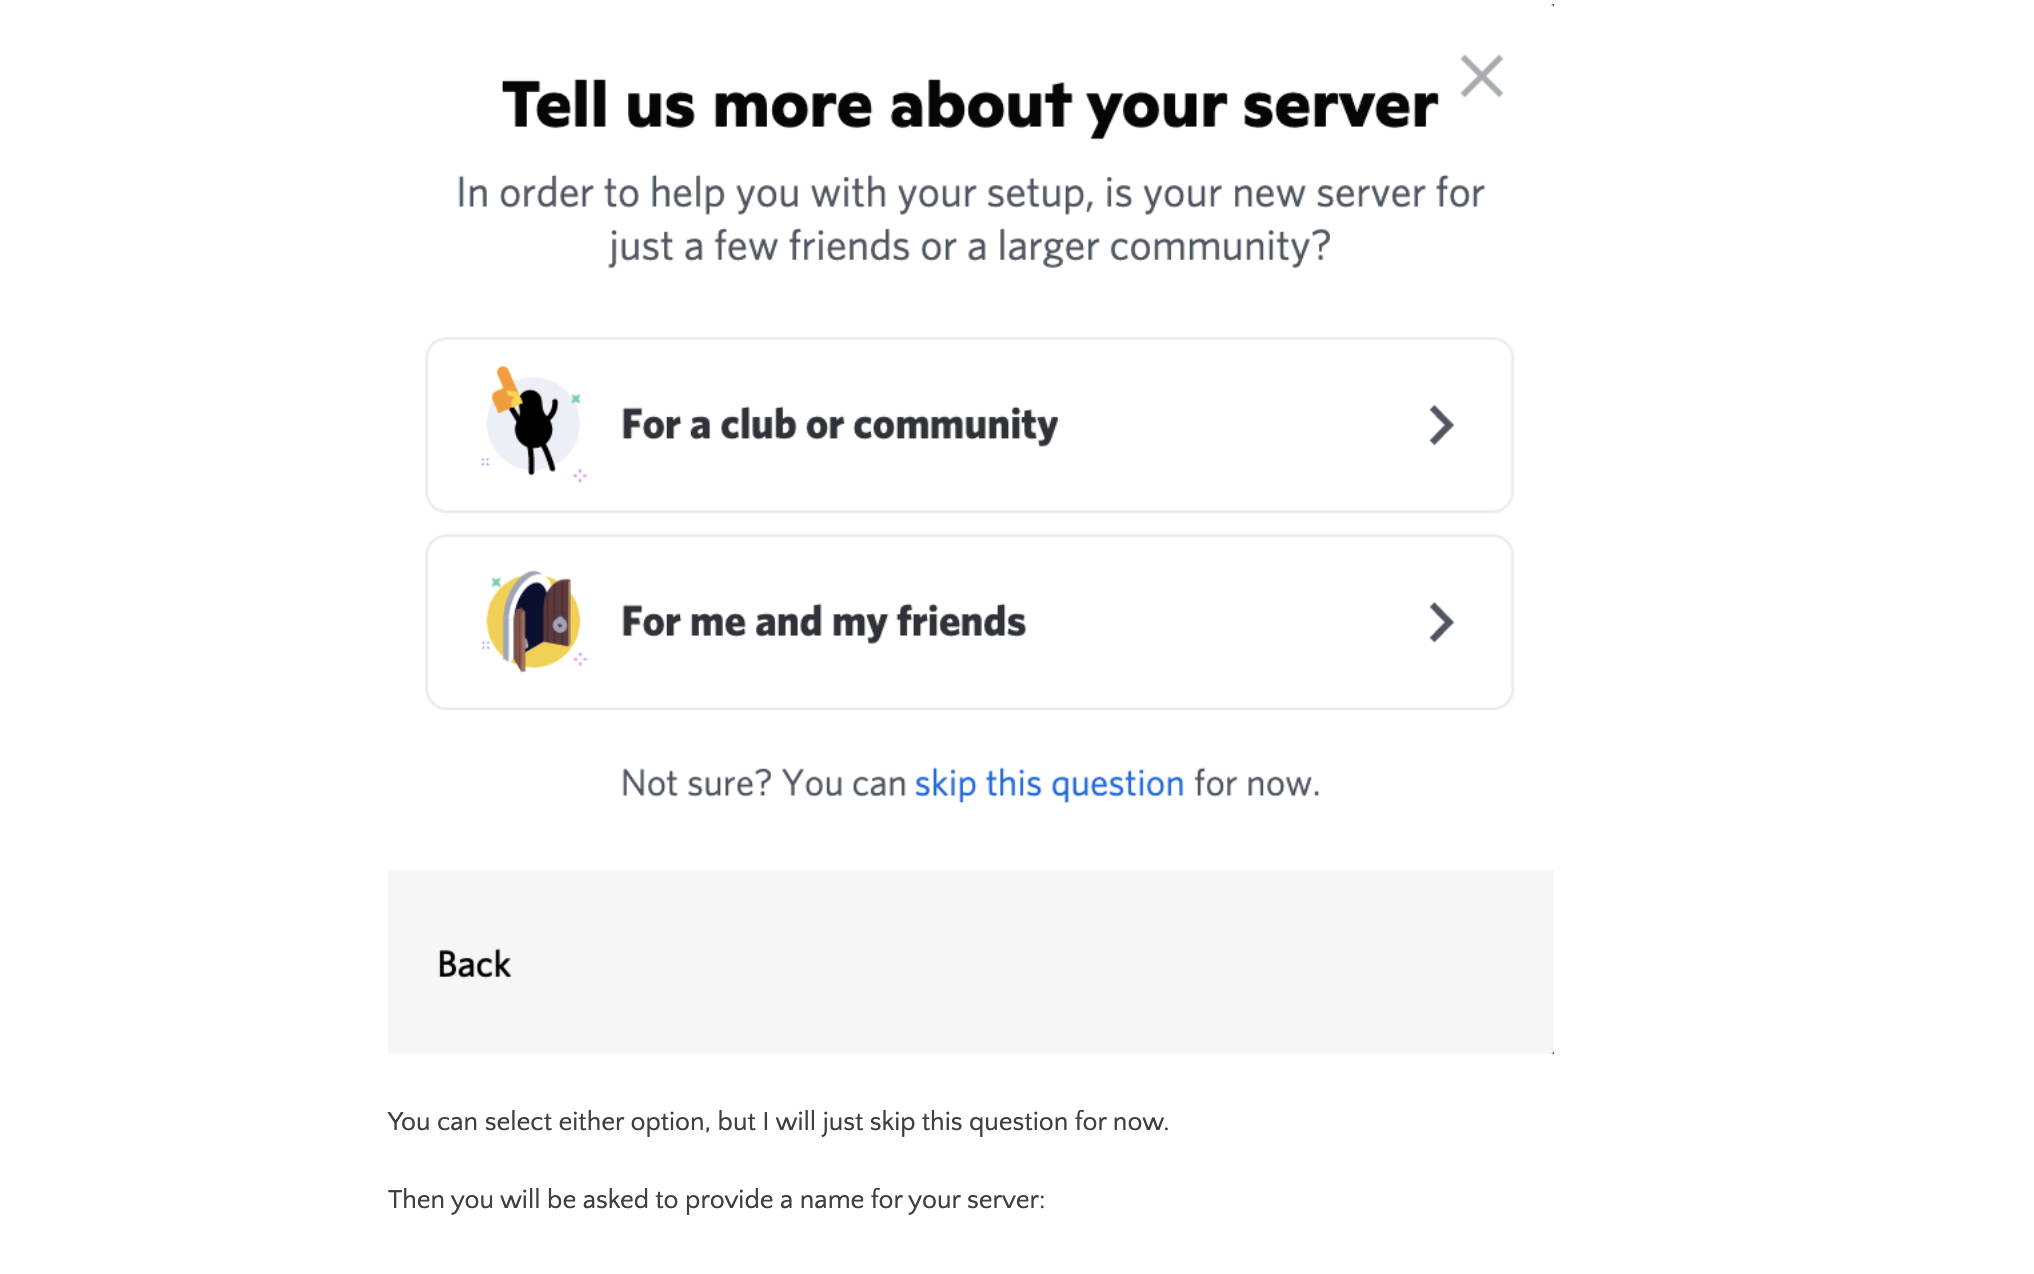
You can choose either option, but I'll just skip this question for now.
Then you will be asked to provide a name for your server:
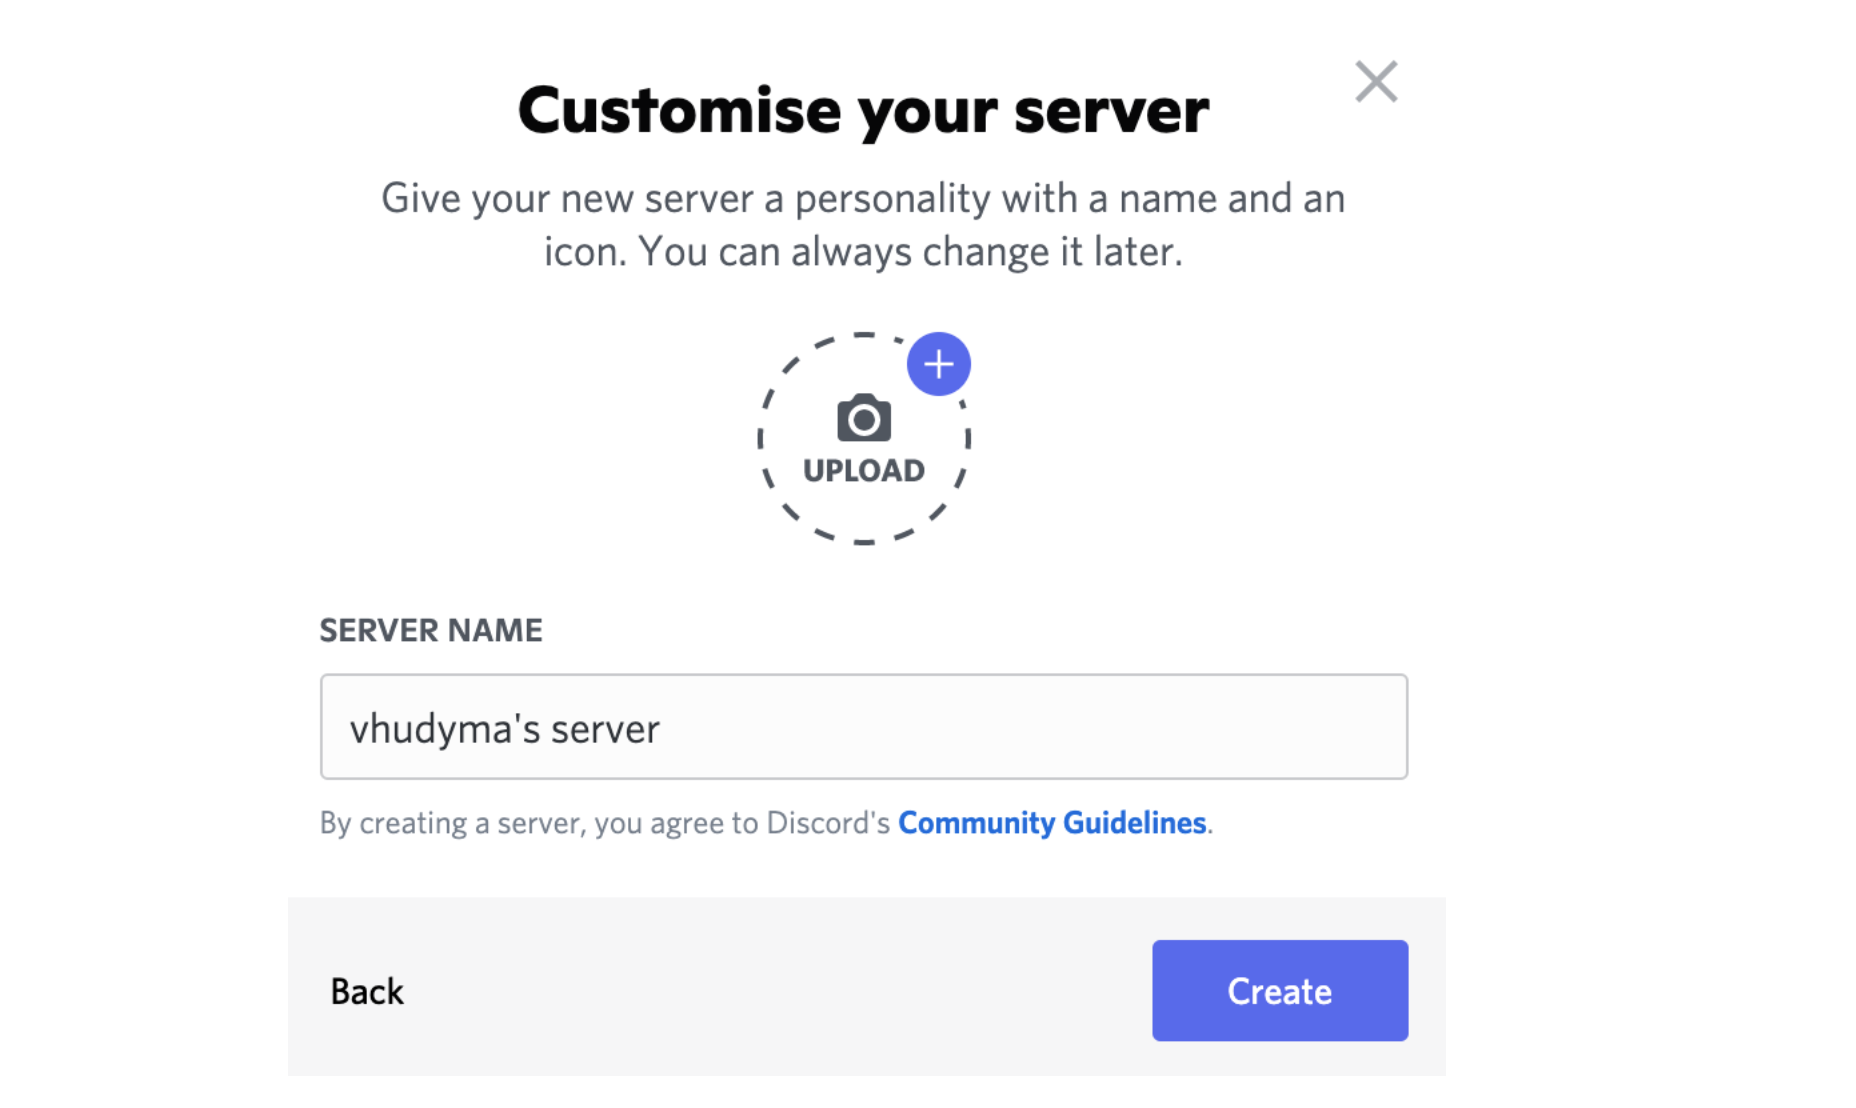
I'll stick with the default and click "Create".
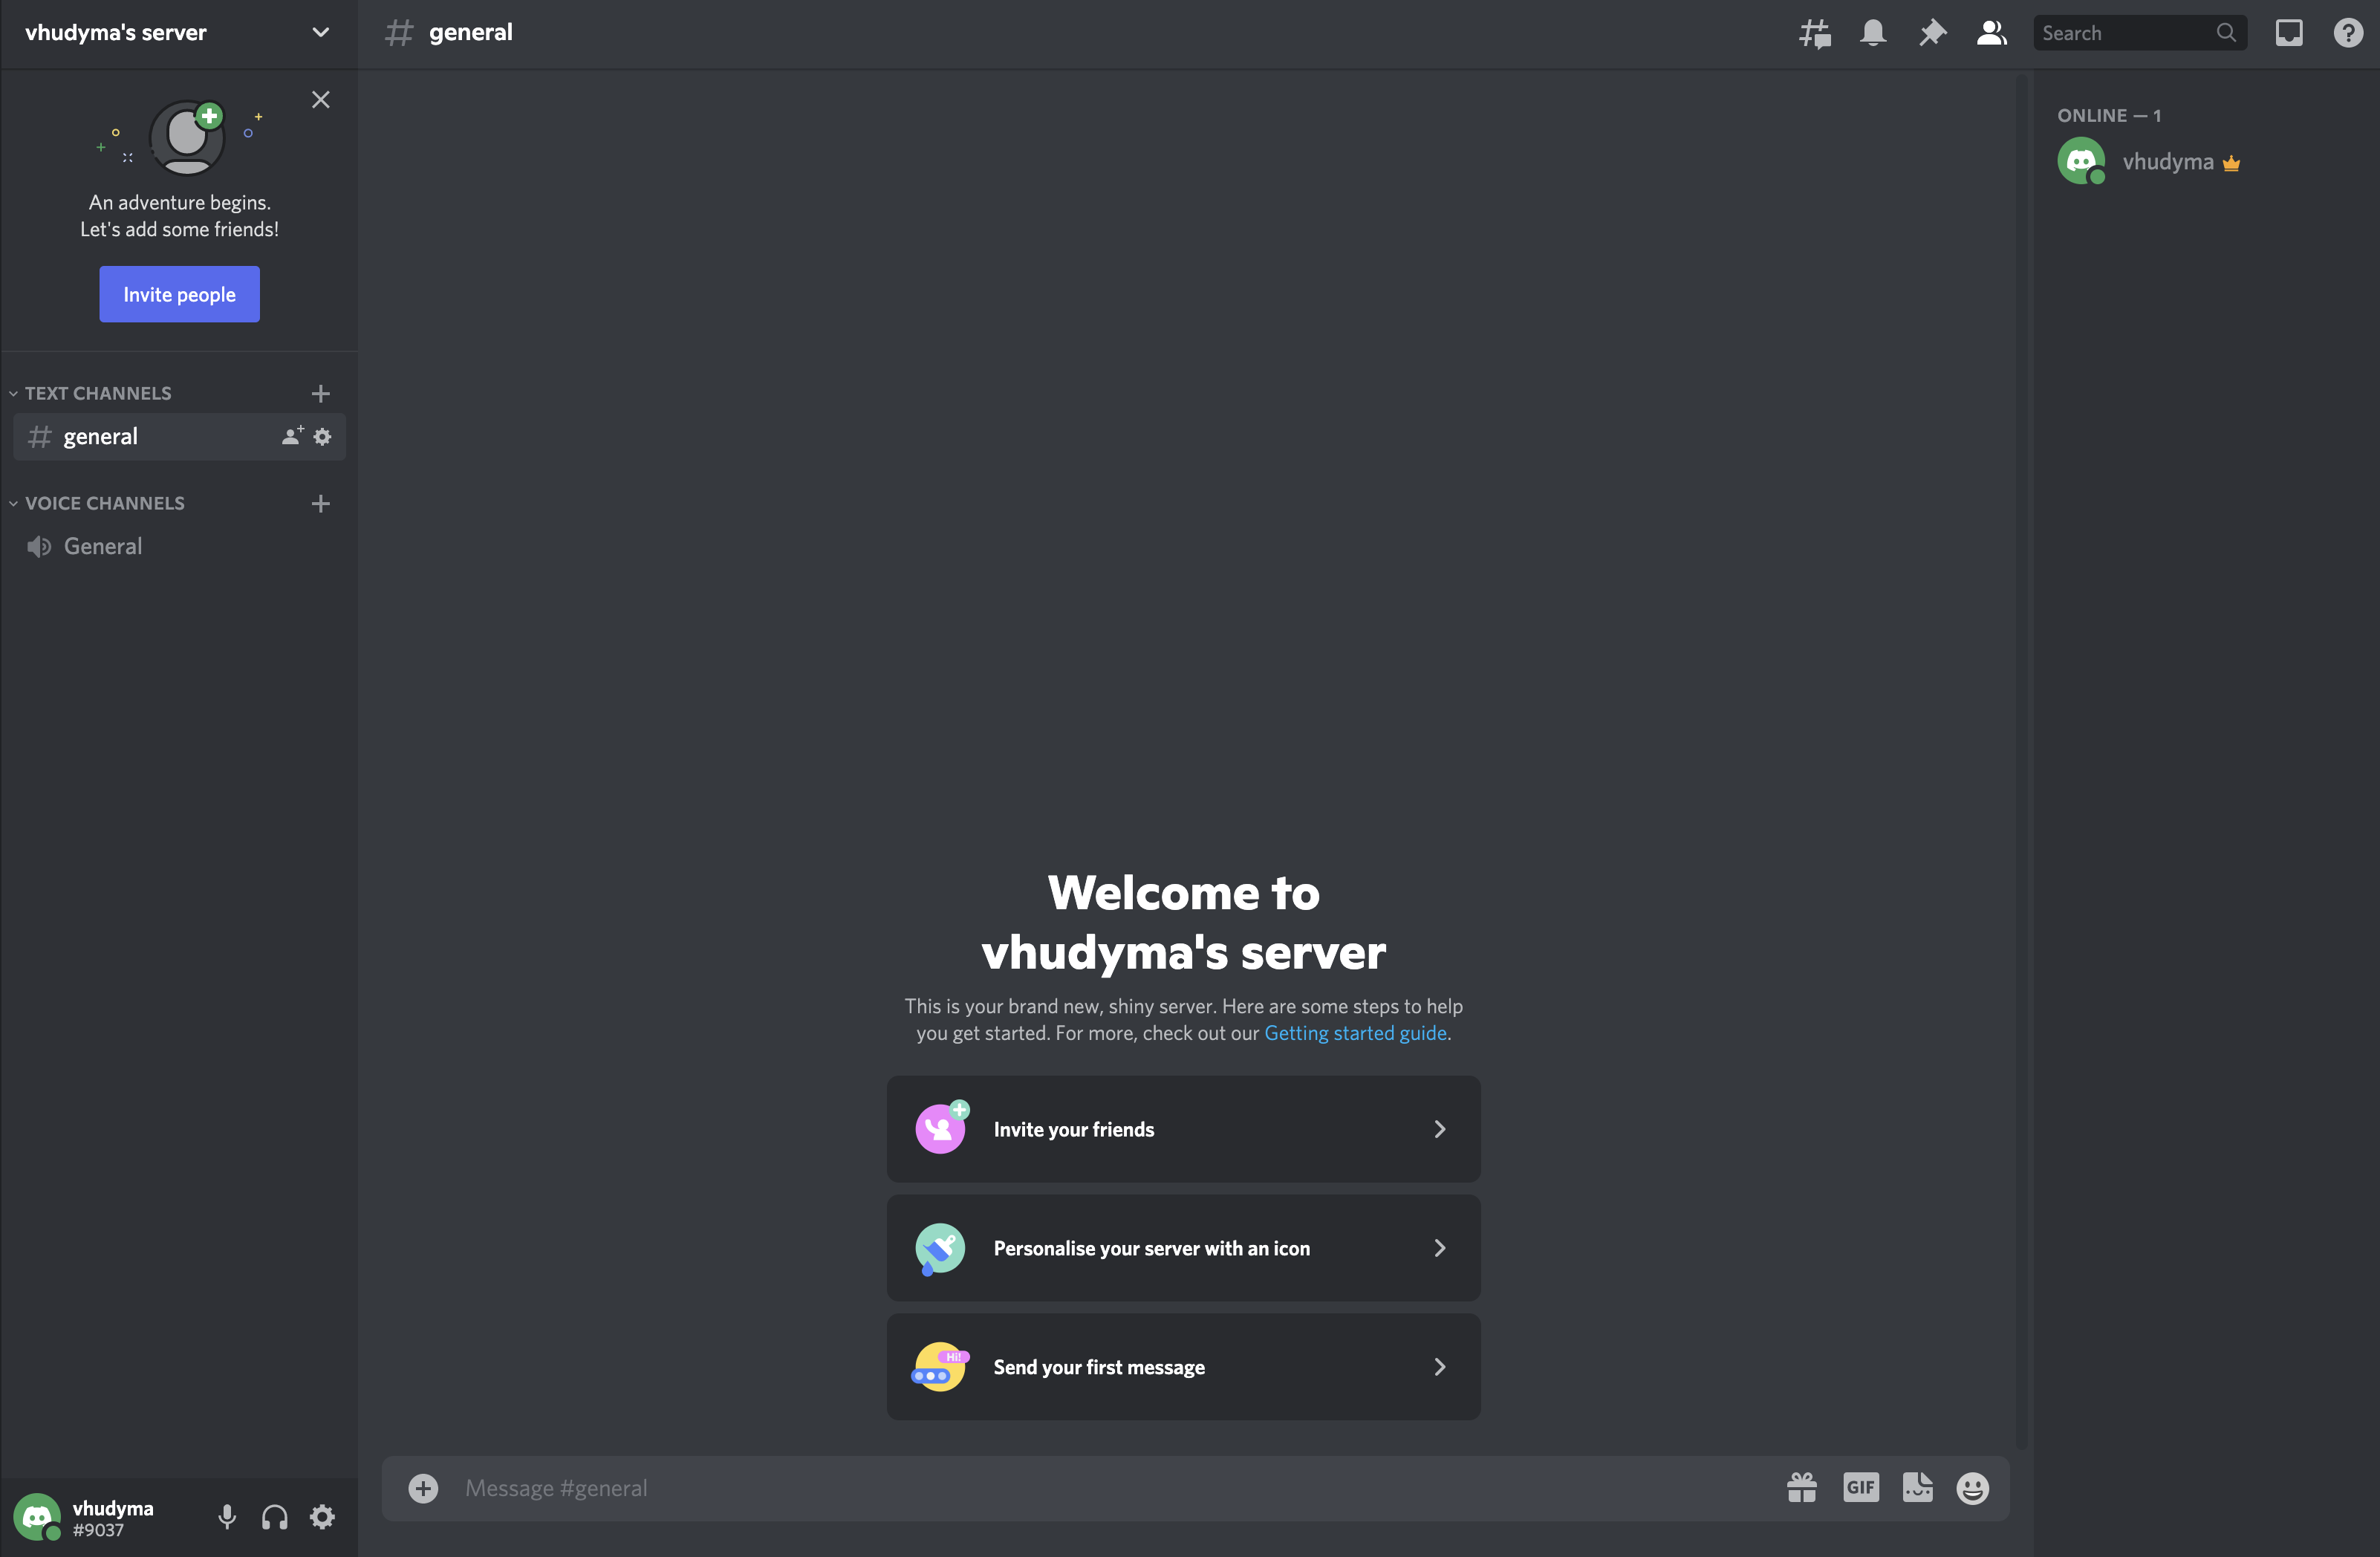
Congratulations on creating your own Discord server:
#2.2 - Invite Bot To Join Server
Return to Discord Developer Portal, navigate to "OAuth2", find the "SCOPE" section and check "Bot":
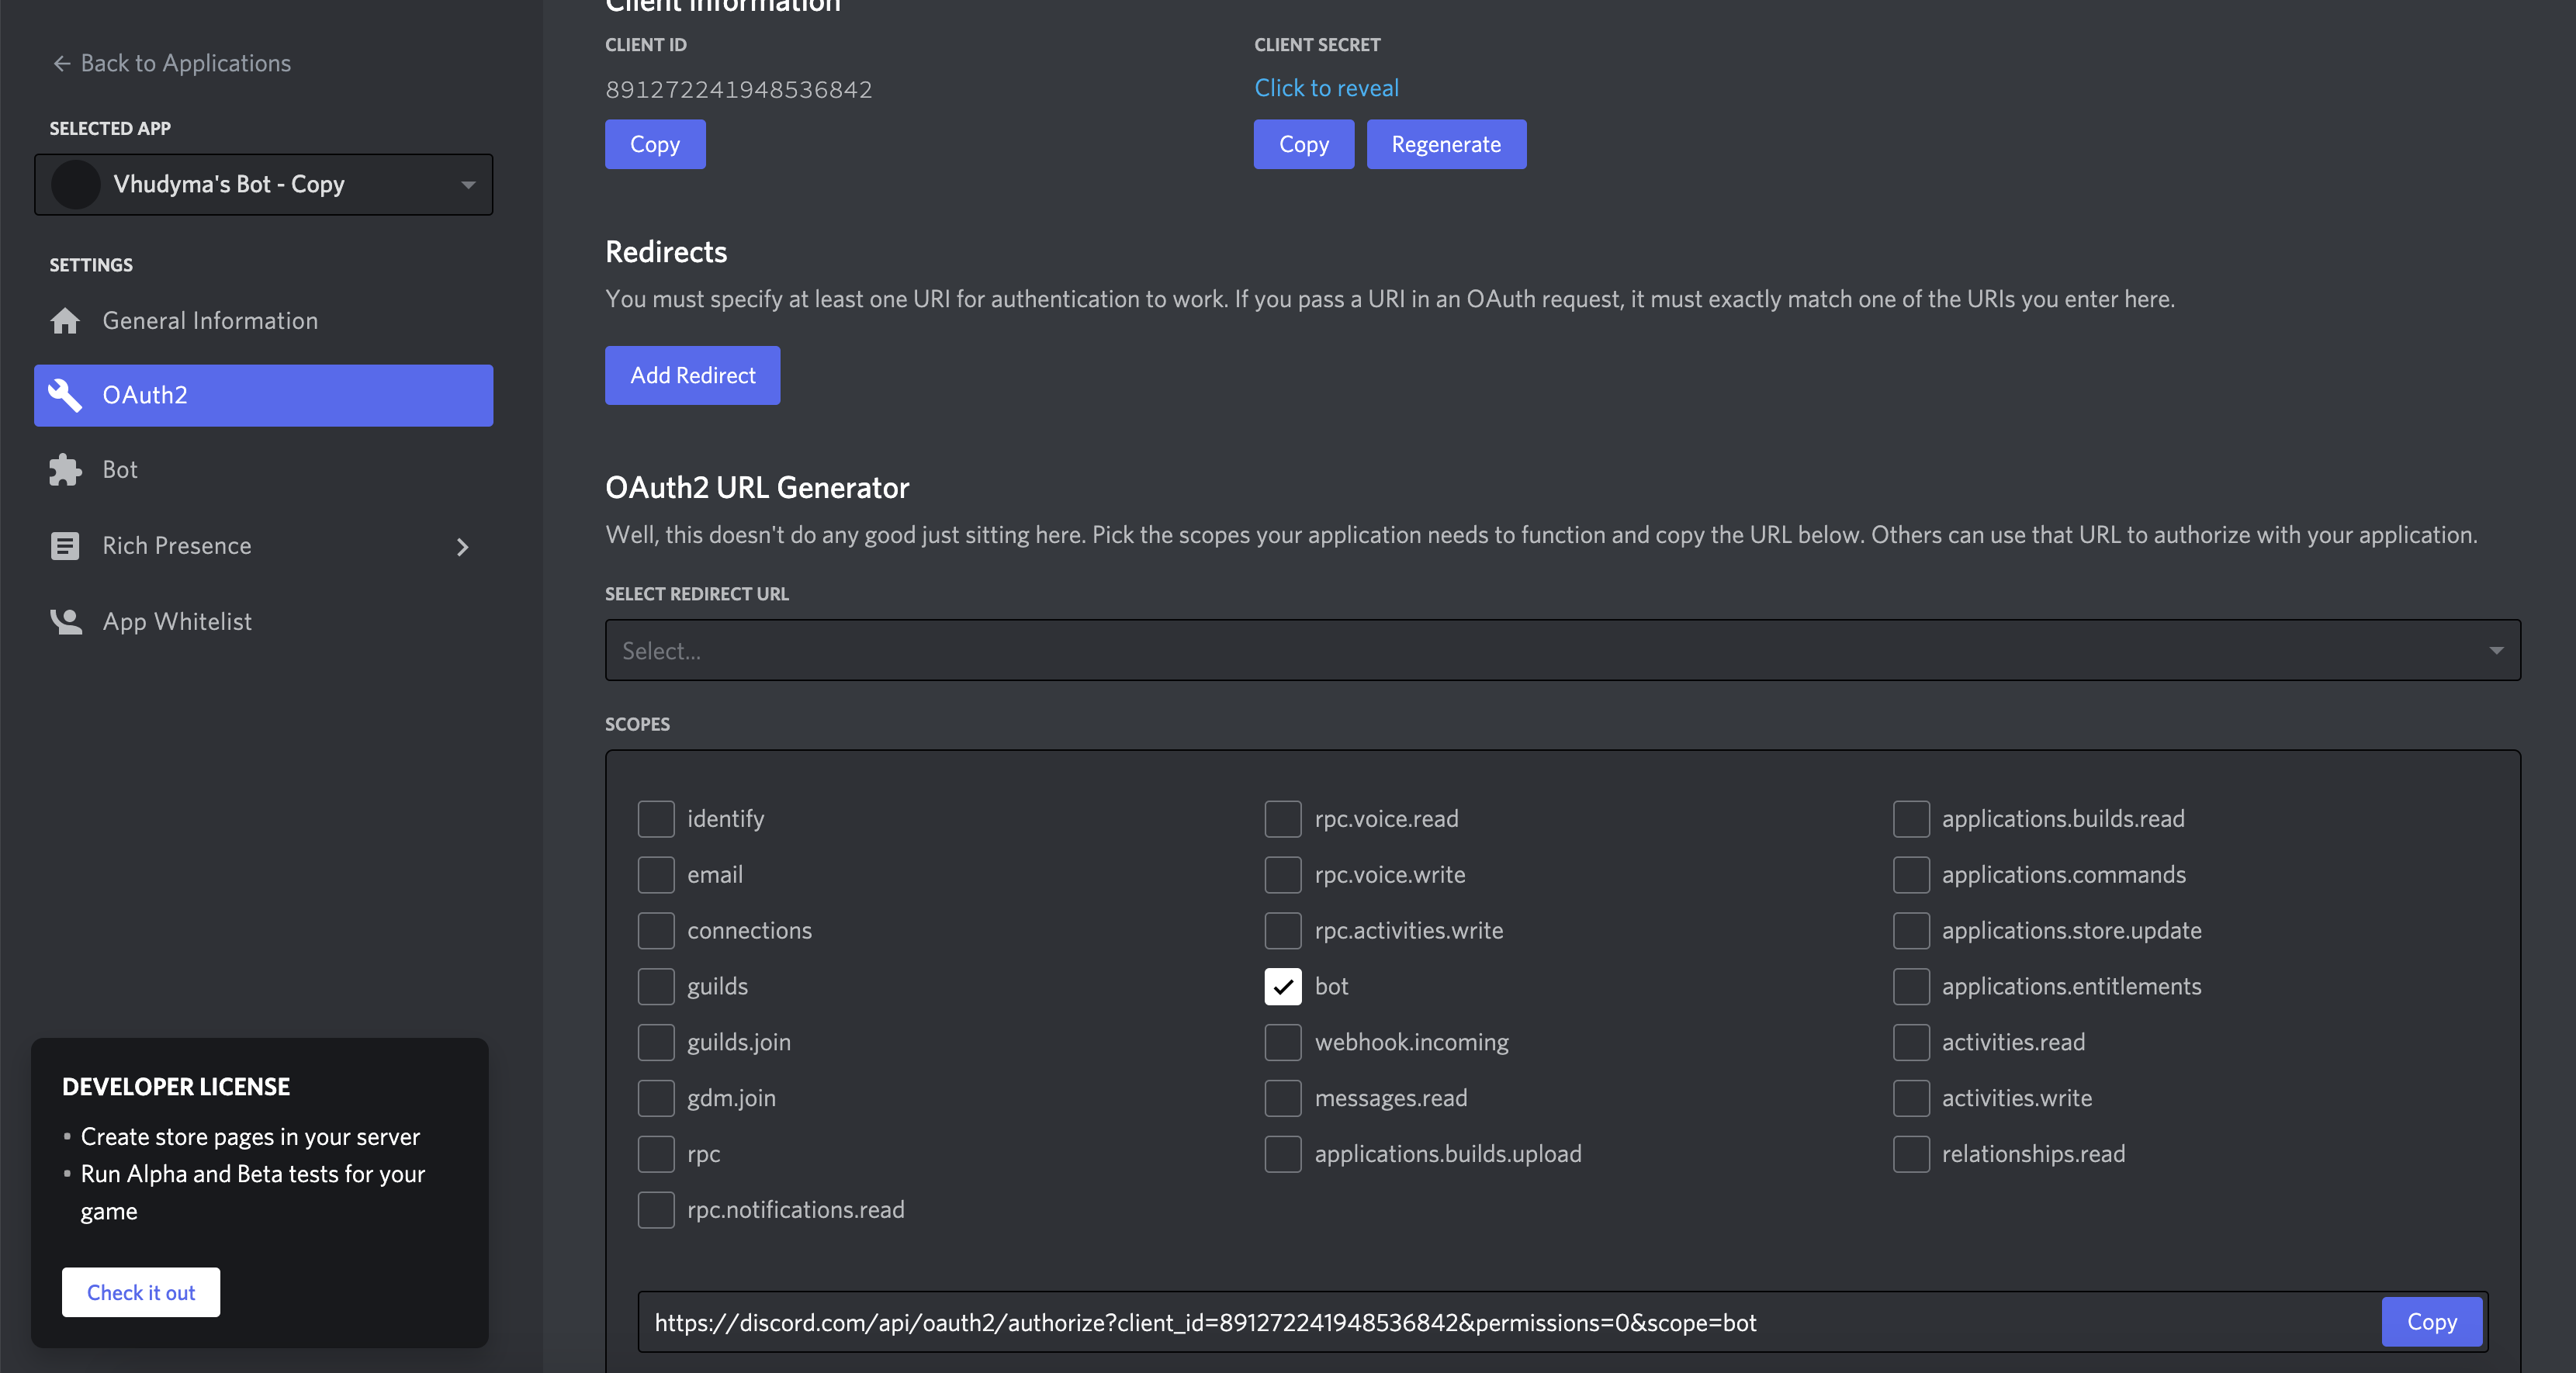
Take a look at the bottom of the "SCOPES" section - you got a generated URL.
Open it in a new tab and you will be redirected to the following page:
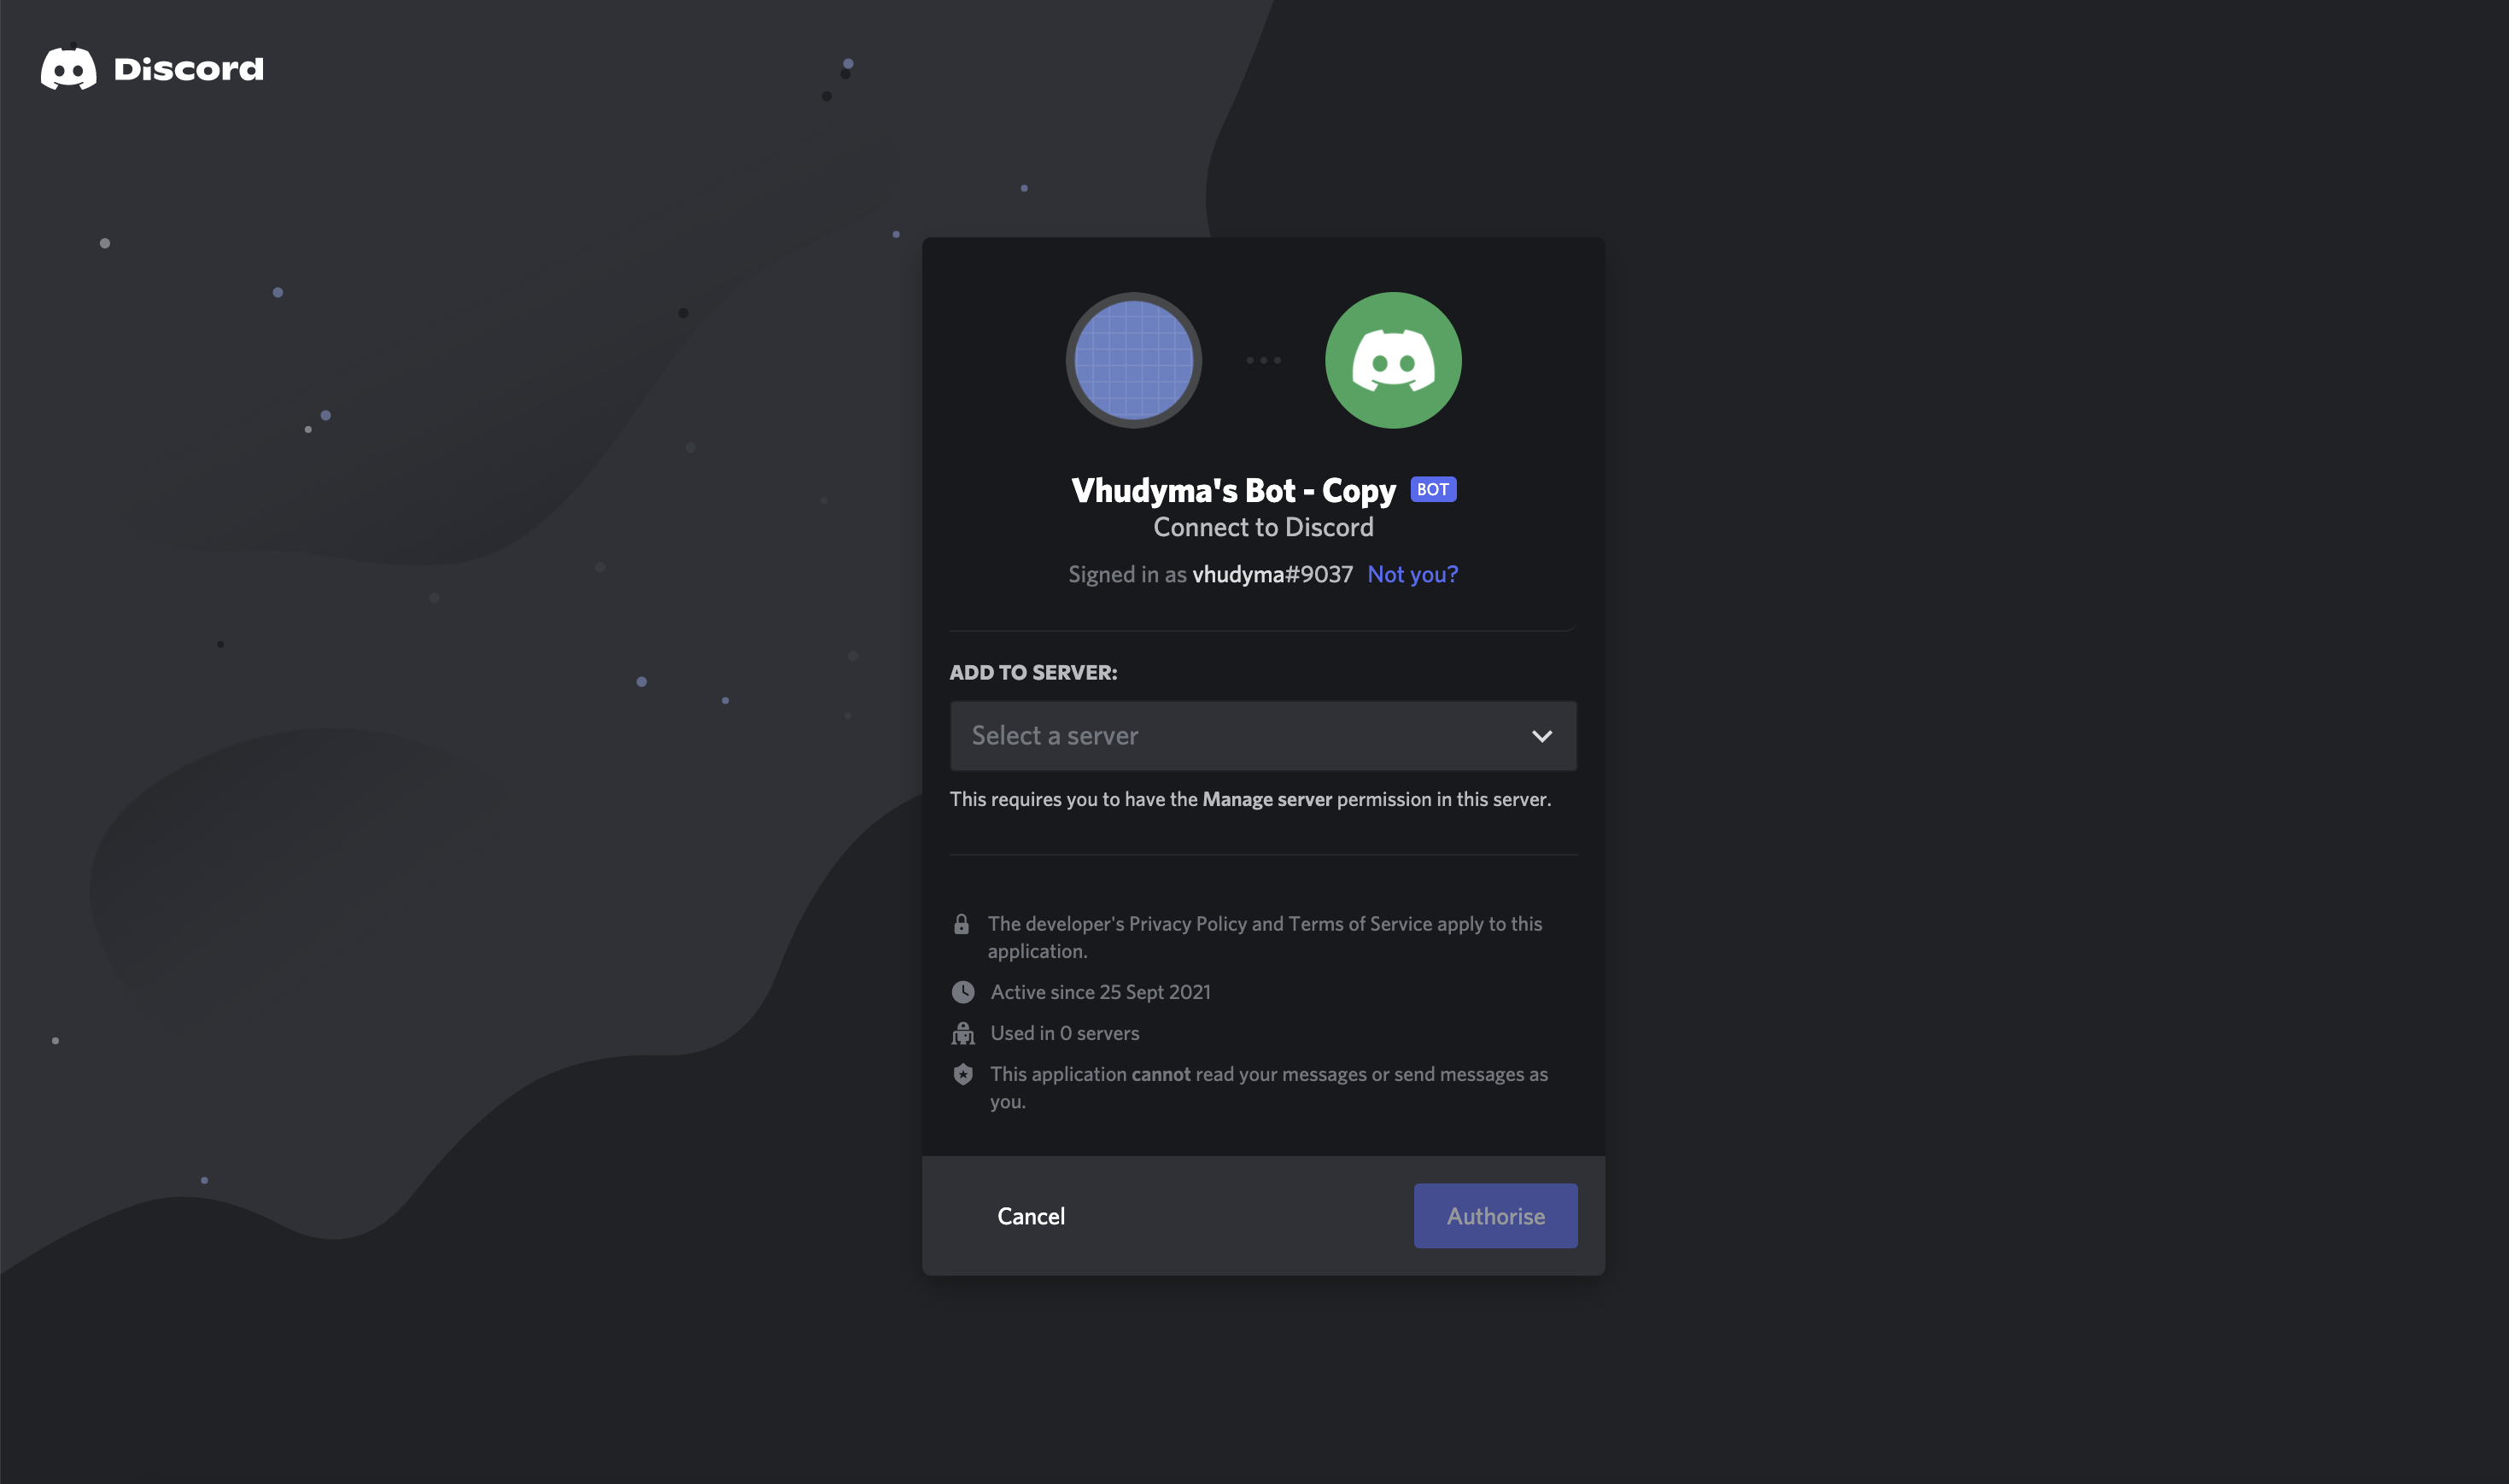
Click the "Select a server" dropdown and choose the server you want to invite the bot to.
Click "Authorise", fill out the captcha and your bot will appear on your server.
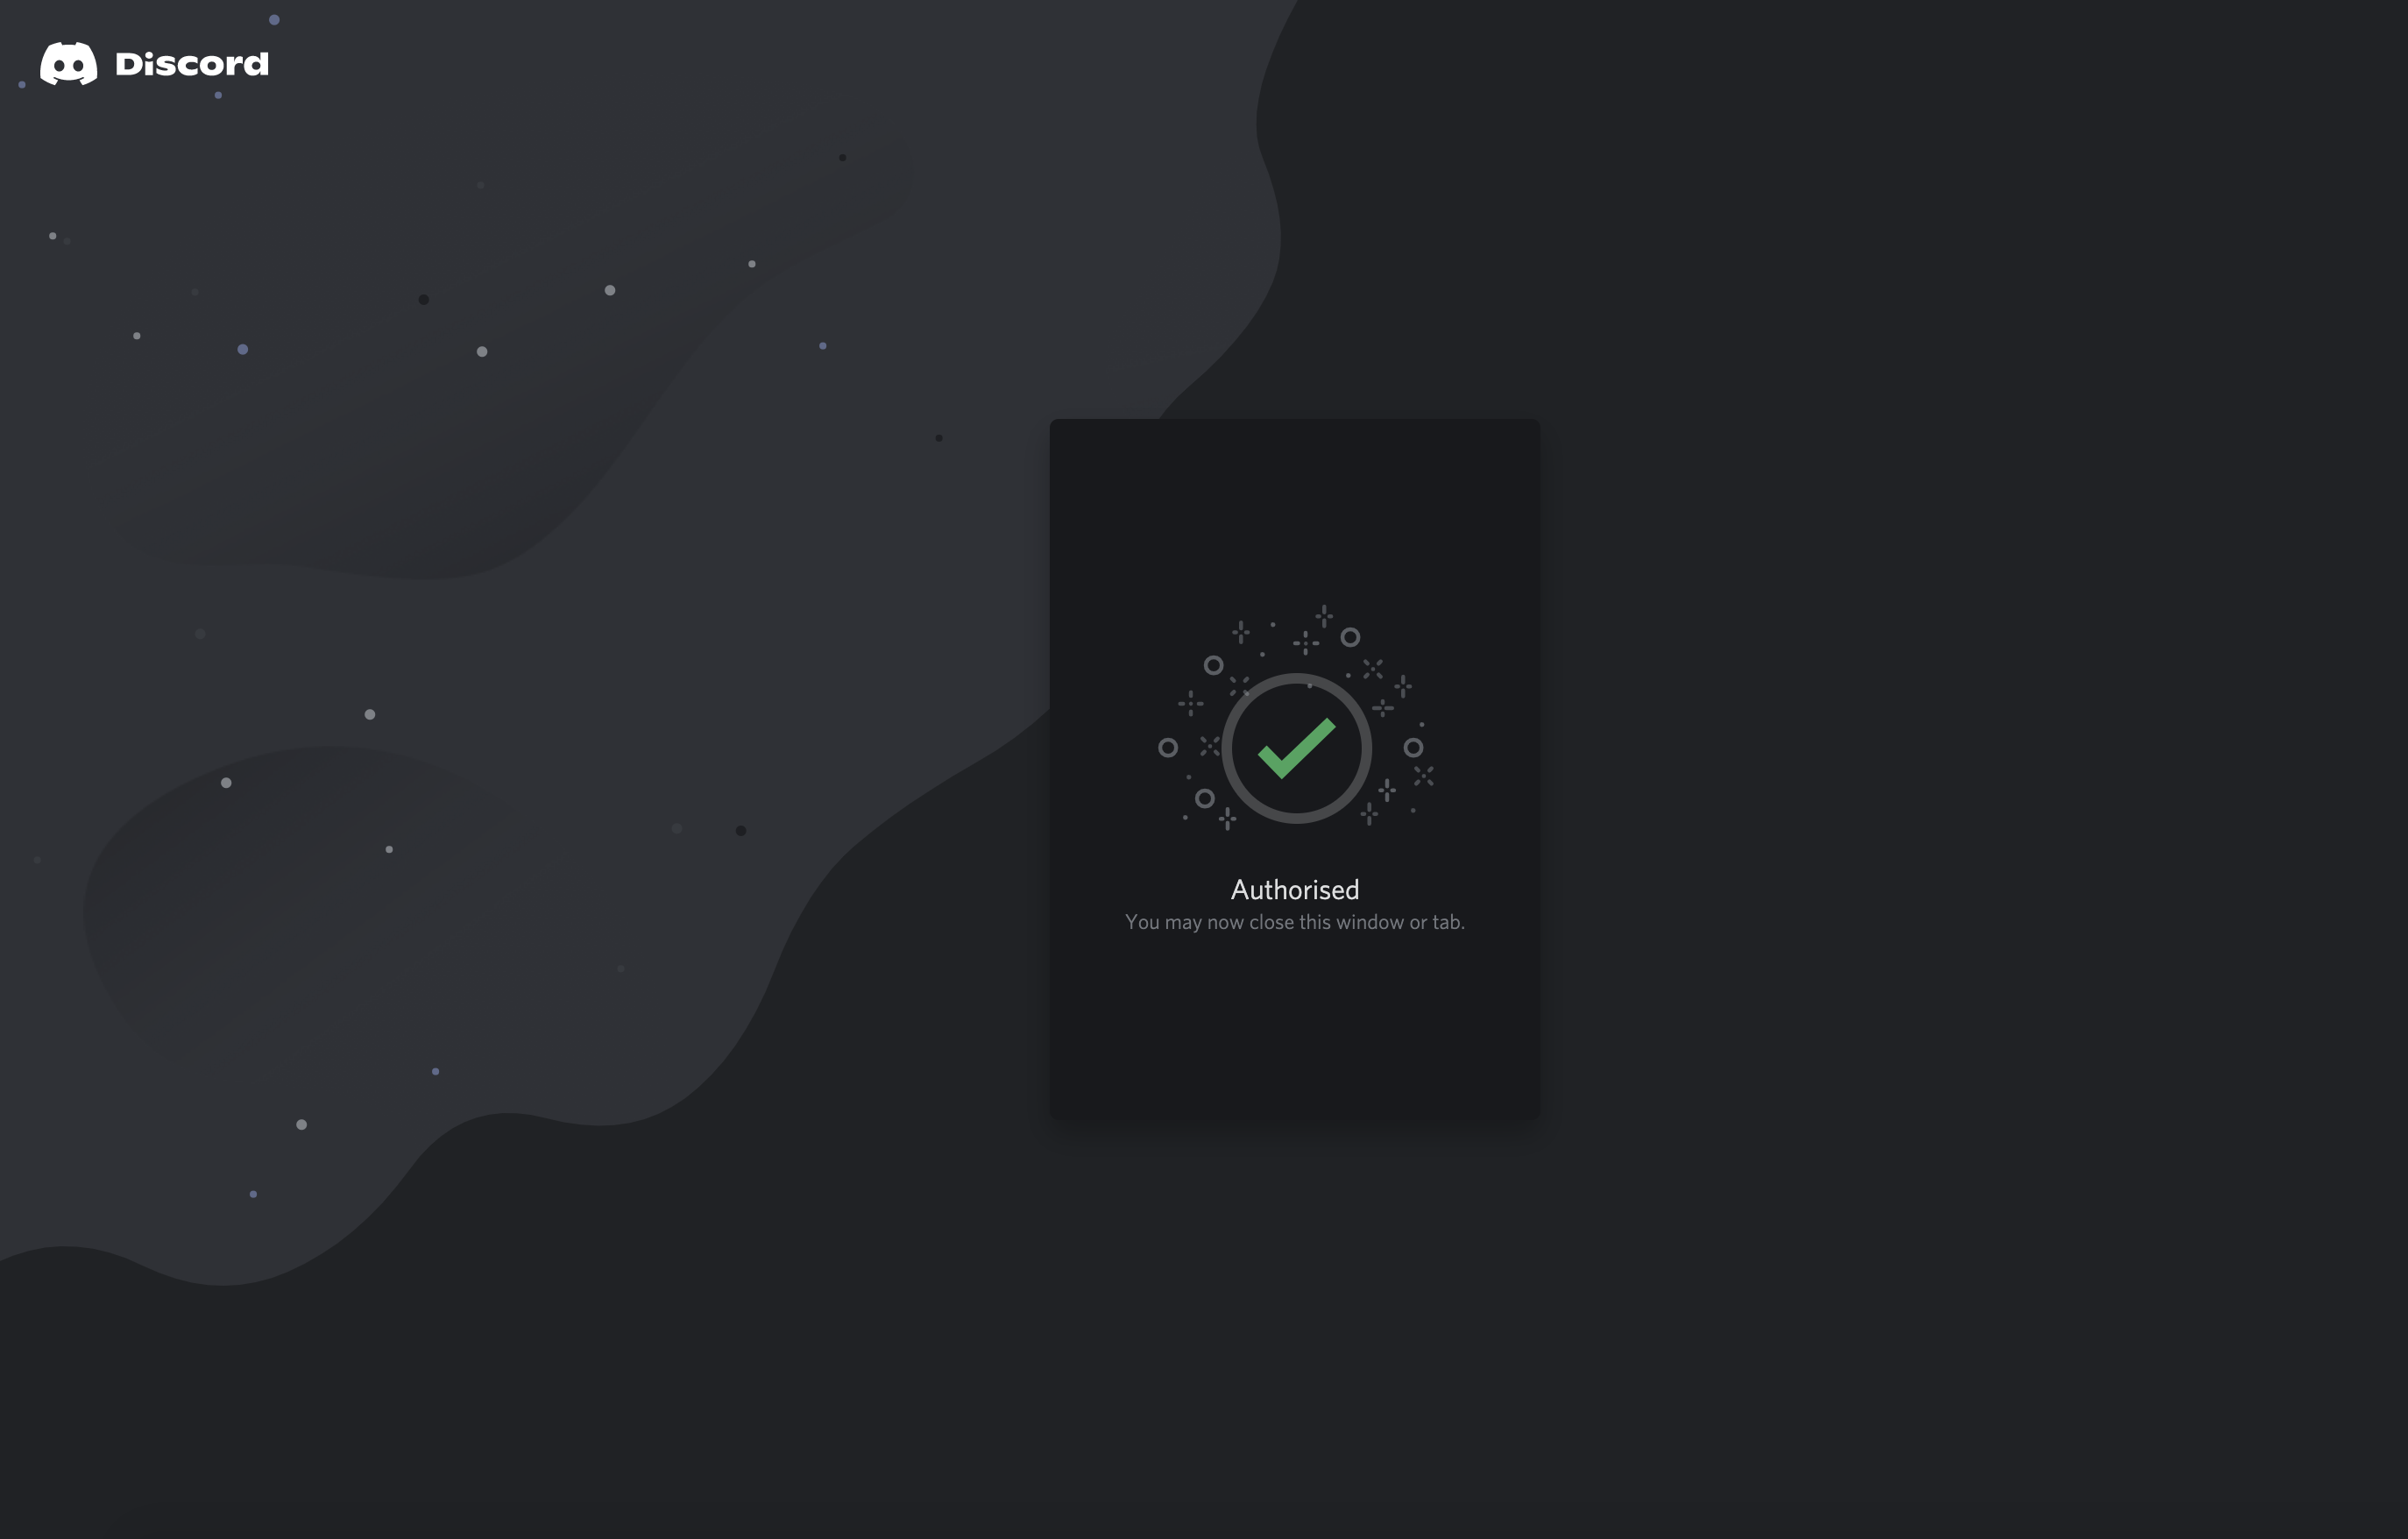
You should see a confirmation message:
Now open a Discord application, navigate to your server, and verify that the bot was added correctly:

It's now offline, but do not worry, we will change that in the next section.
#3 - Create Node Application
Create a new folder for the project:
mkdir discord-bot
Enter the folder:
cd discord-bot
Initialize a new project:
npm init
Install required libraries:
yarn add discord.js dotenv
- discord.js - a powerful Node.js module that allows you to easily interact with the Discord API
- dotenv - library that loads environment variables from the .env file into process.env
With all that done, we can start writing the logic for our bot.
Create the index.js file in the root directory of the project with the following content:
const Discord = require('discord.js');
const dotenv = require('dotenv');

dotenv.config();

const client = new Discord.Client({
  intents: [
    Discord.Intents.FLAGS.GUILDS,
    Discord.Intents.FLAGS.GUILD_MESSAGES
  ],
});

client.on("ready", () => {
  console.log(`Logged in as ${client.user.tag}!`);
});

client.login(process.env.CLIENT_TOKEN);
Create the .env file and paste the token we copied earlier:
CLIENT_TOKEN=<YOUR_COPIED_TOKEN>And run the project:
node index.js
If you did everything correctly, you should see the confirmation message in the console:

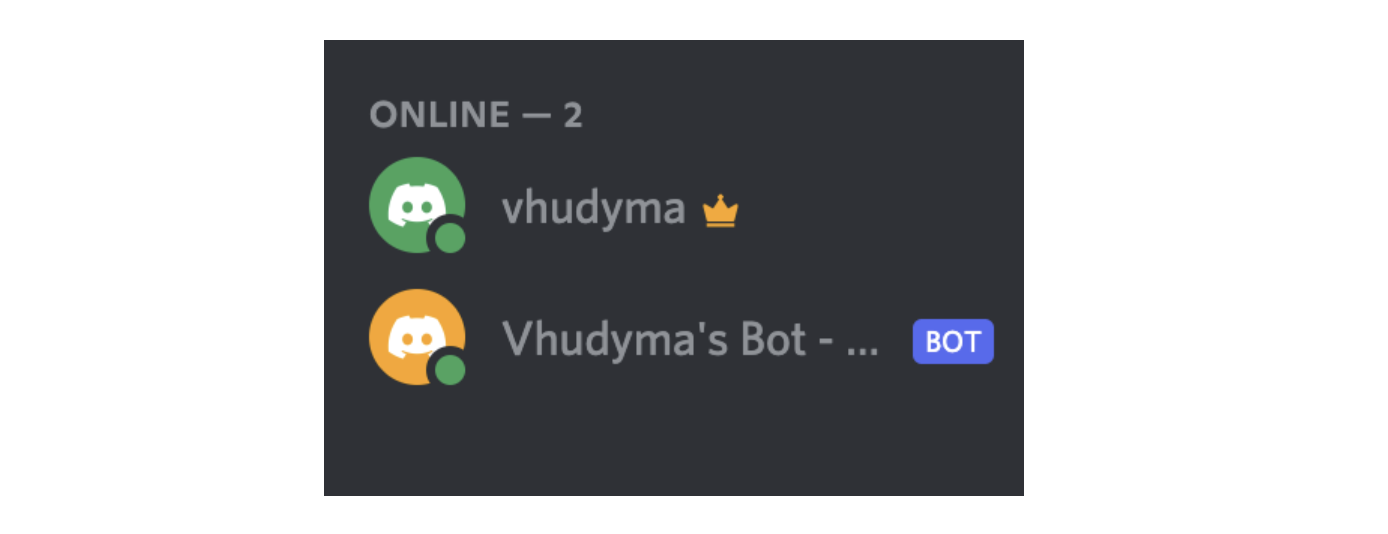
And the status of the bot should now change to "Online":
#4 - Add Custom Command
The bot has been set up, but can't do anything useful yet, so let's change it.
Usually, the very first thing people implement when creating bots is the "Ping - Pong" thing.
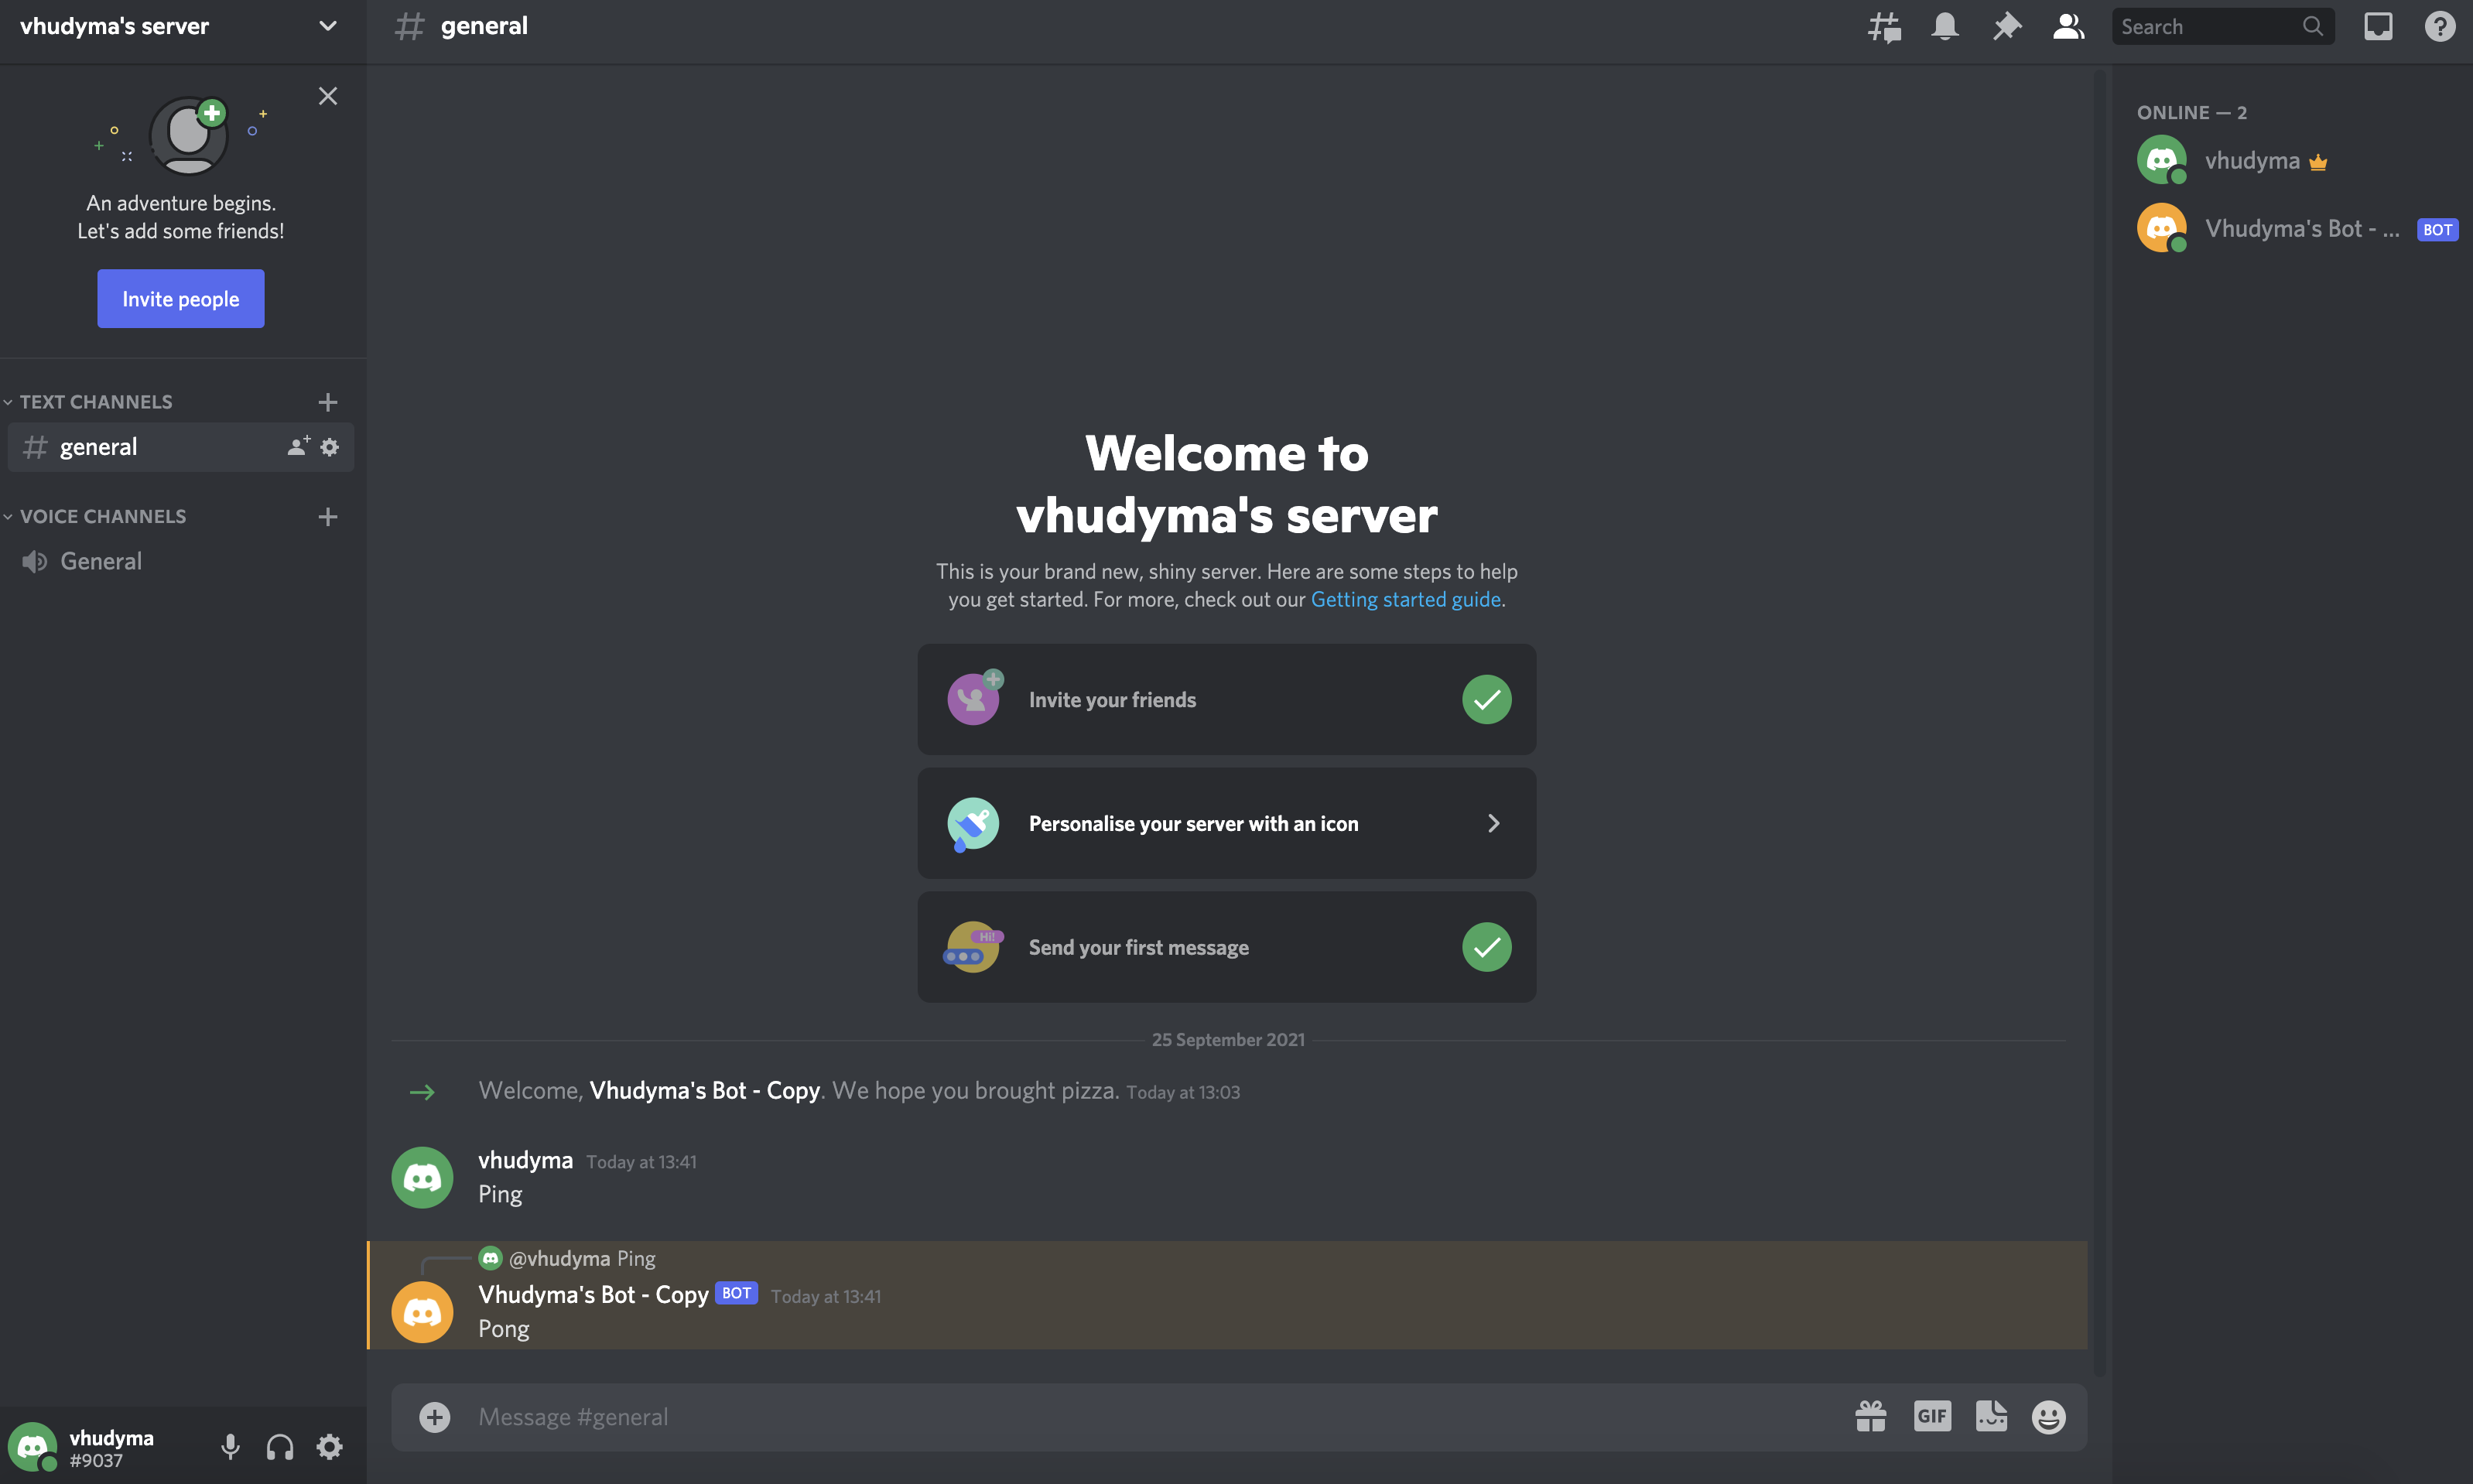
You type "Ping", the bot responds with "Pong" - as simple as that.
Paste the following code into the index.js file (right before the client.login line):
client.on("messageCreate", (message) => {
  if (message.content === "Ping") {
    message.reply("Pong");
  }
});
Restart the application and send a new "Ping" message to the bot in Discord:
Summary
In this article we learned how to create a skeleton for a Discord bot that waits for a "Ping" message and responds with "Pong".
This is not anything useful yet, but you can customise this bot to your needs by exploring and trying out the Discord API via the discord.js external library.
Read the official documentation to learn more.