Add Redux Saga With TypeScript To Your React Application (January 2021)
Table Of Contents
Redux is a library that allows us to easily and predictably manage the state of an application.
Redux Saga is a library that aims to make an application's side effects (i.e., asynchronous things like fetching data and impure things like accessing the browser cache) easier to manage, more efficient to run, easy to test, and better at handling failures.
Today we will learn how to install and configure Redux Saga with TypeScript in an application built with Create React App in a few simple steps.
The application will retrieve todos from the following endpoint (https://jsonplaceholder.typicode.com/todos) and display them in a long list.
Step 1: Create React App
To begin, create a simple React application using create-react-app:
npx create-react-app redux-saga-guide --template typescript
After the installation is complete, run the project to verify that everything is working as expected:
yarn start
A nice spinning React logo with some text should appear on the screen:

Congratulations on the creation of the React application.
Remember that a journey of a thousand miles begins with a single step.
Step 2: Install Redux / Redux Saga
After the React application has been successfully created, we can proceed with the installation of Redux and Redux Saga:
yarn add redux react-redux redux-saga @types/react-redux @types/redux-saga
- redux - the core of Redux
- react-redux - official React binding for Redux, it should be installed because Redux can be used standalone as well
-
redux-saga - saga middleware for Redux
Middleware is some code you can put between the framework that receives a request and the framework that generates a response.
Redux middleware provides a third-party extension point between dispatching an action, and the moment it reaches the reducer. It allows you to write action creators that return a function instead of an action.
Do not worry if something is unclear to you at the moment, we will explain it in detail later.
- @types/react-redux - type declarations for react-redux library
- @types/redux-saga - type declarations for redux-saga library
Step 2.1: Install Redux Logger / Axios
It makes sense to include logger middleware to log all triggered actions in the developer console:
yarn add -D redux-logger @types/redux-logger
And axios - Promise-based HTTP client:
yarn add axios @types/axios
Step 3: Create Store
After the installation we continue with the creation of a store:
Think of a store as something that holds the state of your application.
Create a store under the following path src/store/index.ts with the following content:
import { createStore, applyMiddleware } from "redux";
import createSagaMiddleware from "redux-saga";
import logger from "redux-logger";

import rootReducer from "./rootReducer";
import { rootSaga } from "./rootSaga";

// Create the saga middleware
const sagaMiddleware = createSagaMiddleware();

// Mount it on the Store
const store = createStore(rootReducer, applyMiddleware(sagaMiddleware, logger));

// Run the saga
sagaMiddleware.run(rootSaga);

export default store;
The store is the result of executing the createStore function, which takes rootReducer as its first argument and middlewares as its second argument.
rootReducer is a combination of all reducers present in your app.
rootSaga is a combination of all sagas present in your app.
As your app gets more complex, it is a good idea to split your reducers and sagas into separate functions.
As you might have noticed, rootReducer and rootSaga do not exist yet, so let's add them.
Step 4: Create Root Reducer
Create src/store/rootReducer.ts with the following content:
import { combineReducers } from "redux";

import todoReducer from "./todo/reducer";

const rootReducer = combineReducers({
  todo: todoReducer,
});

export type AppState = ReturnType<typeof rootReducer>;

export default rootReducer;
This rootReducer imports all the separate reducer functions and combines them into one that can be passed to the store.
Step 5: Create Todo Reducer
The next step is to add a todo reducer.
Create src/store/todo/reducer.ts with the following content:
import {
  FETCH_TODO_REQUEST,
  FETCH_TODO_SUCCESS,
  FETCH_TODO_FAILURE,
} from "./actionTypes";

import { TodoActions, TodoState } from "./types";

const initialState: TodoState = {
  pending: false,
  todos: [],
  error: null,
};

export default (state = initialState, action: TodoActions) => {
  switch (action.type) {
    case FETCH_TODO_REQUEST:
      return {
        ...state,
        pending: true,
      };
    case FETCH_TODO_SUCCESS:
      return {
        ...state,
        pending: false,
        todos: action.payload.todos,
        error: null,
      };
    case FETCH_TODO_FAILURE:
      return {
        ...state,
        pending: false,
        todos: [],
        error: action.payload.error,
      };
    default:
      return {
        ...state,
      };
  }
};
We define the initial state, which contains our list of todo elements whose value corresponds to an empty array([]) by default, a flag indicating whether the API call is still running, and an error text if it occurs.
In the body of the reducer, we check the type of the action that was triggered (action.type) and change the state accordingly.
In the case of FETCHTODOREQUEST action, we tell the UI that the API call is in progress.
In the case of FETCHTODOSUCCESS action, we populate todo items in the store, tell the UI that the API call is finished, and clear an error if there was one before.
In the case of FETCHTODOFAILURE action, we clear all todo items in the store, tell the UI that the API call is finished, and set an error to be displayed later on.
Important note: Remember that the reducer function should return the new state without even touching the existing one.
Step 6: Create Action Types
The next step is to define action types.
As you know, actions are plain JavaScript objects.
They must have a type property that specifies the type of action being performed.
Types should typically be defined as string constants in larger projects to keep your codebase clean, but it is also good to just use string literals.
In our project, we will extract them to a separate file named src/store/todo/actionTypes.ts.
Paste the following content into this file:
export const FETCH_TODO_REQUEST = "FETCH_TODO_REQUEST";
export const FETCH_TODO_SUCCESS = "FETCH_TODO_SUCCESS";
export const FETCH_TODO_FAILURE = "FETCH_TODO_FAILURE";
We have 3 action types that indicate the state of the current API call.
Since we are using TypeScript, it is necessary to create types for the initial state and each fired action.
Step 7: Add Types
Create a file src/store/todo/types.ts with the following content:
import {
  FETCH_TODO_REQUEST,
  FETCH_TODO_SUCCESS,
  FETCH_TODO_FAILURE,
} from "./actionTypes";

export interface ITodo {
  userId: number;
  id: number;
  title: string;
  completed: boolean;
}

export interface TodoState {
  pending: boolean;
  todos: ITodo[];
  error: string | null;
}

export interface FetchTodoSuccessPayload {
  todos: ITodo[];
}

export interface FetchTodoFailurePayload {
  error: string;
}

export interface FetchTodoRequest {
  type: typeof FETCH_TODO_REQUEST;
}

export type FetchTodoSuccess = {
  type: typeof FETCH_TODO_SUCCESS;
  payload: FetchTodoSuccessPayload;
};

export type FetchTodoFailure = {
  type: typeof FETCH_TODO_FAILURE;
  payload: FetchTodoFailurePayload;
};

export type TodoActions =
  | FetchTodoRequest
  | FetchTodoSuccess
  | FetchTodoFailure;
And we are ready to build our first action.
Step 8: Create Actions
Create a new file src/store/todo/actions.ts with the following content:
import {
  FETCH_TODO_REQUEST,
  FETCH_TODO_FAILURE,
  FETCH_TODO_SUCCESS,
} from "./actionTypes";
import {
  FetchTodoRequest,
  FetchTodoSuccess,
  FetchTodoSuccessPayload,
  FetchTodoFailure,
  FetchTodoFailurePayload,
} from "./types";

export const fetchTodoRequest = (): FetchTodoRequest => ({
  type: FETCH_TODO_REQUEST,
});

export const fetchTodoSuccess = (
  payload: FetchTodoSuccessPayload
): FetchTodoSuccess => ({
  type: FETCH_TODO_SUCCESS,
  payload,
});

export const fetchTodoFailure = (
  payload: FetchTodoFailurePayload
): FetchTodoFailure => ({
  type: FETCH_TODO_FAILURE,
  payload,
});
Notice, how we return a plain object from an action.
Step 9: Create Sagas
The next step is to create a saga that watches FETCHTODOREQUEST and performs side effect handling.
Create a new file src/store/todo/sagas.ts with the following content:
import axios from "axios";
import { all, call, put, takeLatest } from "redux-saga/effects";

import { fetchTodoFailure, fetchTodoSuccess } from "./actions";
import { FETCH_TODO_REQUEST } from "./actionTypes";
import { ITodo } from "./types";

const getTodos = () =>
  axios.get<ITodo[]>("https://jsonplaceholder.typicode.com/todos");

/*
  Worker Saga: Fired on FETCH_TODO_REQUEST action
*/
function* fetchTodoSaga() {
  try {
    const response = yield call(getTodos);
    yield put(
      fetchTodoSuccess({
        todos: response.data,
      })
    );
  } catch (e) {
    yield put(
      fetchTodoFailure({
        error: e.message,
      })
    );
  }
}

/*
  Starts worker saga on latest dispatched `FETCH_TODO_REQUEST` action.
  Allows concurrent increments.
*/
function* todoSaga() {
  yield all([takeLatest(FETCH_TODO_REQUEST, fetchTodoSaga)]);
}

export default todoSaga;
Step 10: Create Root Saga
And the last configuration step is to import all sagas into the rootSaga.ts file.
Create a new file src/store/rootSaga.ts with the following content:
import { all, fork } from "redux-saga/effects";

import todoSaga from "./todo/sagas";

export function* rootSaga() {
  yield all([fork(todoSaga)]);
}
After that, we need to find a way to get the data out of the store.
Step 11: Add Reselect
We will install reselect for this purpose - a simple "selector" library for Redux:
yarn add reselect
There is one big advantage of using reselect - it creates memoized selectors that are only re-executed when their arguments change.
Create the file src/store/todo/selectors.ts with the following content:
import { createSelector } from "reselect";

import { AppState } from "../rootReducer";

const getPending = (state: AppState) => state.todo.pending;

const getTodos = (state: AppState) => state.todo.todos;

const getError = (state: AppState) => state.todo.error;

export const getTodosSelector = createSelector(getTodos, (todos) => todos);

export const getPendingSelector = createSelector(
  getPending,
  (pending) => pending
);

export const getErrorSelector = createSelector(getError, (error) => error);
Finally, we need to make our React app aware of the entire Redux store.
Step 12: Add Store Provider
Add Provider with store in the src/index.tsx file:
import React from "react";
import ReactDOM from "react-dom";
import { Provider } from "react-redux";

import "./index.css";
import store from "./store";
import App from "./App";

ReactDOM.render(
  <React.StrictMode>
    <Provider store={store}>
      <App />
    </Provider>
  </React.StrictMode>,
  document.getElementById("root")
);
That is it! We are done with the configuration, let's try it out.
Step 13: Try It Out
Change the content of src/App.tsx component:
import React, { useEffect } from "react";
import { useDispatch, useSelector } from "react-redux";

import {
  getPendingSelector,
  getTodosSelector,
  getErrorSelector,
} from "./store/todo/selectors";
import { fetchTodoRequest } from "./store/todo/actions";

const App = () => {
  const dispatch = useDispatch();
  const pending = useSelector(getPendingSelector);
  const todos = useSelector(getTodosSelector);
  const error = useSelector(getErrorSelector);

  useEffect(() => {
    dispatch(fetchTodoRequest());
  }, []);

  return (
    <div style={{ padding: "15px" }}>
      {pending ? (
        <div>Loading...</div>
      ) : error ? (
        <div>Error</div>
      ) : (
        todos.map((todo, index) => (
          <div style={{ marginBottom: "10px" }} key={todo.id}>
            {++index}. {todo.title}
          </div>
        ))
      )}
    </div>
  );
};

export default App;
And run the application:
yarn start
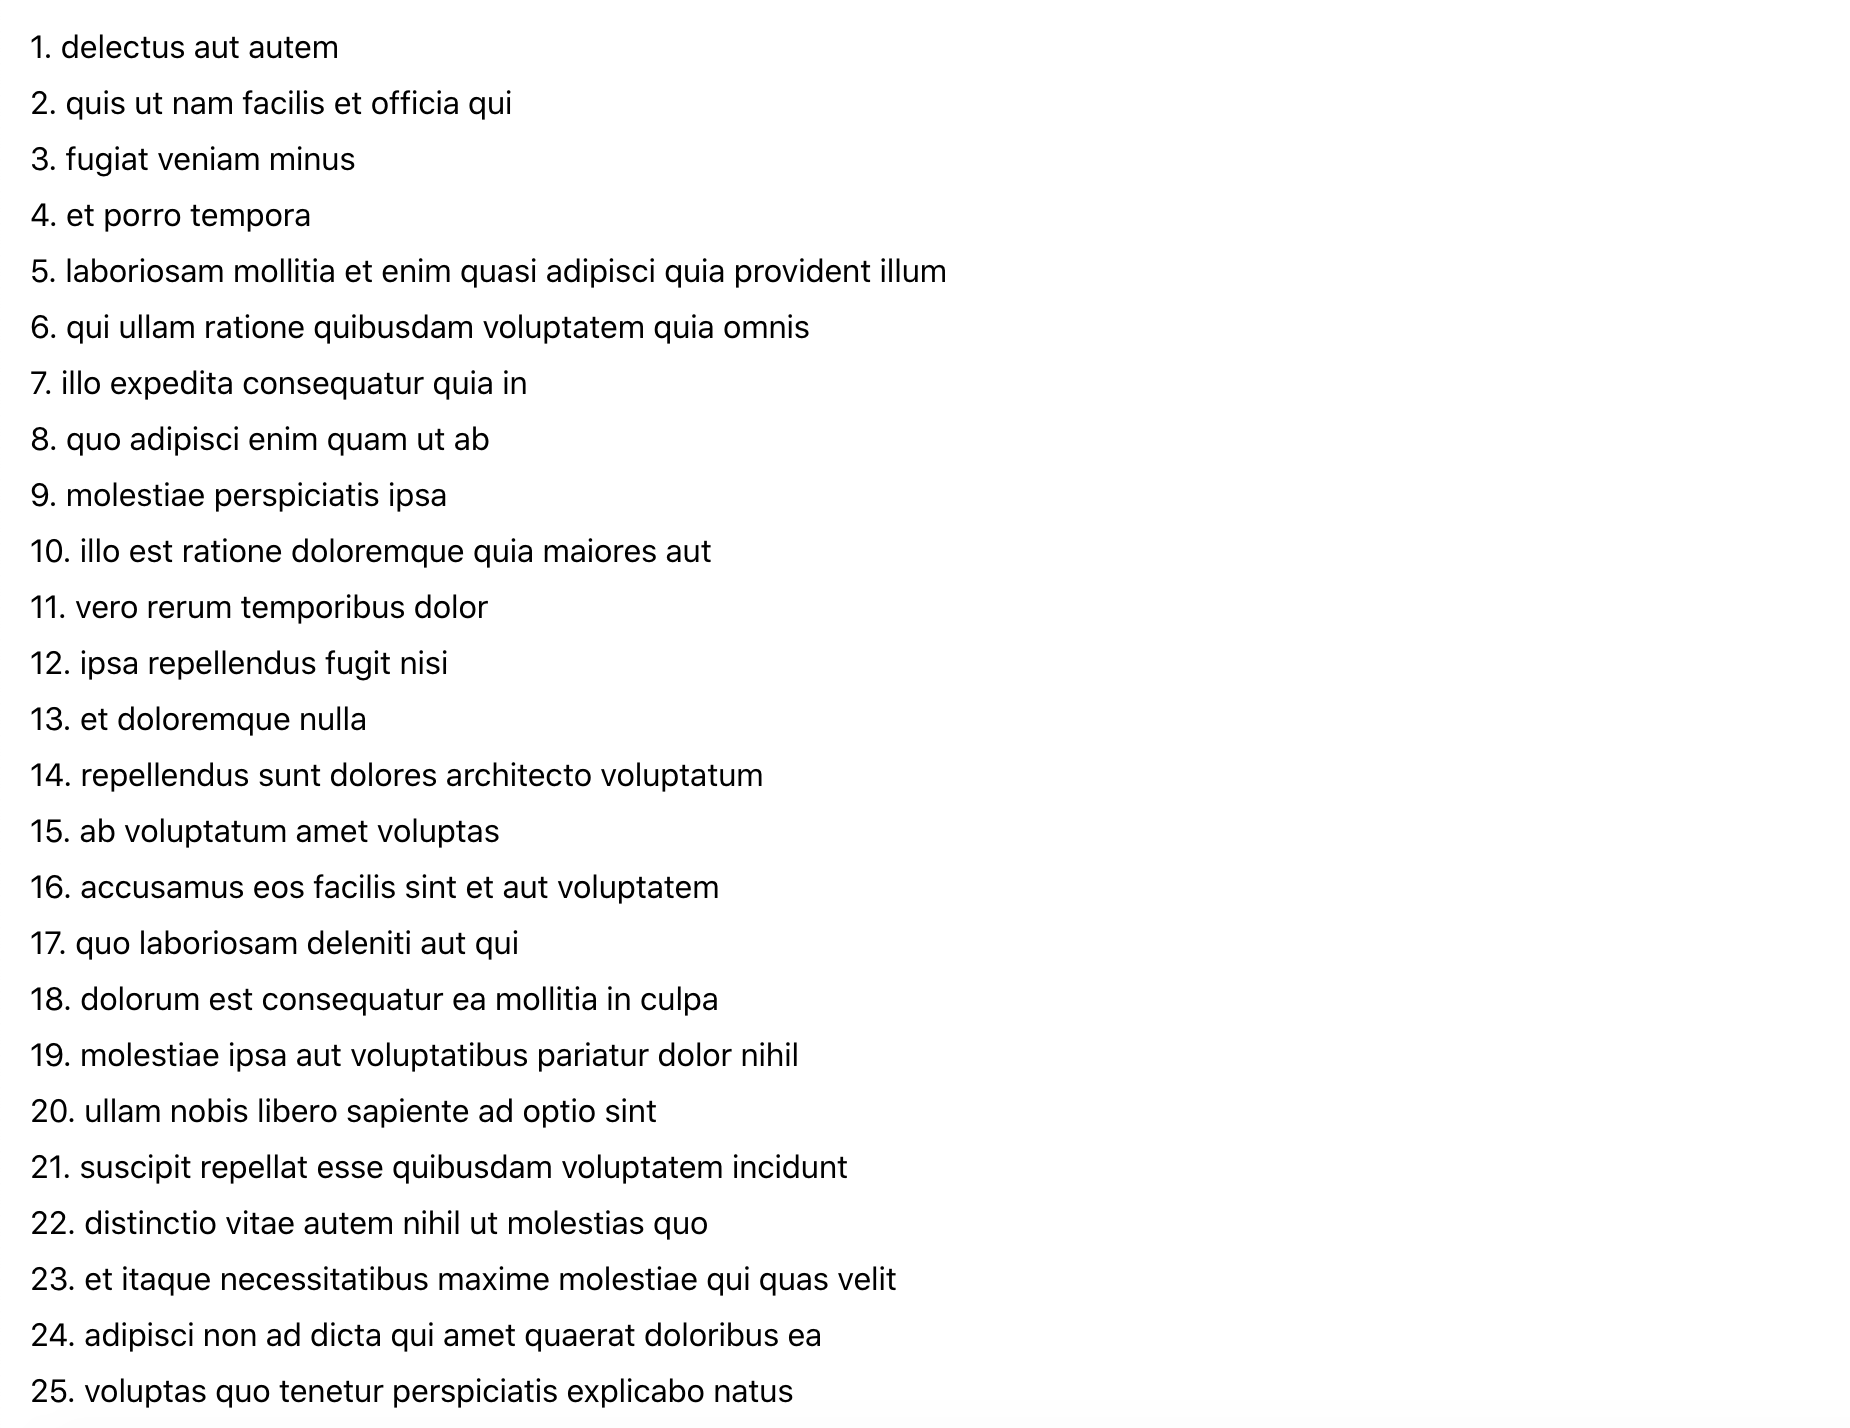
You should see the list of fetched todos, which contains 200 entries:

Update (15.07.2021)
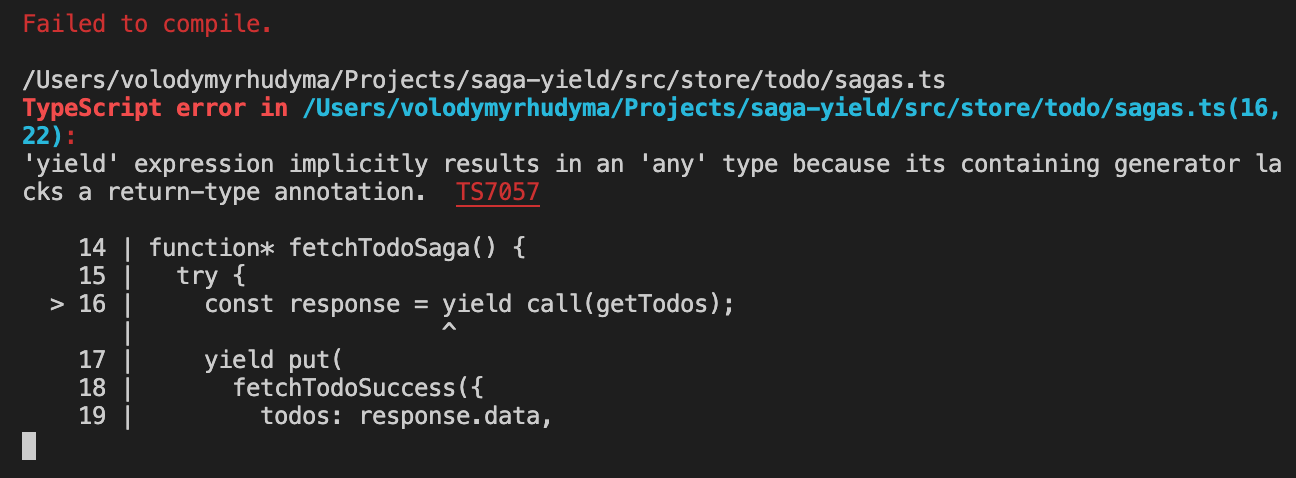
If you see the following error:

And don't know how to fix it, please read this article which explains why this error occurs and how to fix it.
Summary
In this article, we covered the simplest Redux + Redux Saga + TypeScript configuration for the React application built with Create React App.
Be sure to read the documentation of Redux Saga before you start coding anything with this middleware, as it is much more complicated and provides us with more features than the Redux Thunk.
I hope this guide was helpful for you.
See you in the next articles.