Create A Blog With Gatsby And Netlify CMS In 10 Minutes
Table Of Contents
Creating a website has never been easier than it is now.
There is an enormous amount of tools available for building a website of varying complexity - from a small landing page to a huge web application that processes hundreds of thousands of requests per second.
Today we are going to build a simple blog using Gatsby for the Front-End and Netlify CMS for the Content Management.
Gatsby
Gatsby is a powerful framework and Jamstack delivery platform based on React, for building amazingly fast, secure and beautiful websites.
The reasons why we will be using it over plain React for the blog are the following:
-
Gatsby is optimized for performance
It only loads critical HTML, CSS, and JavaScript code and prefetches other pages you might navigate to, so clicking around on a website built with Gatsby feels blazing fast.
-
Gatsby is optimized for Search Engines
Gatsby pages are rendered on the server, so Search Engine Crawlers see the full content of your website and are able to index it properly, which is extremely important for our blog.
-
Gatsby comes with many plugins that speed up development
There are tons of available plugins for various purposes that can be installed and used right away. Click here to see the full list.
Netlify CMS
Netlify CMS is an Open-Source Content Management System, a perfect choice for Static-Site Generators, like Gatsby.
A Static Site Generator is a software application that creates HTML pages from templates or components and a given content source.
It's a tool for content editors that makes commits to your repository without them having to learn or even touch Git.
Each blog entry created is added to the repository in a separate commit.
The main reason for using it - a quick installation and configuration process.
Prerequisites
Before we continue, let's install Gatsby CLI, which allows you to create websites using Gatsby:
yarn global add gatsby-cli
Once the installation process is successfully completed, we can start creating a blog.
Of course, besides Gatsby CLI, we also need Node.js and Git installed to be able to execute the JavaScript code outside the browser and push it to the repository.
Pick Up A Template
We have two ways to create a blog: either you create it from scratch, or you use an existing template that has already done a lot of things for you.
Both approaches have their advantages and disadvantages.
If we choose to create from scratch - we would have more control over the website, however we would spend a lot of time configuring some basic things that could already be configured for you.
If we choose to use an existing template - we would save a lot of time on things that are already done for you, however we would have a little less control over the website and changing an existing configuration would take slightly more time since it wasn't written by us.
In this tutorial, as we set up a blog in 10 minutes, choosing the second option is a must.
Gatsby provides us with a lot of starters we can use.
Click here to see the full list.
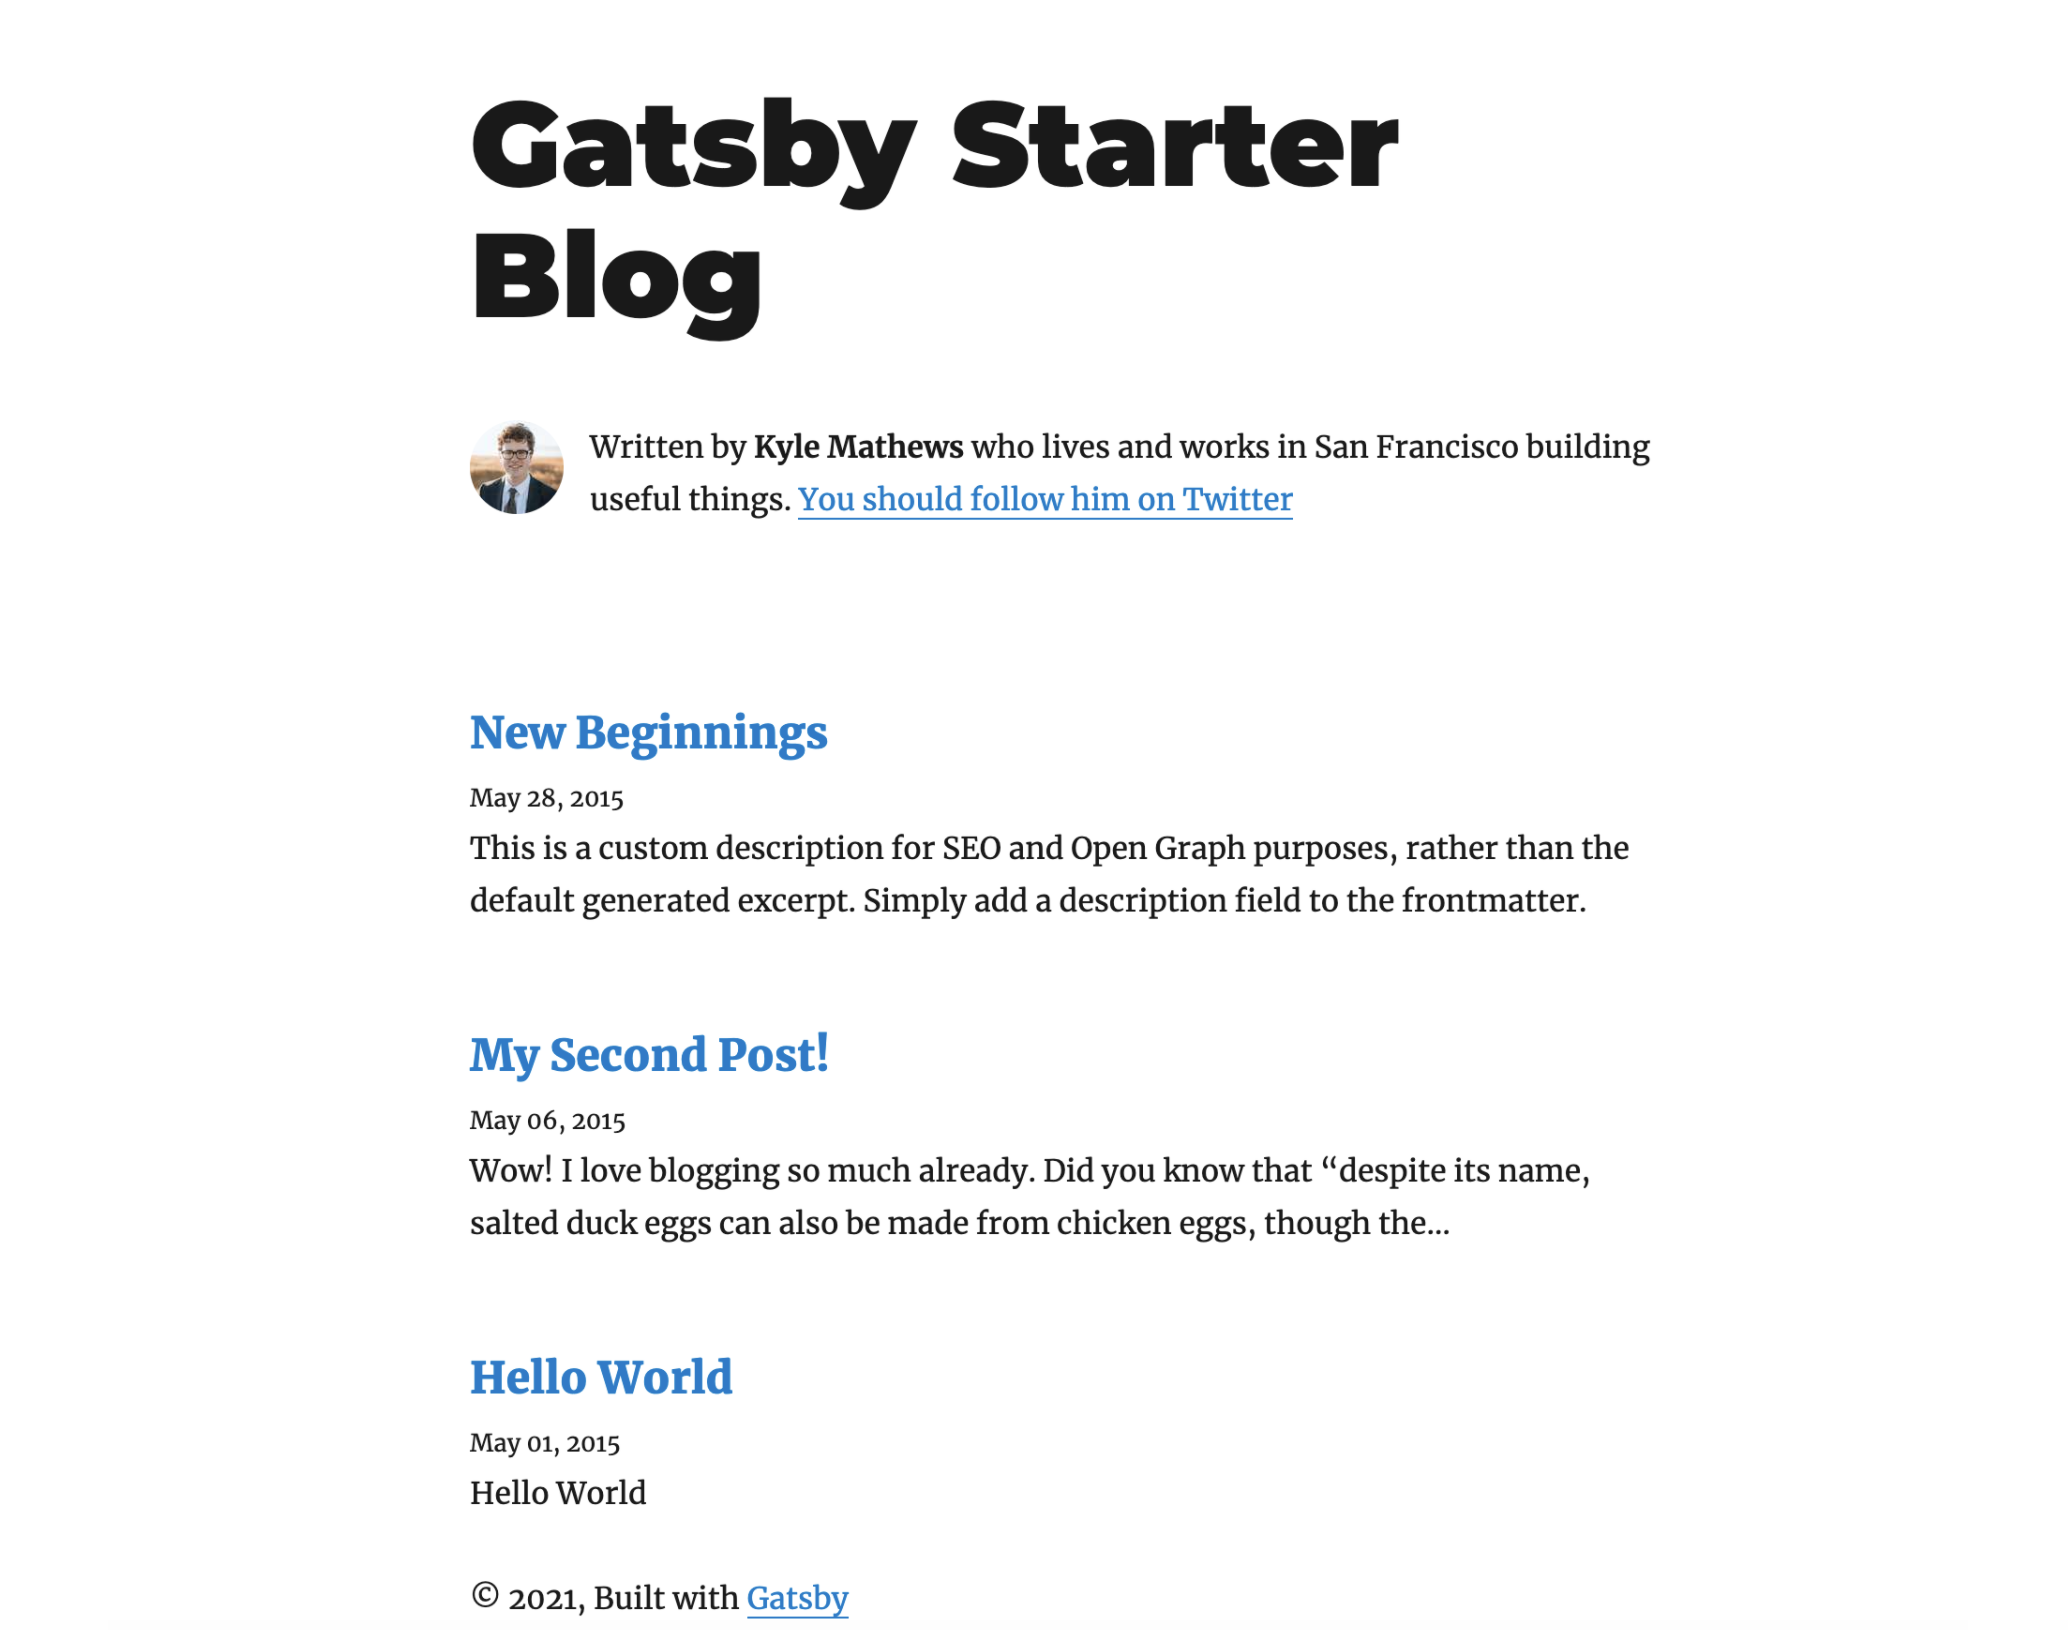
I chose this template because it is the official template for a blog created by the Gatsby team:
Install A Template
The next step is to install a template.
Create a folder that contains all your projects, if you don't have one, open it and run the following inside:
gatsby new my-blog https://github.com/gatsbyjs/gatsby-starter-blog
Let's break the above command into parts:
- gatsby new - creates a new Gatsby project
- my-blog - a name for your project, you can enter any name you like
- URL(https://github.com/gatsbyjs/gatsby-starter-blog) - the URL to the starter repository
Once the installation process is complete, let's navigate to the project:
cd blog
And run it locally:
yarn develop
And it should be accessible under the localhost:8000.
Create Github Repository
The next step is to create a Github Repository and place the code of the template inside.
I prefer to keep it in the private repository, so let's create one:
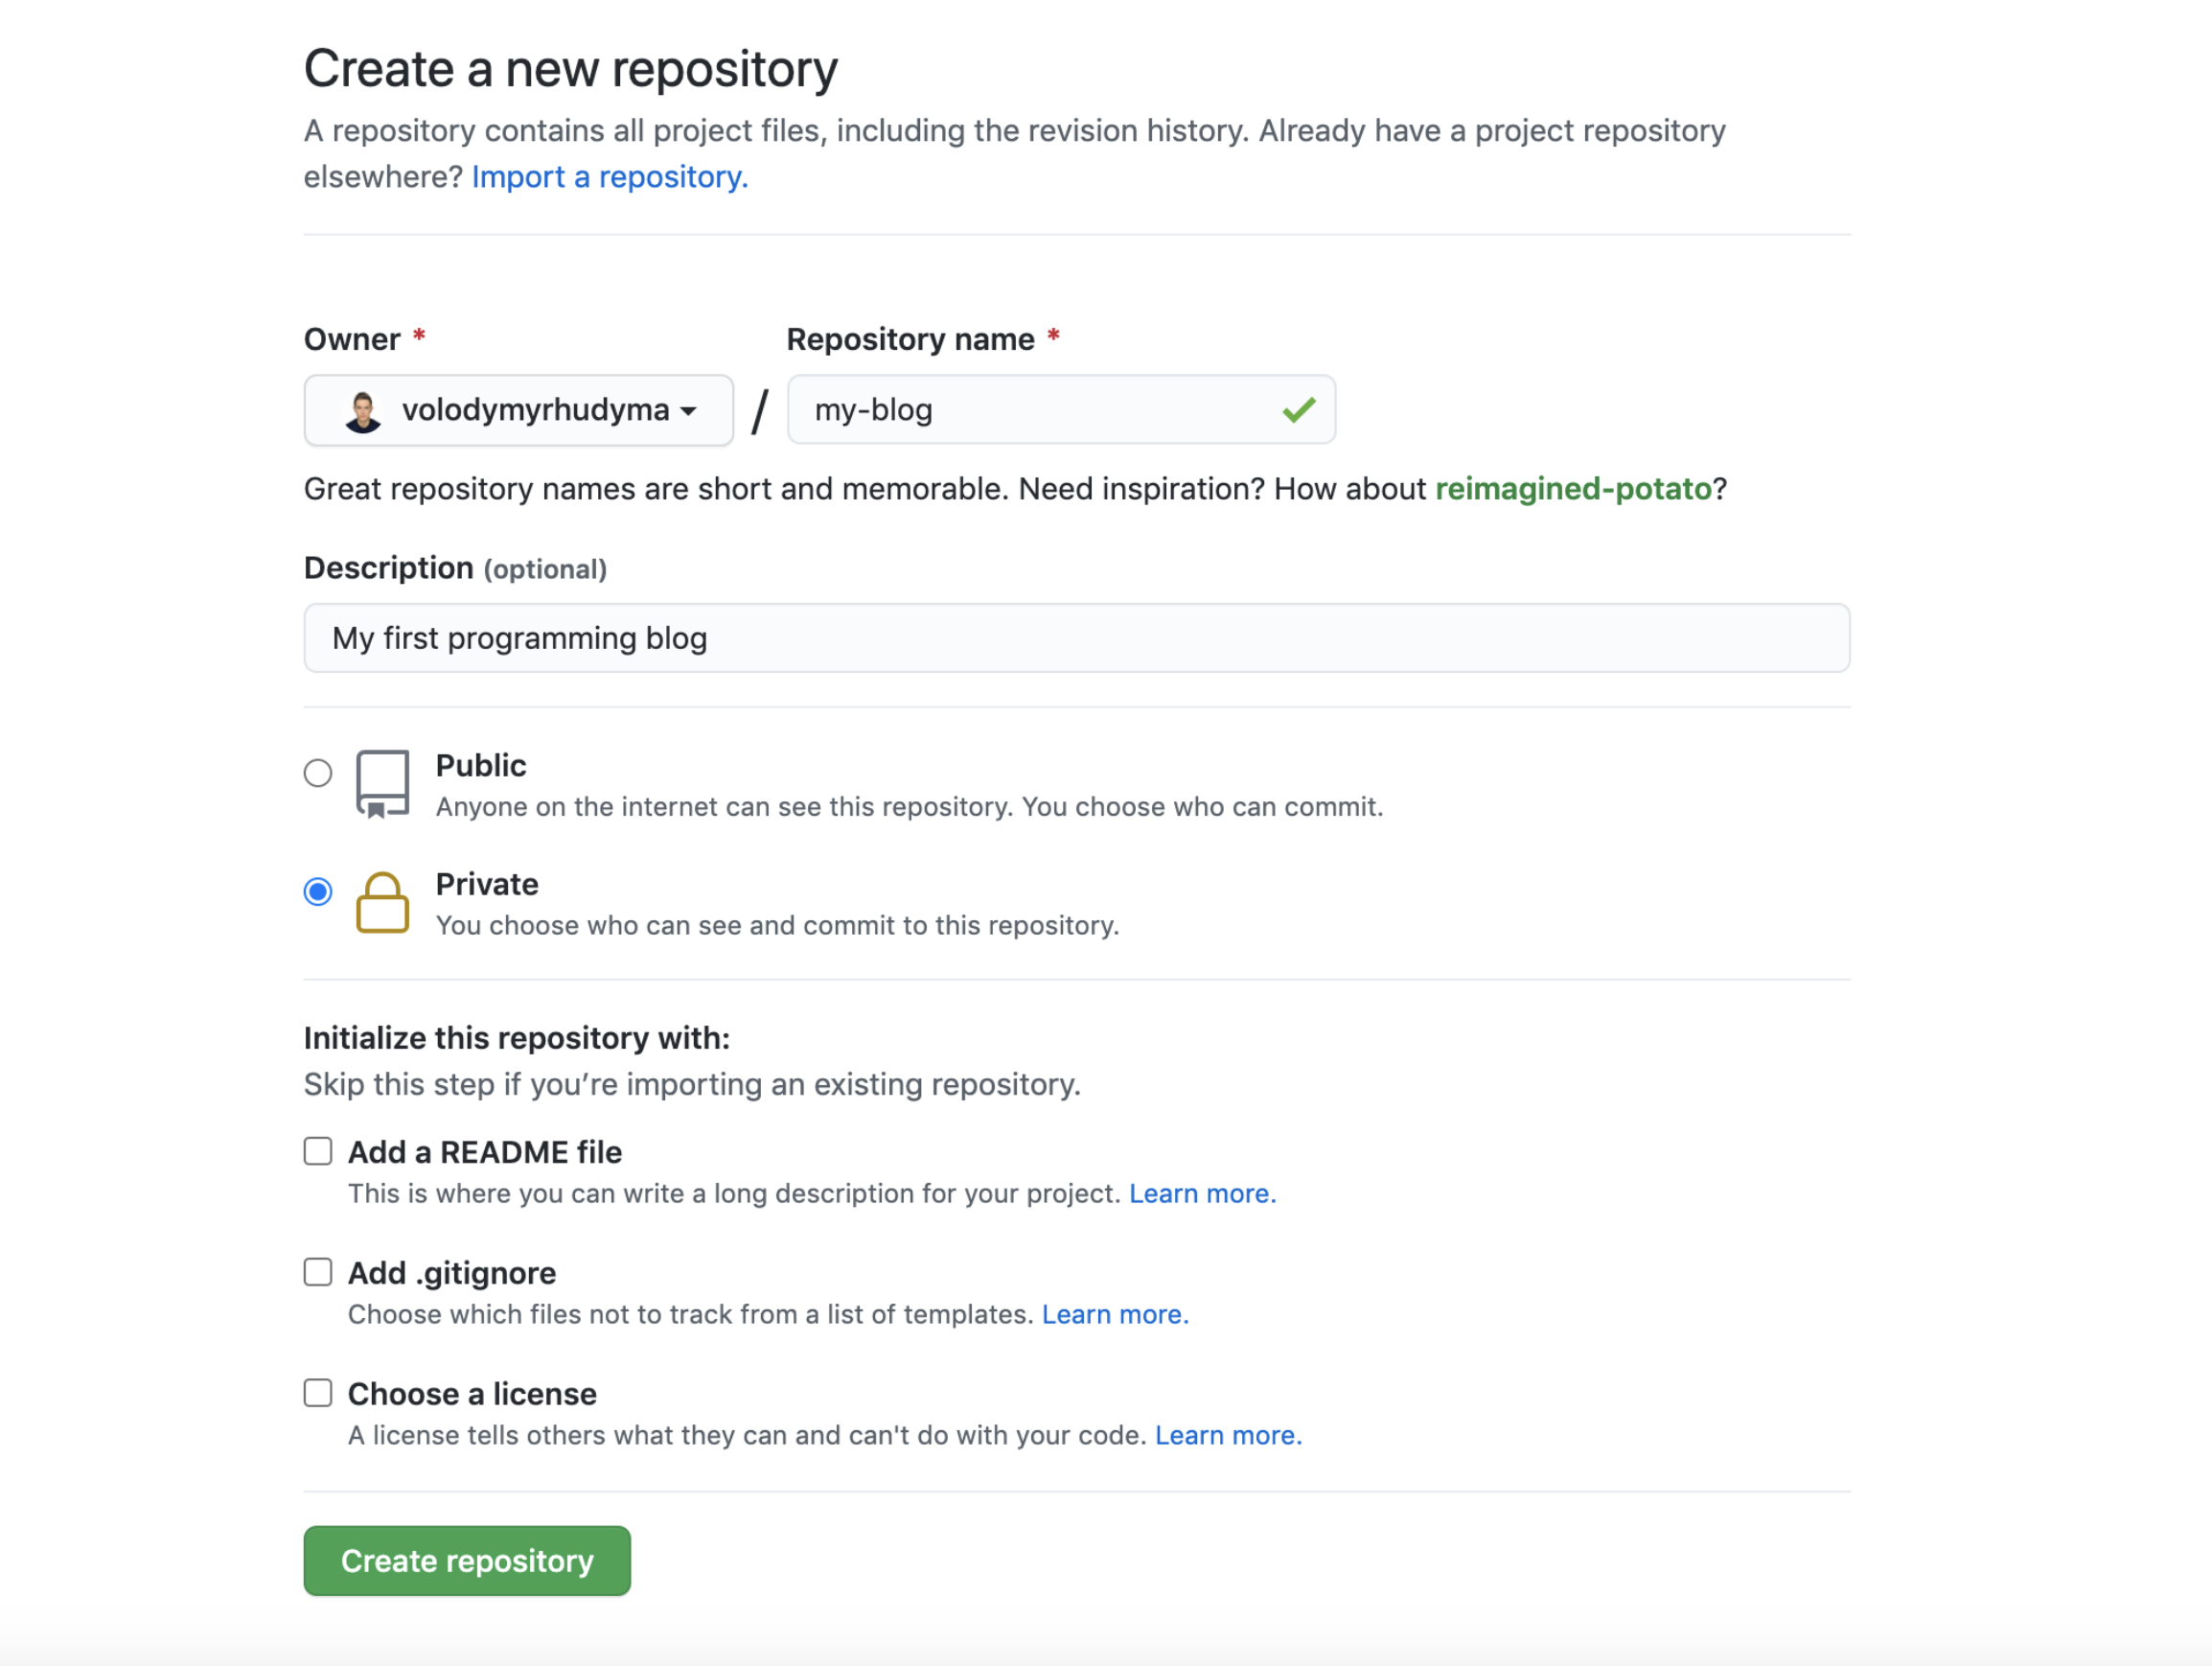
And follow these instructions to push the code:
git remote add origin https://github.com/volodymyrhudyma/my-blog.git
git branch -M main
git push -u origin main
Alright, let's add Netlify CMS then.
Configure Netlify CMS
First, we need to install the following dependencies:
- netlify-cms-app - a CMS itself
- gatsby-plugin-netlify-cms - automatically generates an admin/index.html with a default Netlify CMS implementation
yarn add netlify-cms-app gatsby-plugin-netlify-cms
To configure the CMS, create a static/admin/config.yml:
 backend:
  name: github
  repo: volodymyrhudyma/my-blog
  branch: main

media_folder: "static/img"
public_folder: "/img"

collections:
  - name: "article"
    label: "Article"
    folder: "content/blog"
    create: true
    slug: "{{slug}}"
    editor:
      preview: false
    fields:
      - { label: "Title", name: "title", widget: "string" }
      - { label: "Publish Date", name: "date", widget: "datetime" }
      - { label: "Description", name: "description", widget: "string" }
      - { label: "Body", name: "body", widget: "markdown" }
The configuration looks scary, so let's see what each of these lines does:
-
backend section - specifies how to access the backend of your website
- repo - the name of your Github repository, including the username
- branch - the main branch of your blog
- media_folder - specifies the folder path where uploaded files should be stored, relative to the base of the repo
- public_folder - specifies the folder path where files uploaded by the media library will be accessed, relative to the base of the built site. Defaults to the value of media_folder, with an opening / if one is not already included
-
collections section - determines how content types and editor fields in the UI generate files and content in your repository
- name - unique identifier for the collection, used as a key when referenced in other contexts
- label - label for the collection in the editor UI; defaults to the value of name
- folder - specifies the location of the collection
- create - allows the user to create new items in the collection if set to true, defaults to false
- slug - specifies a template for generating new filenames
- editor section - changes options for the editor view of a collection or a file within a file collection
- preview - the only option so far, set false to disable the preview pane for this collection or file, defaults to true
- fields section - maps editor UI widgets to field-value pairs, accepts a list of collection objects, some (but not all) available options:
- name (required): unique identifier for the field, used as a key when referenced in other contexts
- label: label for the field in the editor UI; defaults to the value of name
- widget: defines editor UI and inputs and file field data types (see all widgets here)
Next, add the plugin to your gatsby-config.js:
plugins: [
  `gatsby-plugin-netlify-cms`,
  // ...
],
And push the changes to the Github.
git add -A
git commit -m "Add Netlify CMS config"
git push
Login To CMS Locally
Basically we are done with the configuration, now you can log in and check the CMS you have just added.
In the browser, type: localhost:8000/admin and you will see the following screen:

You can log in to the CMS via Github, so click the button, authorize the application, and you will land on the dashboard page:

Add New Blog Post
Would you like to test adding a new blog post in our CMS?
Before you do, let's clean up the existing posts stored in the content/blog directory and commit the changes to the Github repository.
Make sure the directory exists but is empty, and let's add content for a new article:
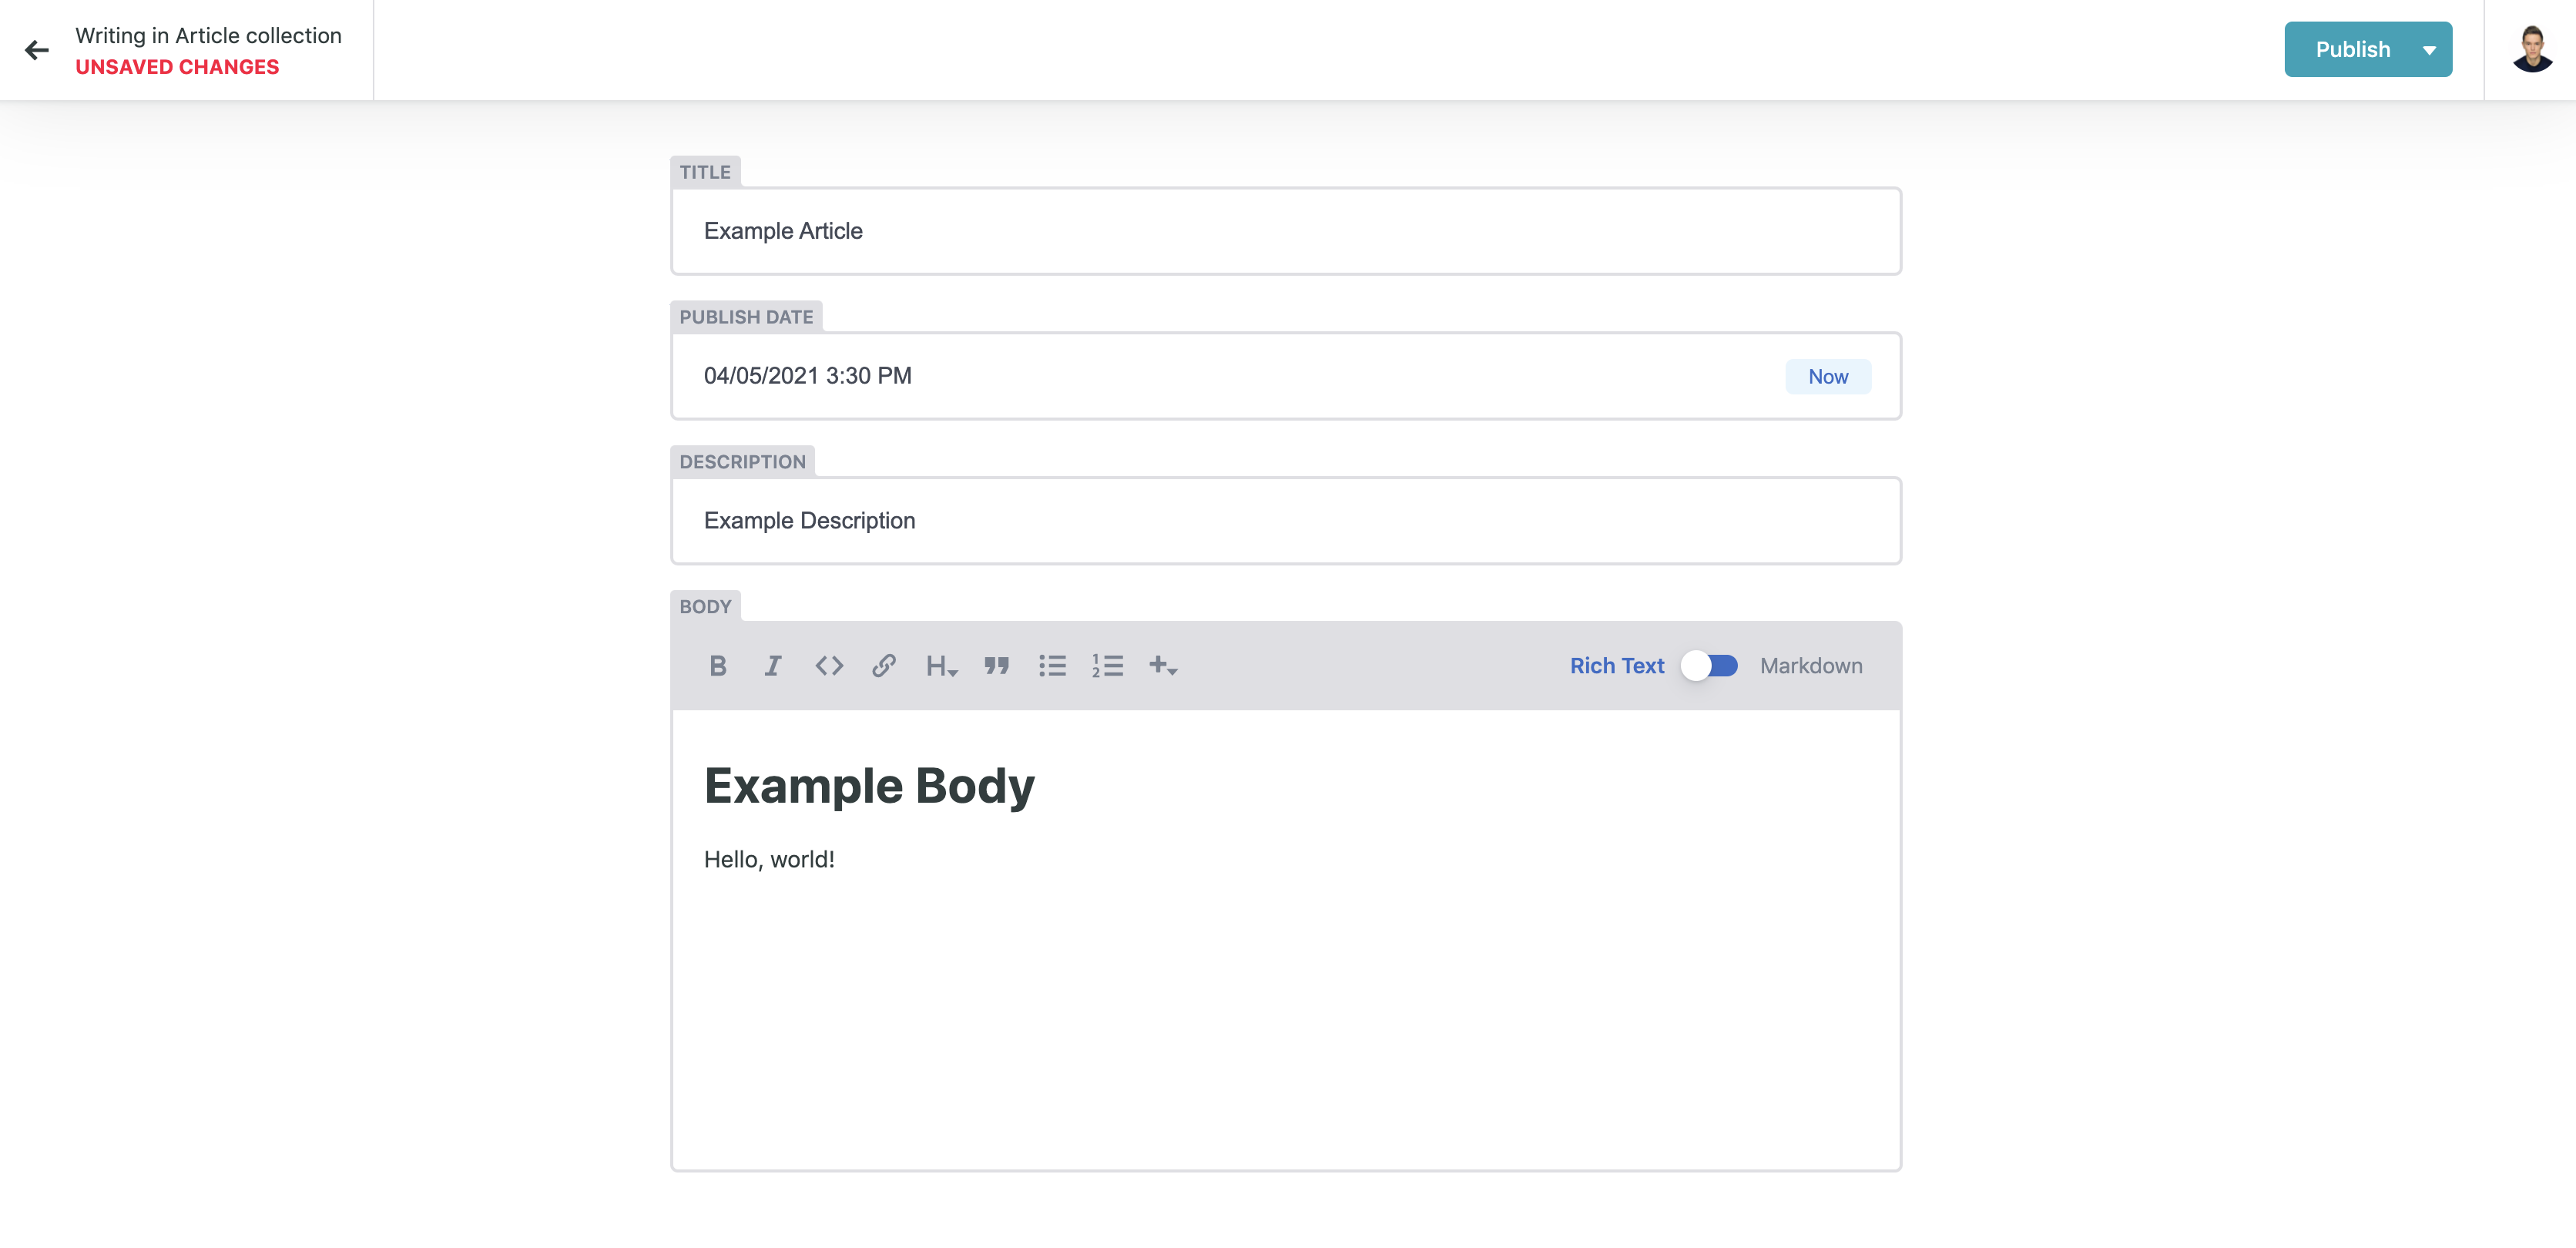
And click Publish.
You should now see the entry in the list:

Then switch back to the code editor and do a pull:
git pull
You should see that the article has appeared in the content/blog folder:
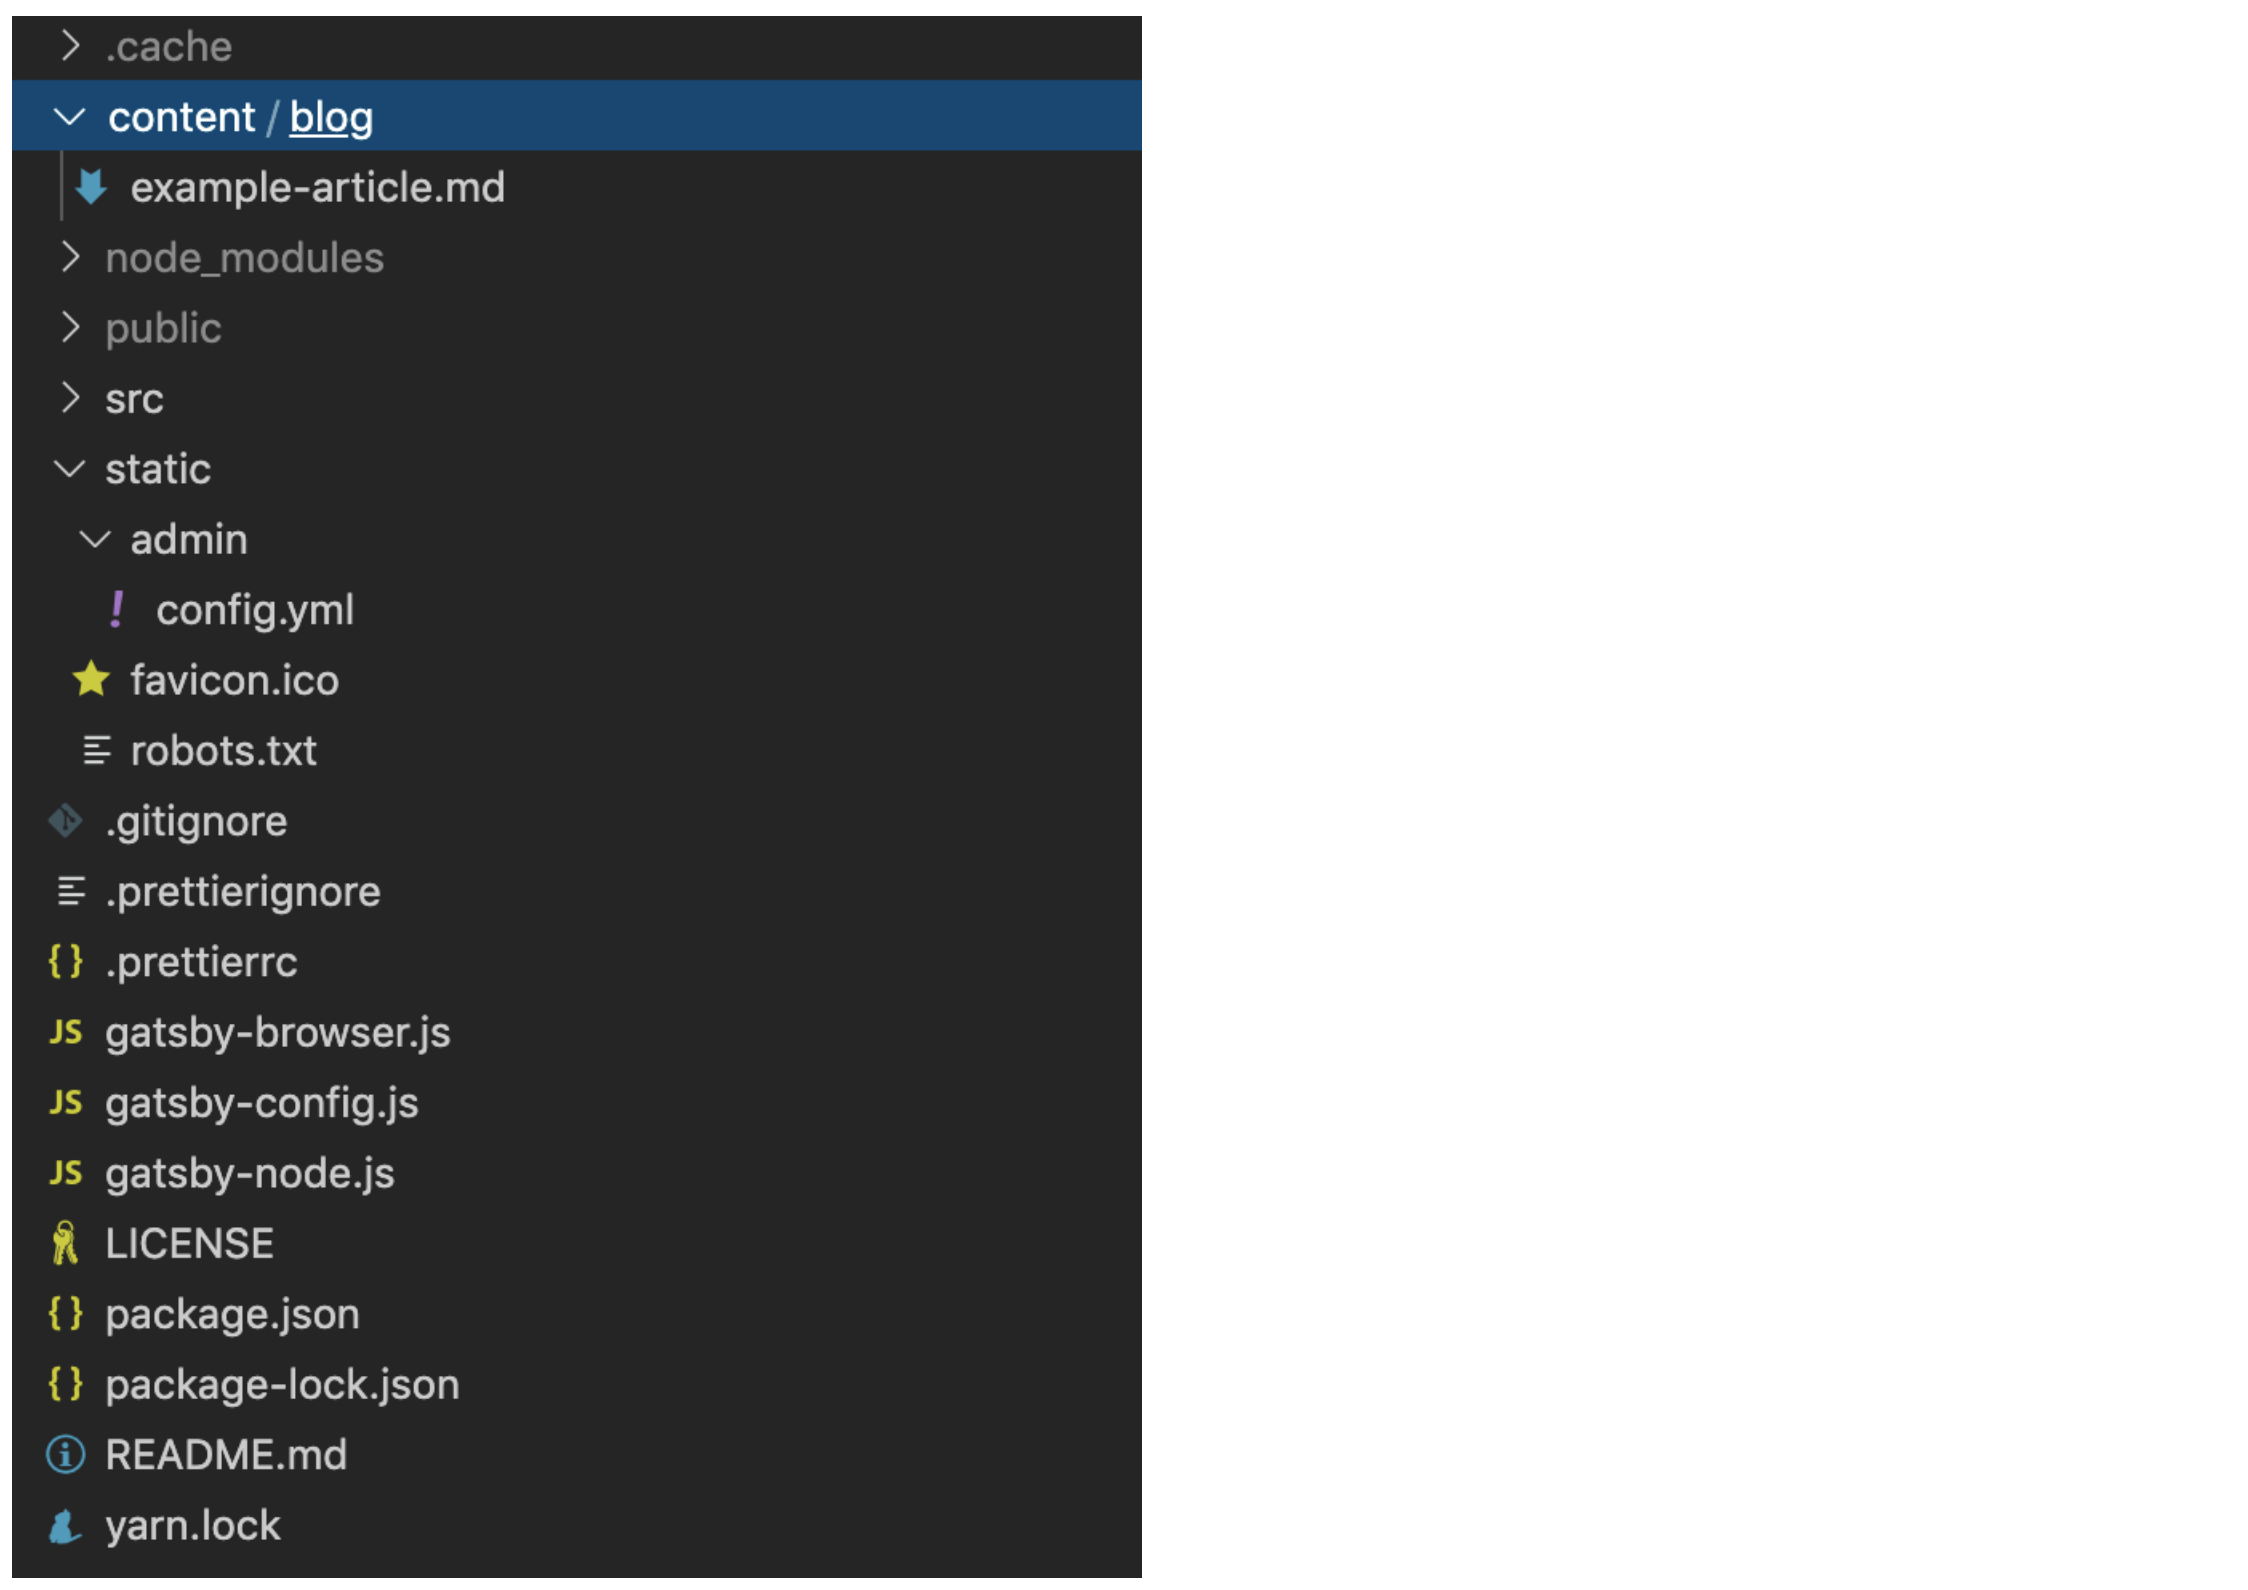
Netlify CMS has committed to our my-blog repository:
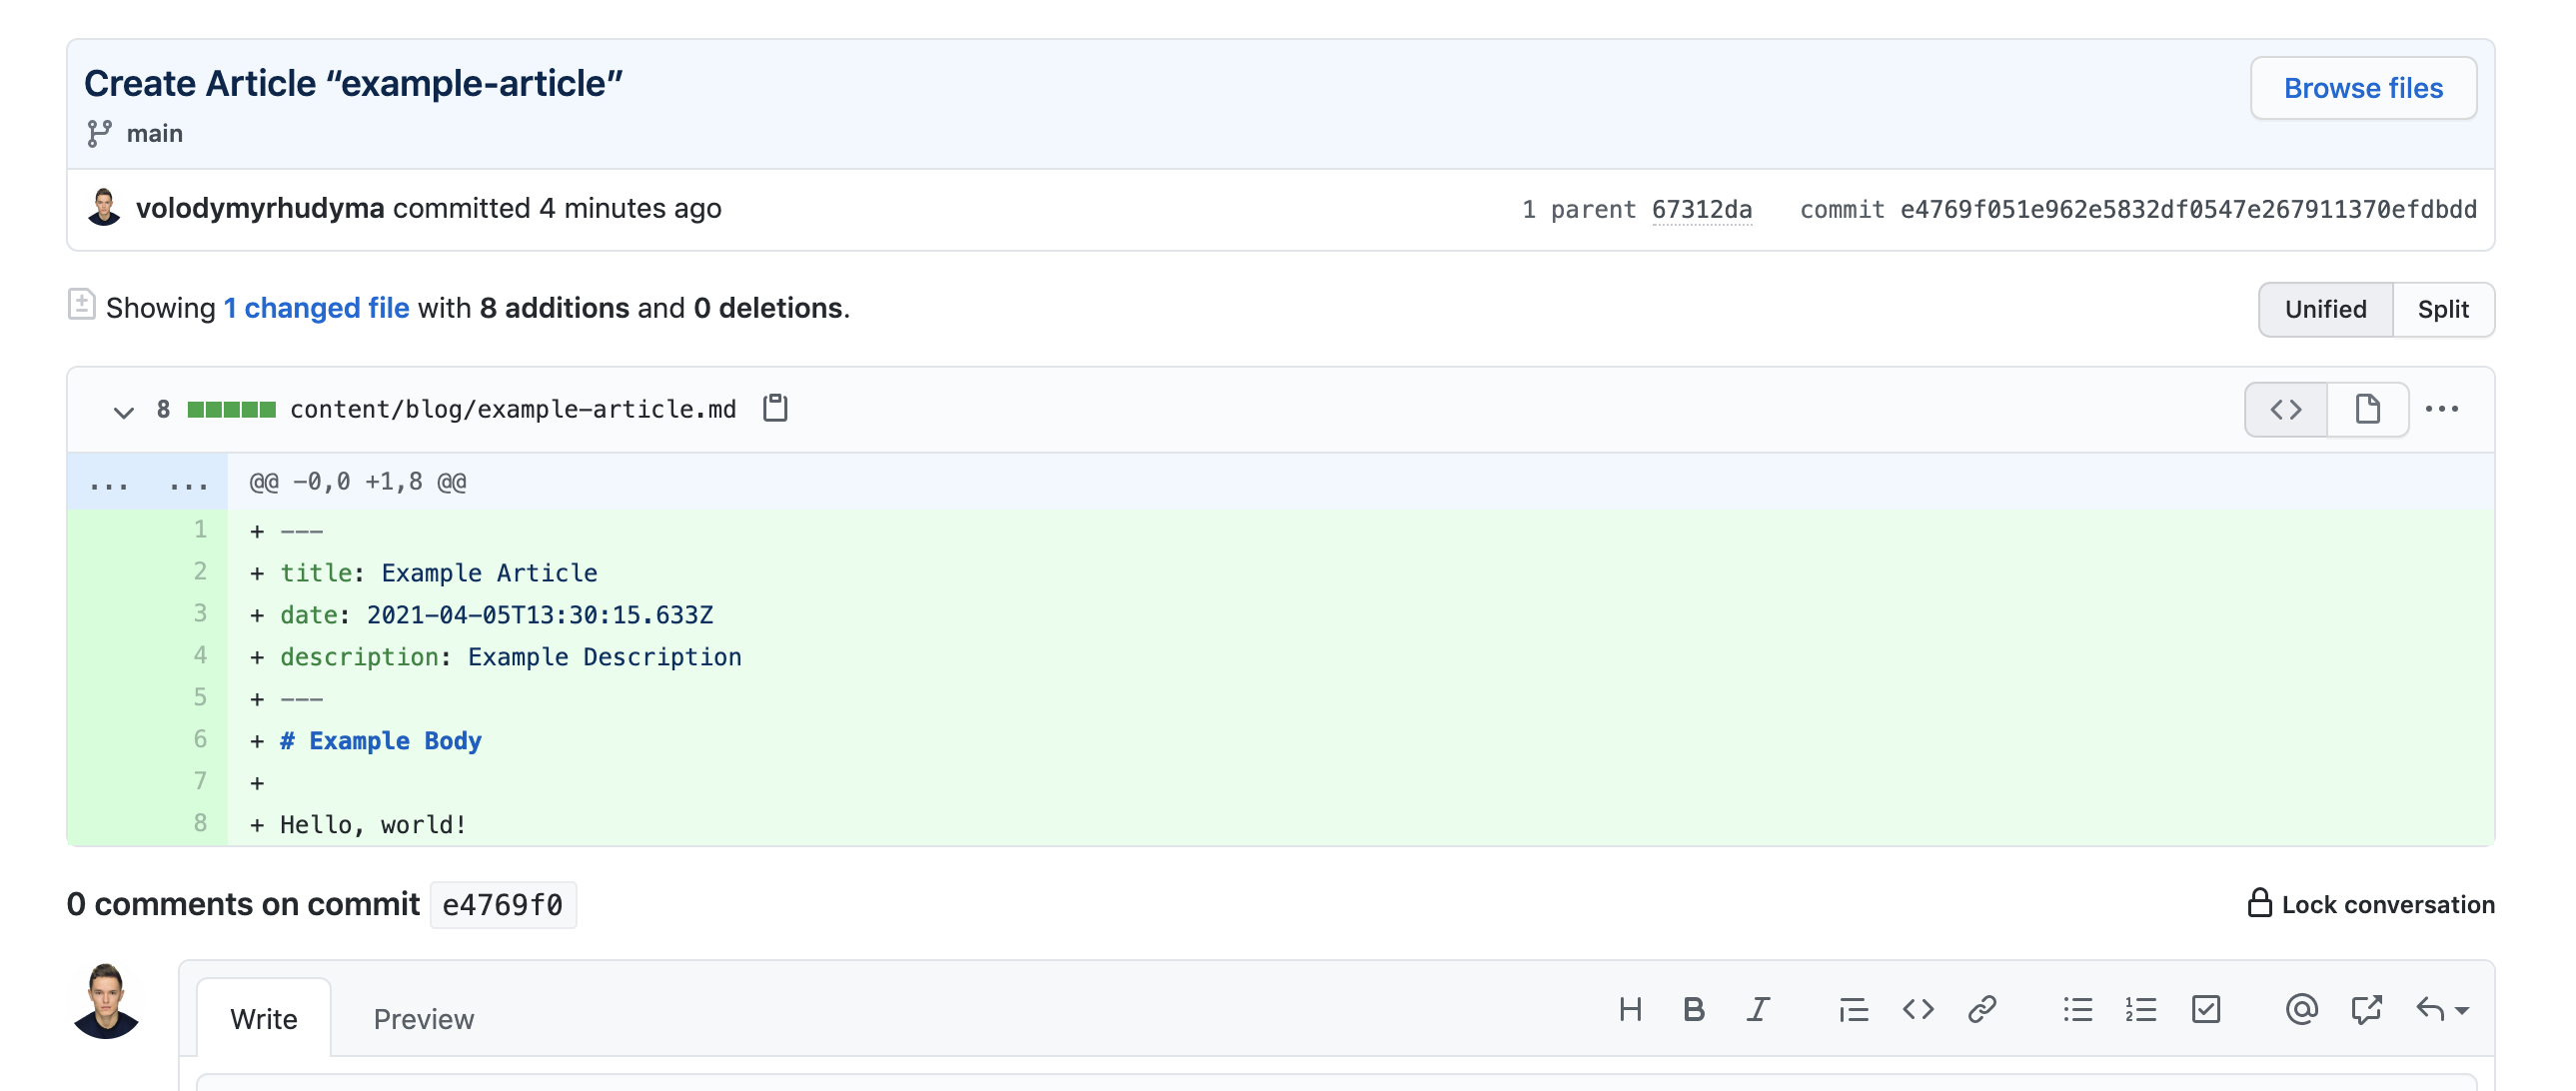
Let's also check UI to make sure the article is visible:
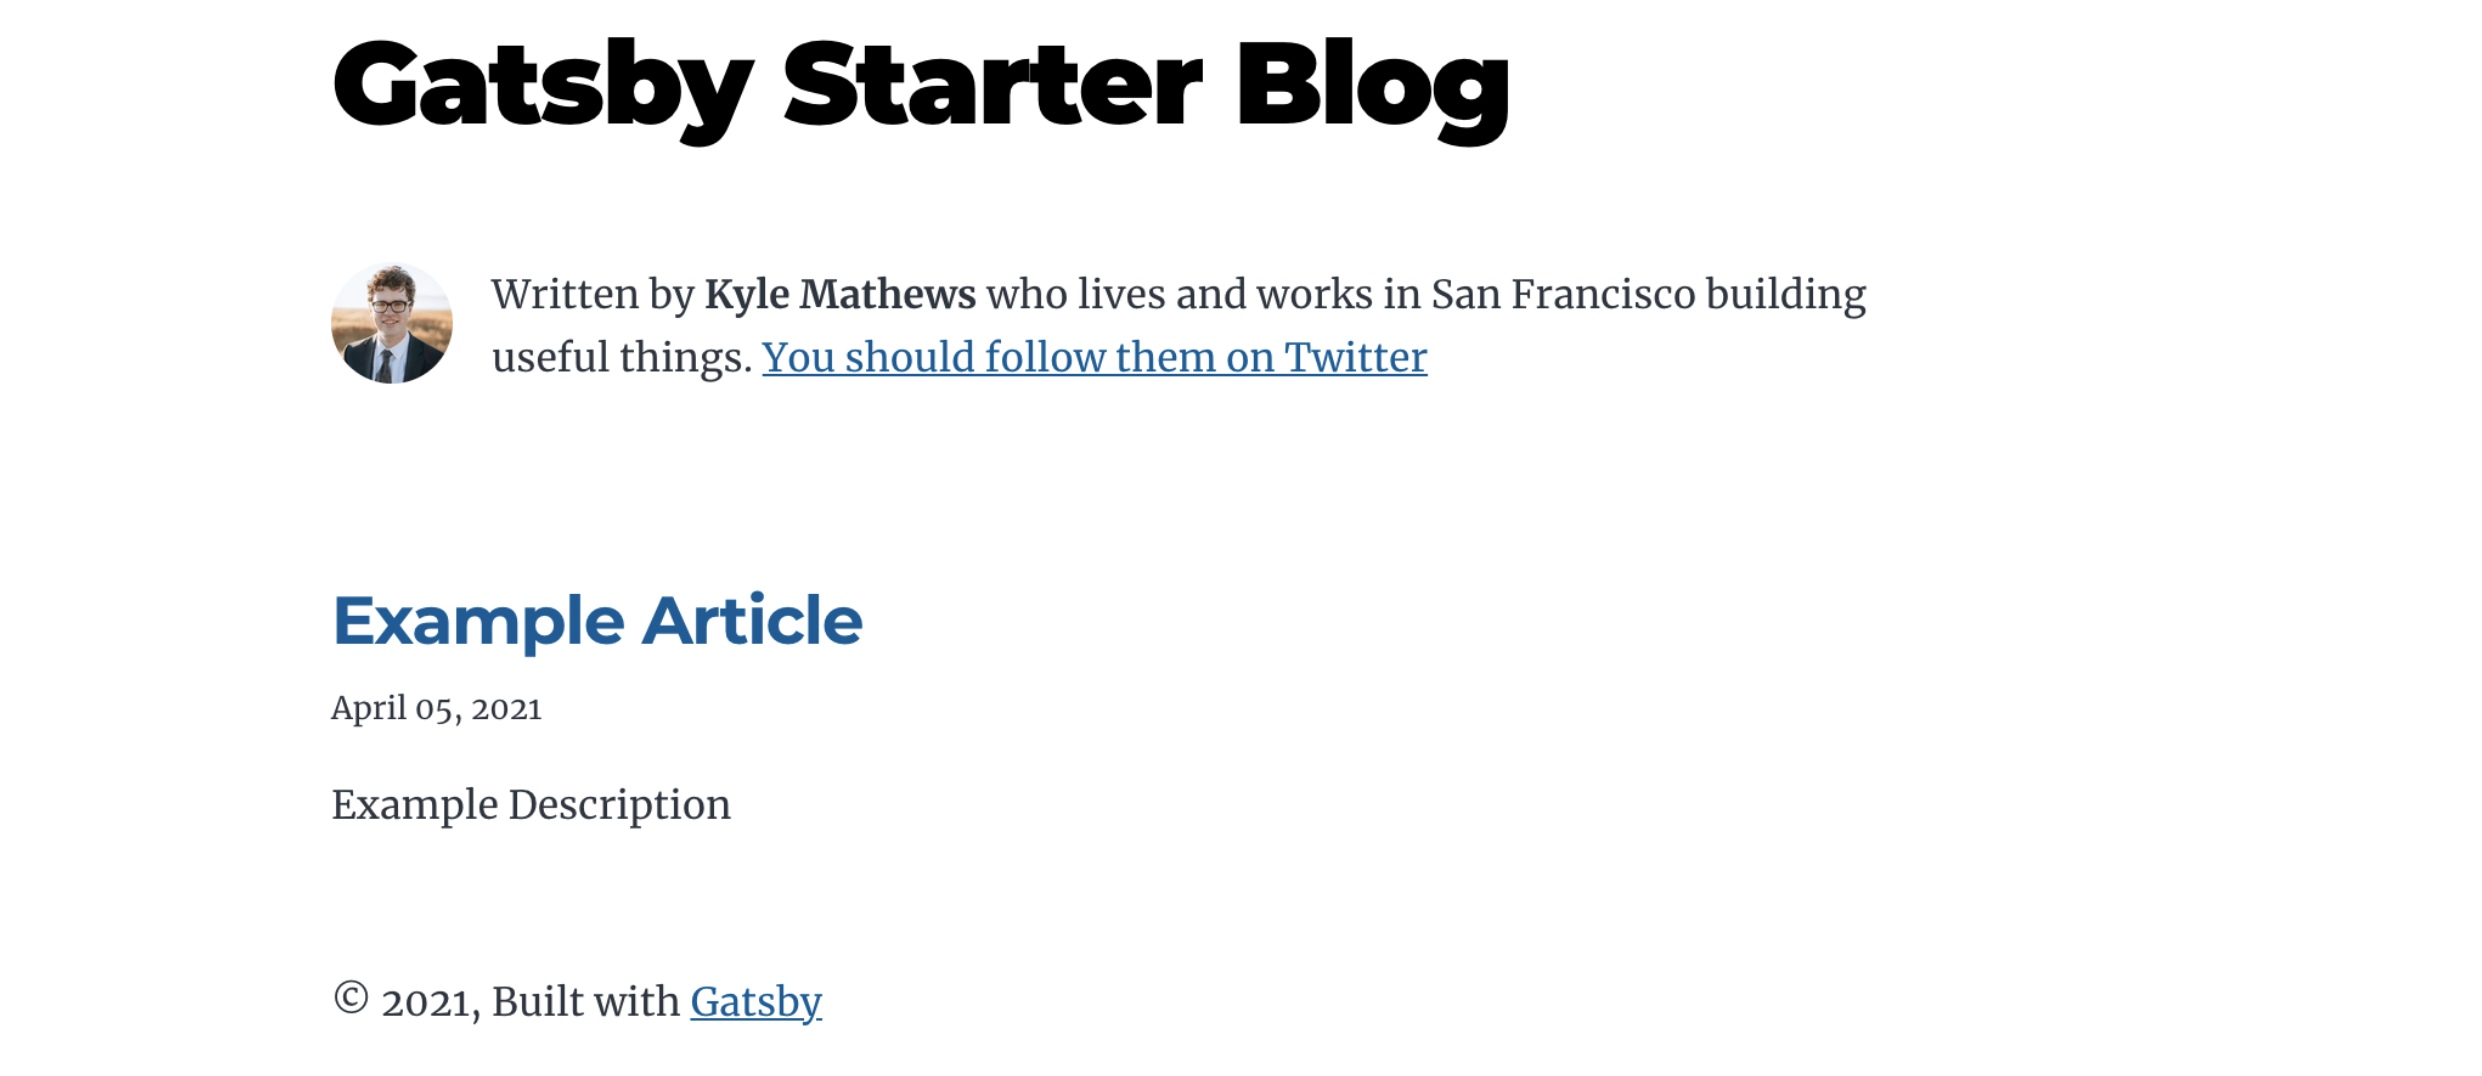
Deploy Your Blog To Netlify
Netlify is a service that automates the creation, deployment, and management of your websites.
Nowadays, it is one of the fastest and easiest deployment solutions.
The folks at Netlify have developed Netlify CMS, so it's really easy to integrate the two together.
Create an account if you don't already have one, sign in and click a New Website from Git button:

In the next step, select Github as your Git provider:
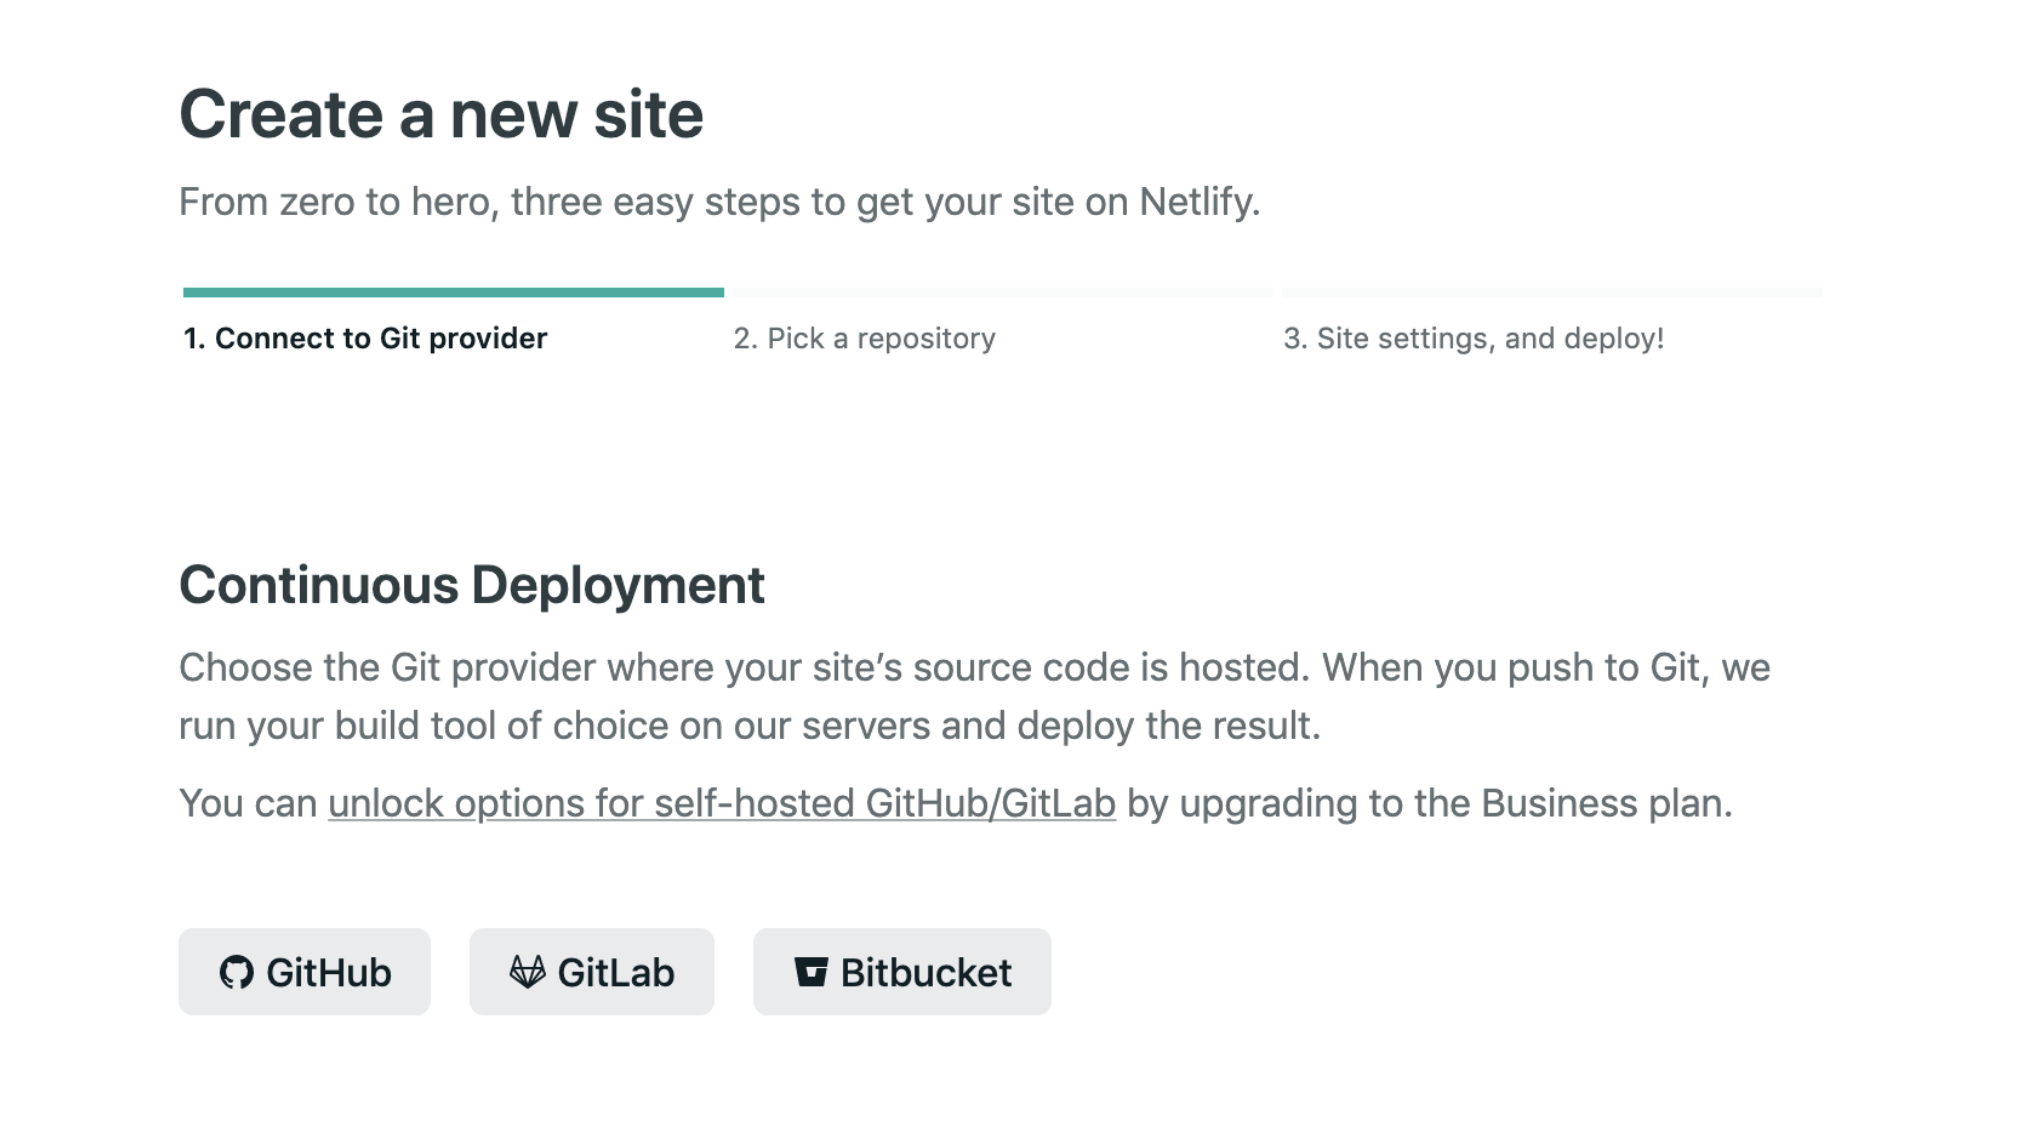
And pick a repository:
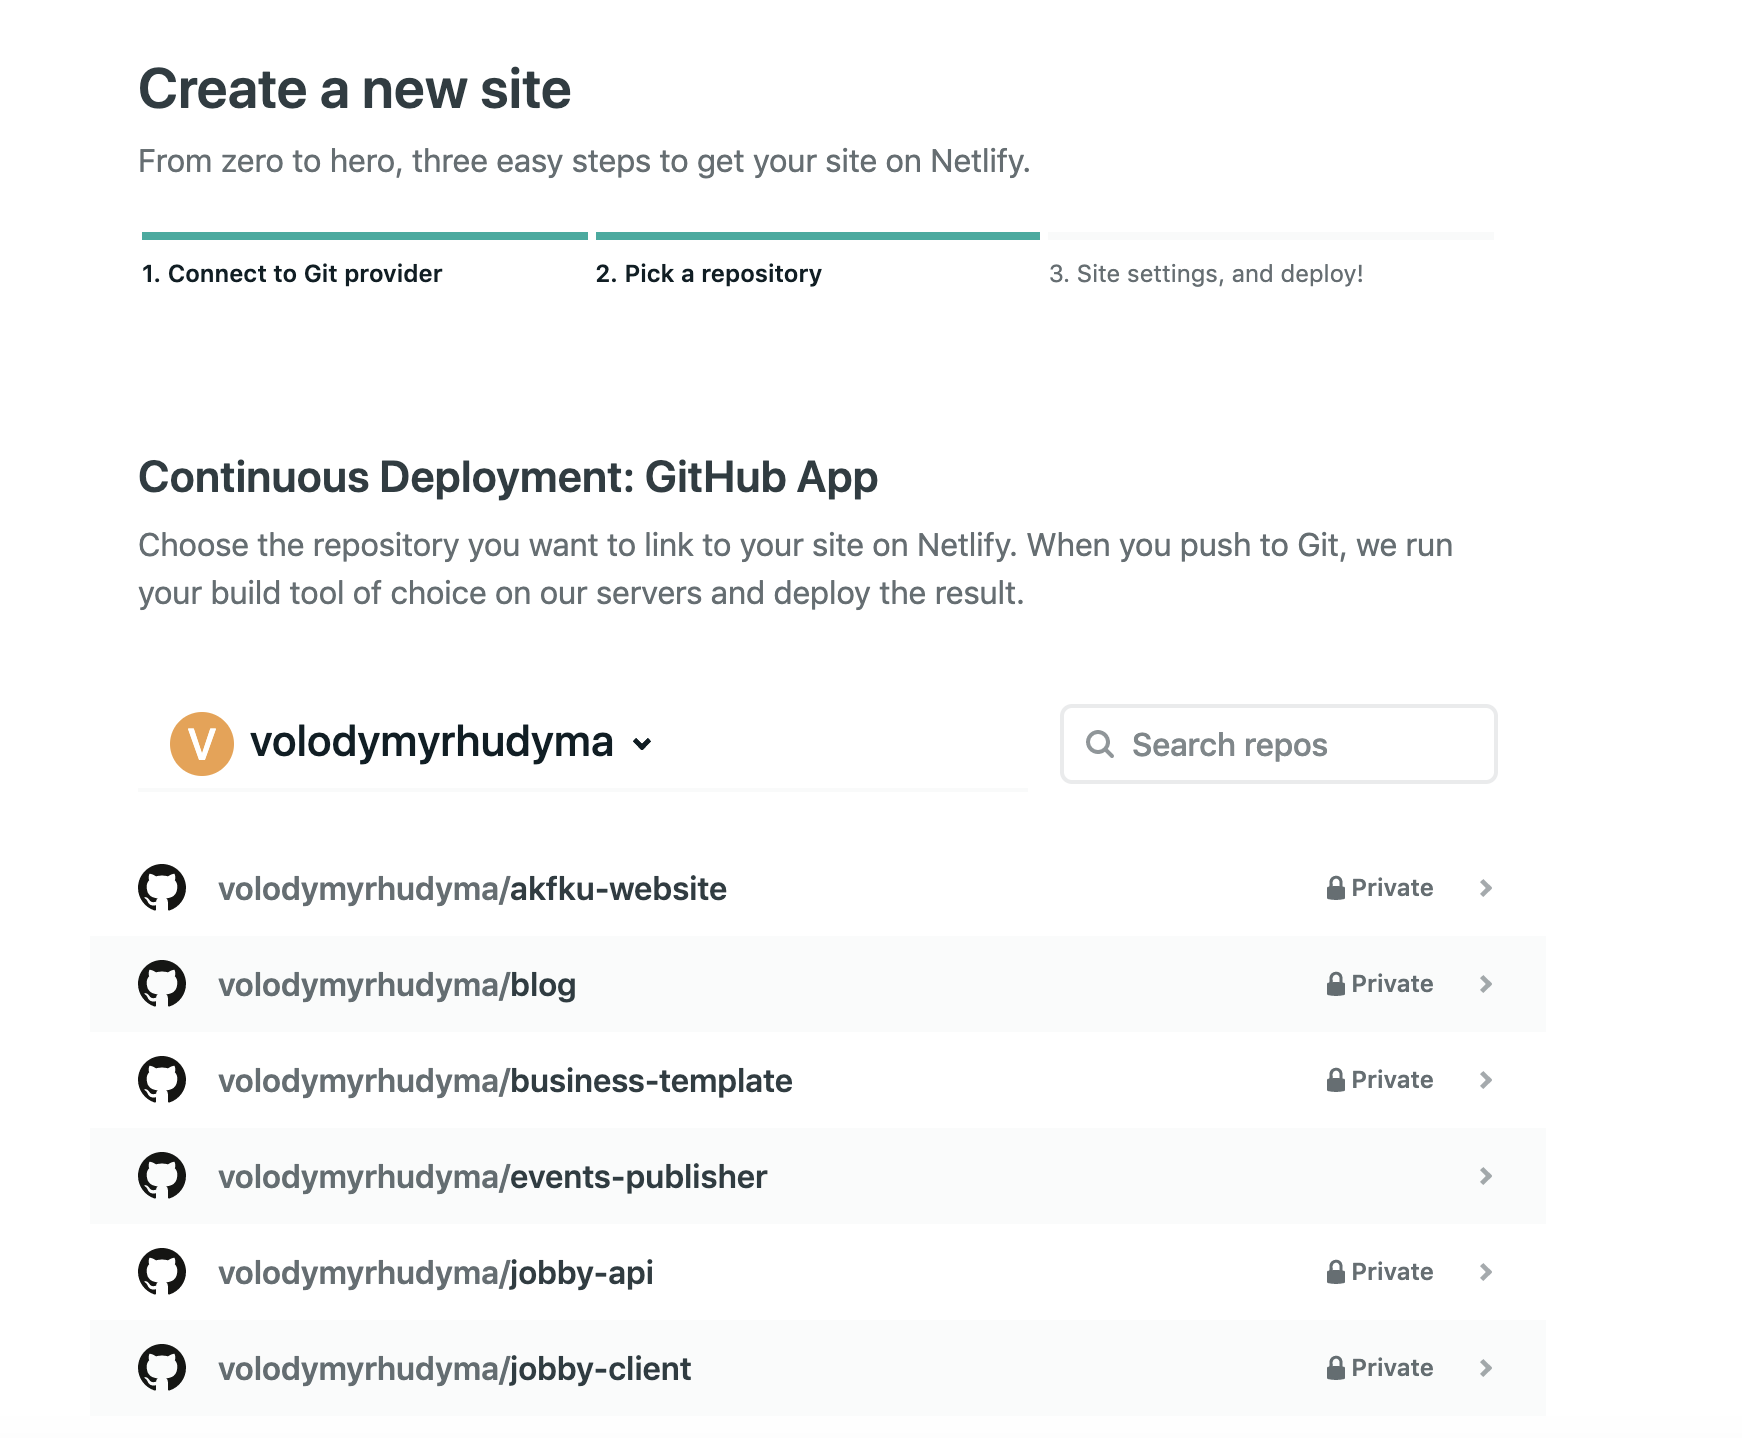
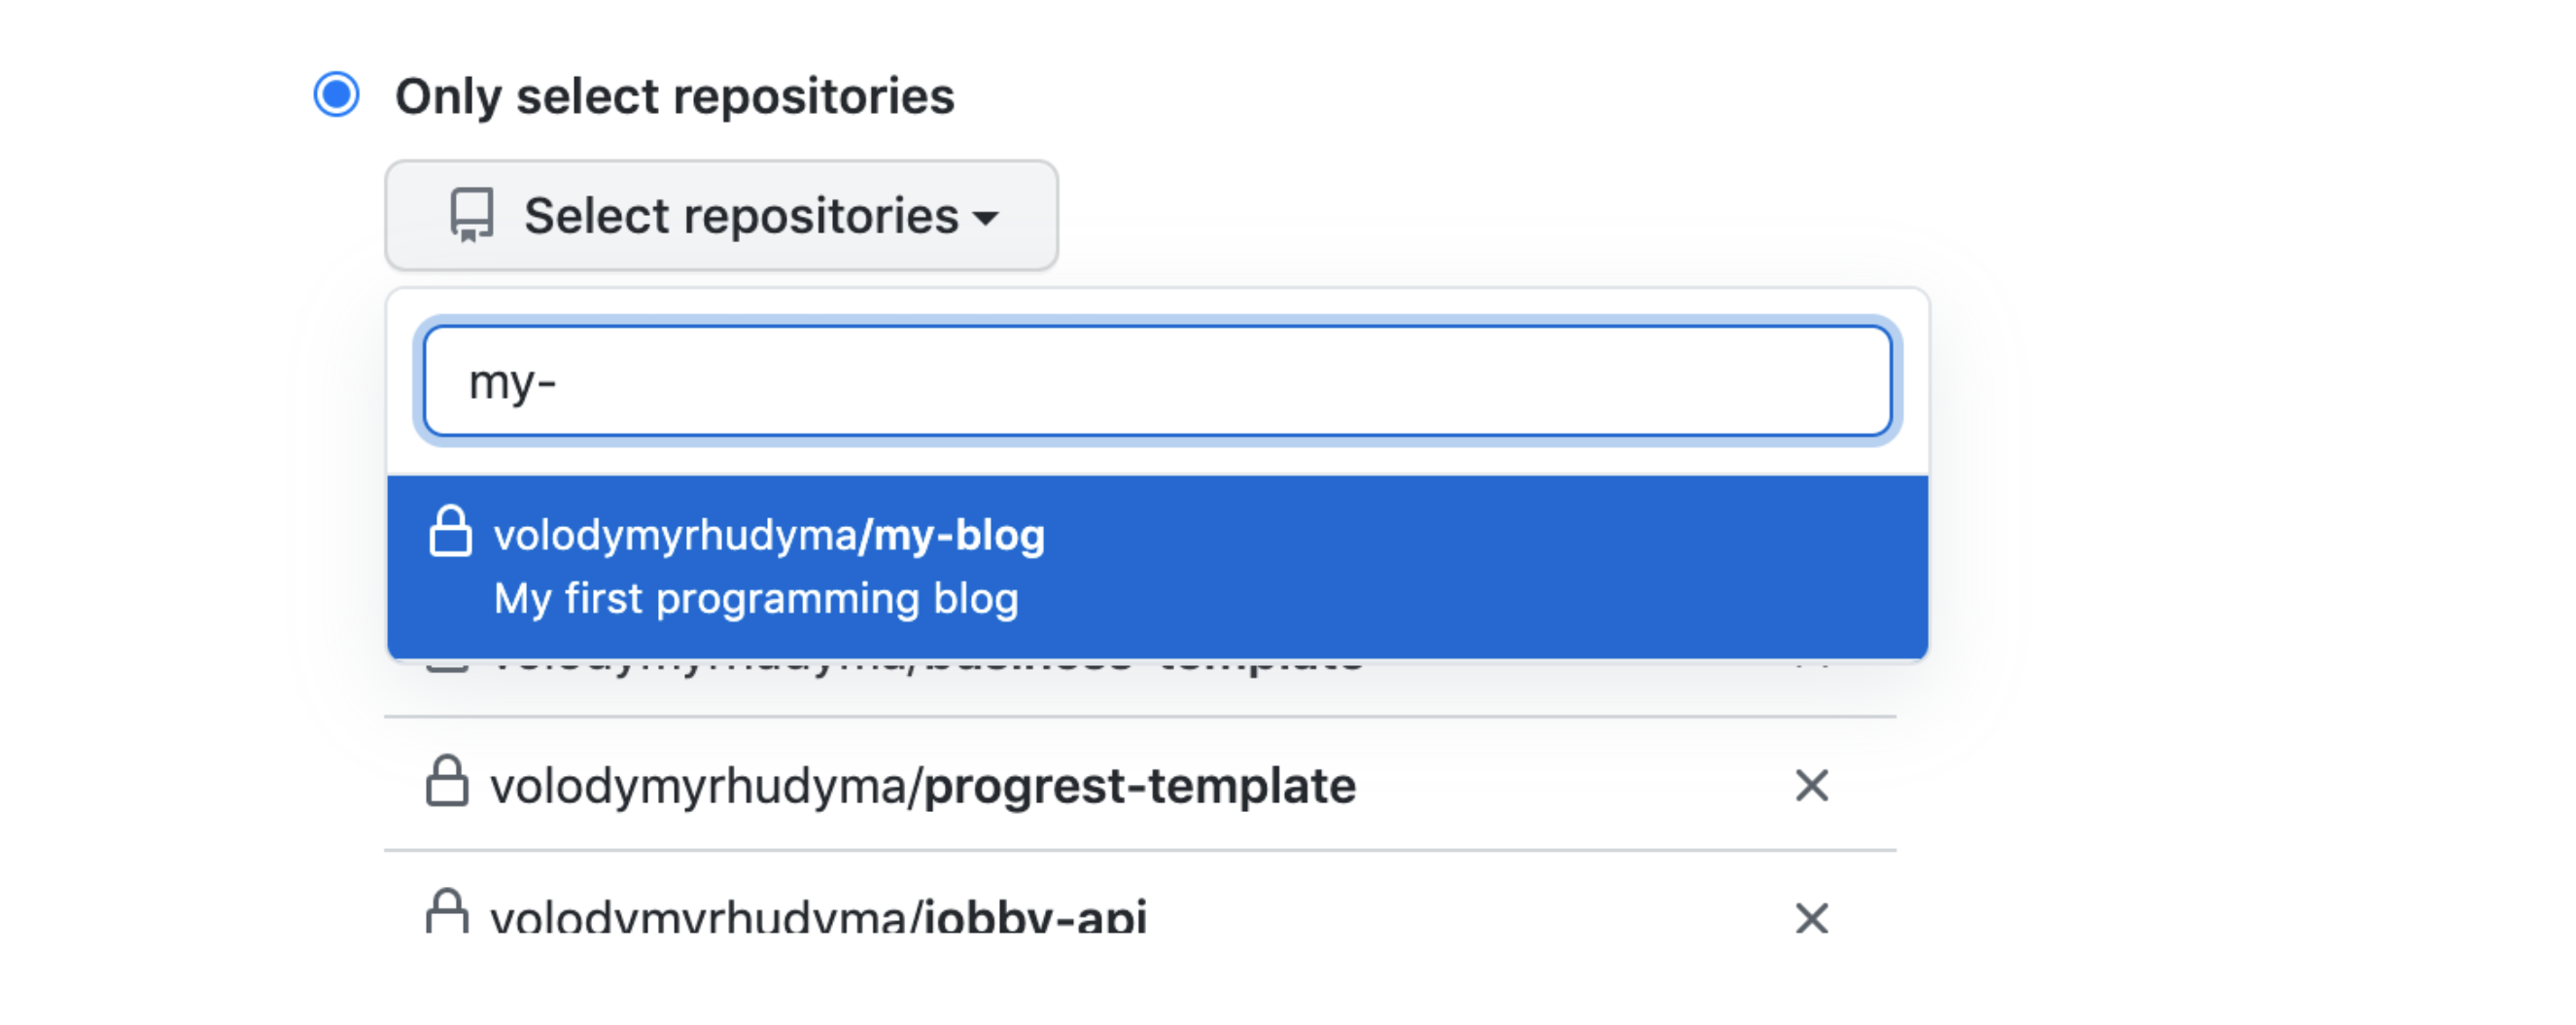
Important note: if you can not find your repository in the list, you need to allow Netlify to access it. To do this, click on the link below the list: Can’t see your repo here? Configure the Netlify app on GitHub:
Finally, provide the deploy settings.
The most important ones are: which branch to deploy (we will deploy main), which command to execute to build the project (in our case yarn build), and which folder to deploy (in our case public folder):
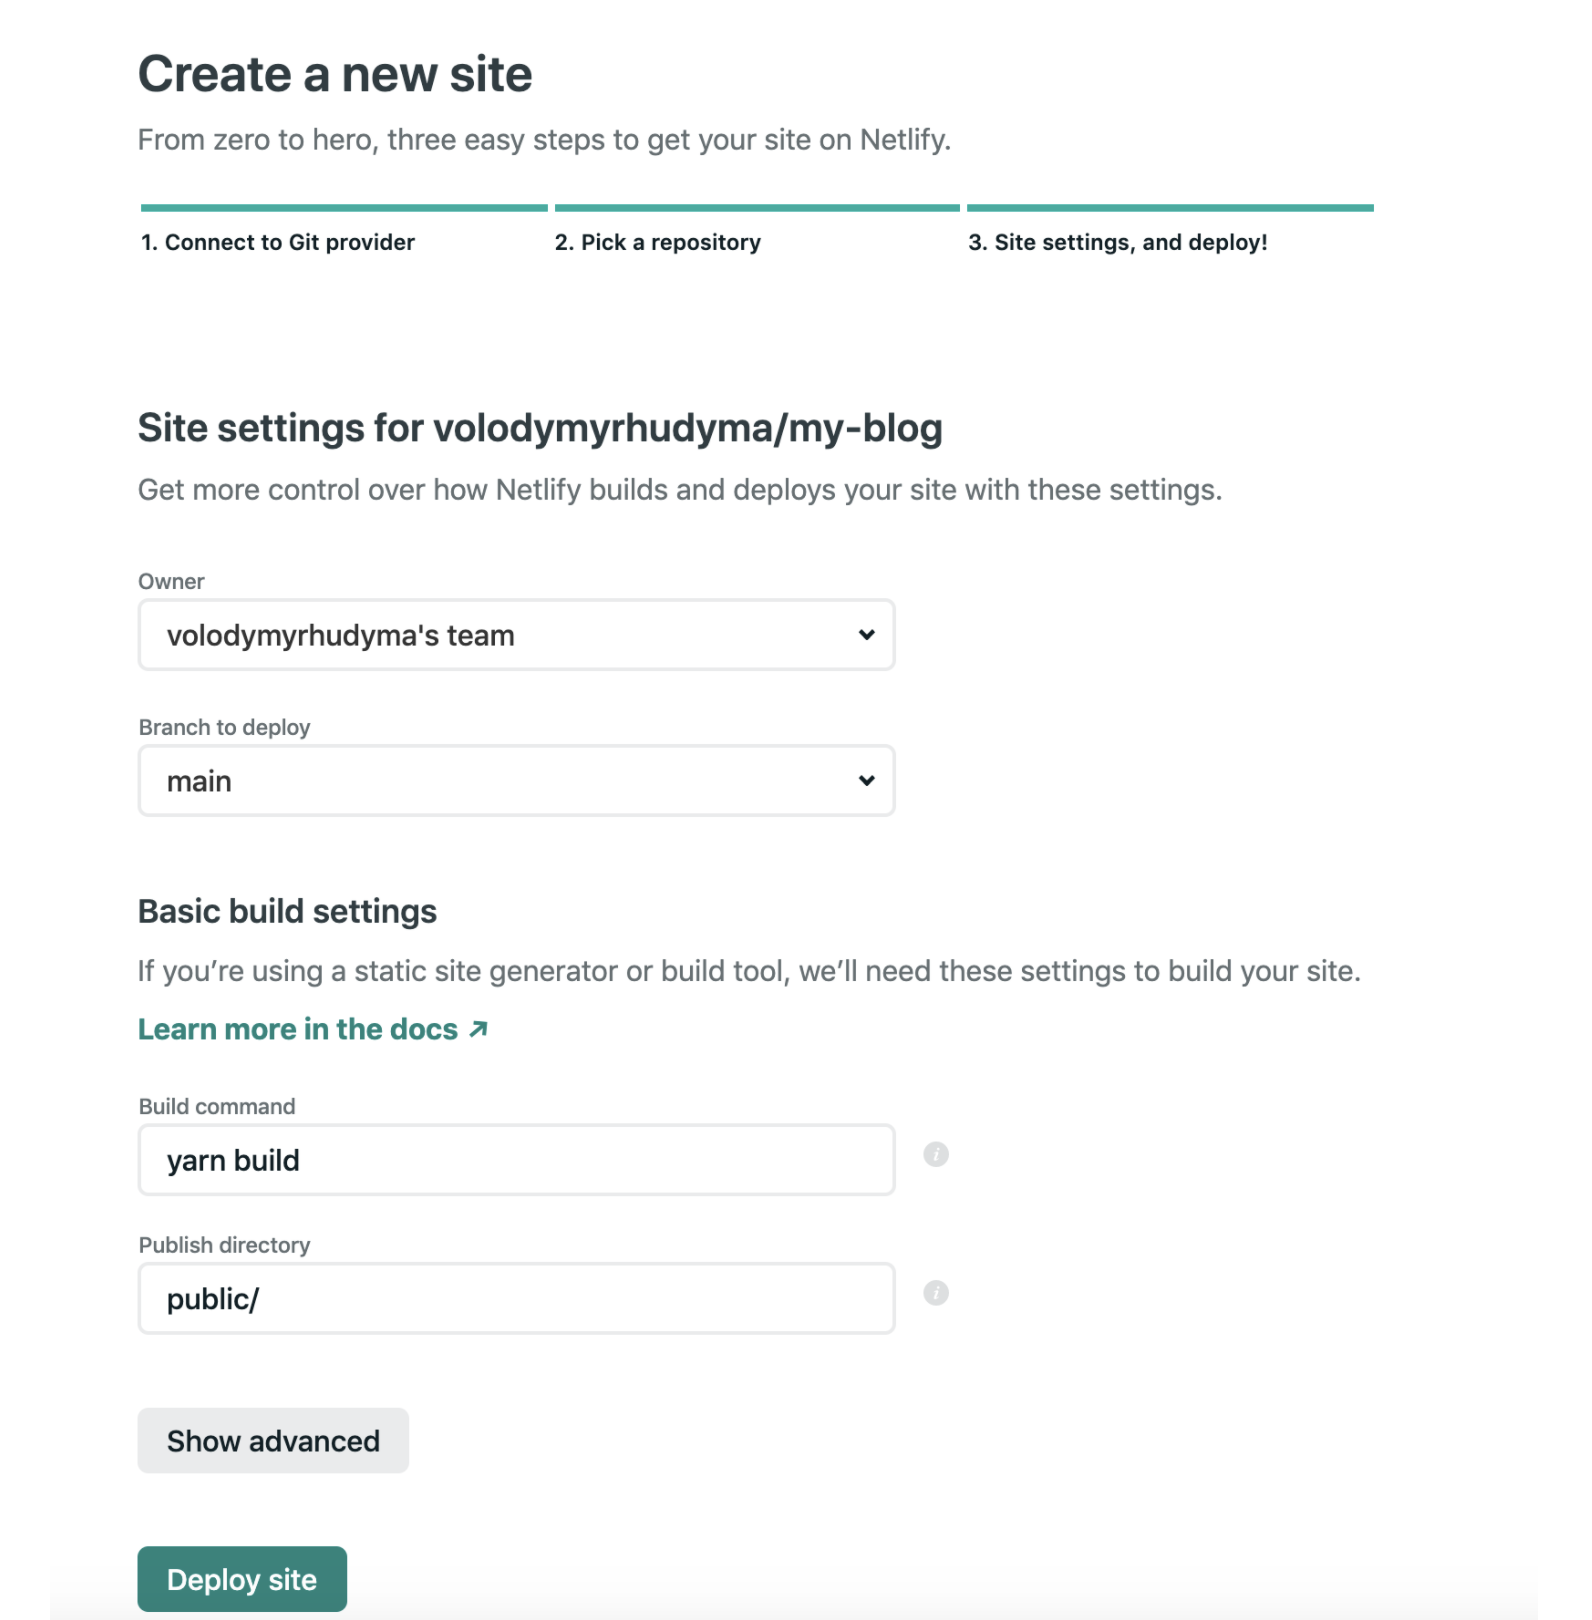
And click on a Deploy site button.
Now it's time to relax a bit and have a coffee.
Netlify will build and deploy the website for you.
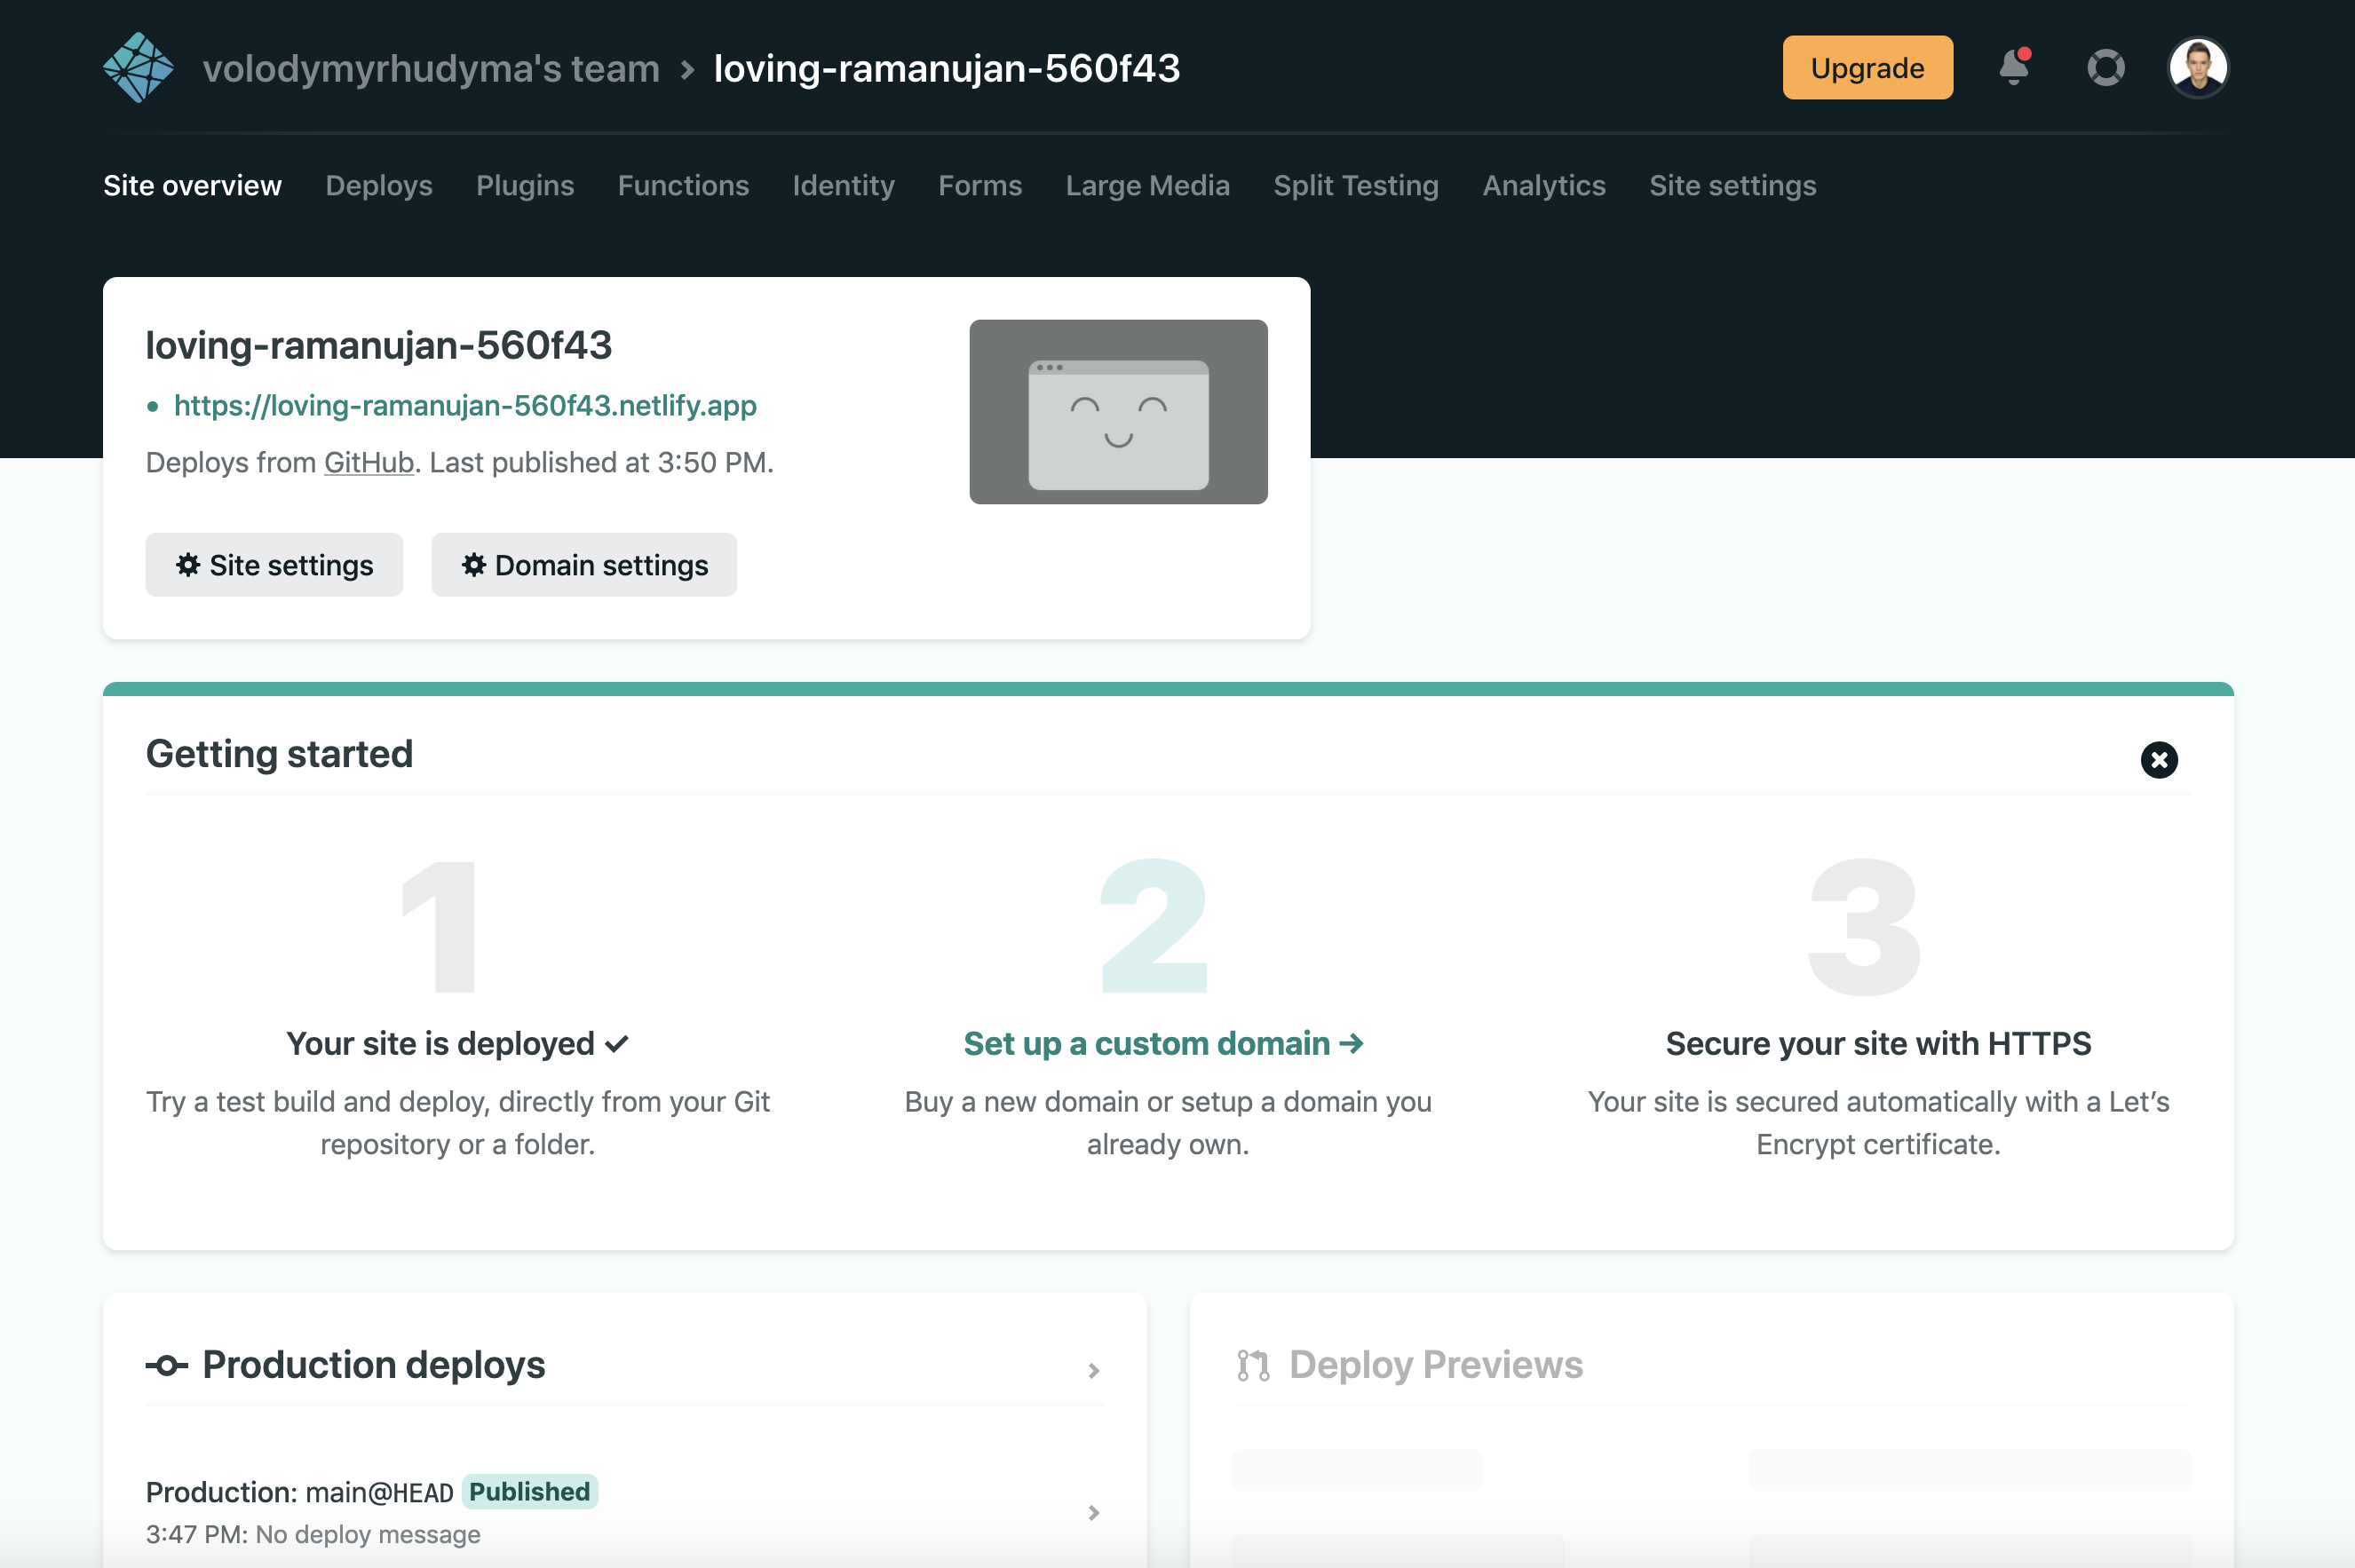
Once the deployment is complete, your blog will be accessible:
Login To CMS On Netlify
Everything seems to be working as expected until we try to log in to the CMS.
After clicking a Login with Github button, you see the following:
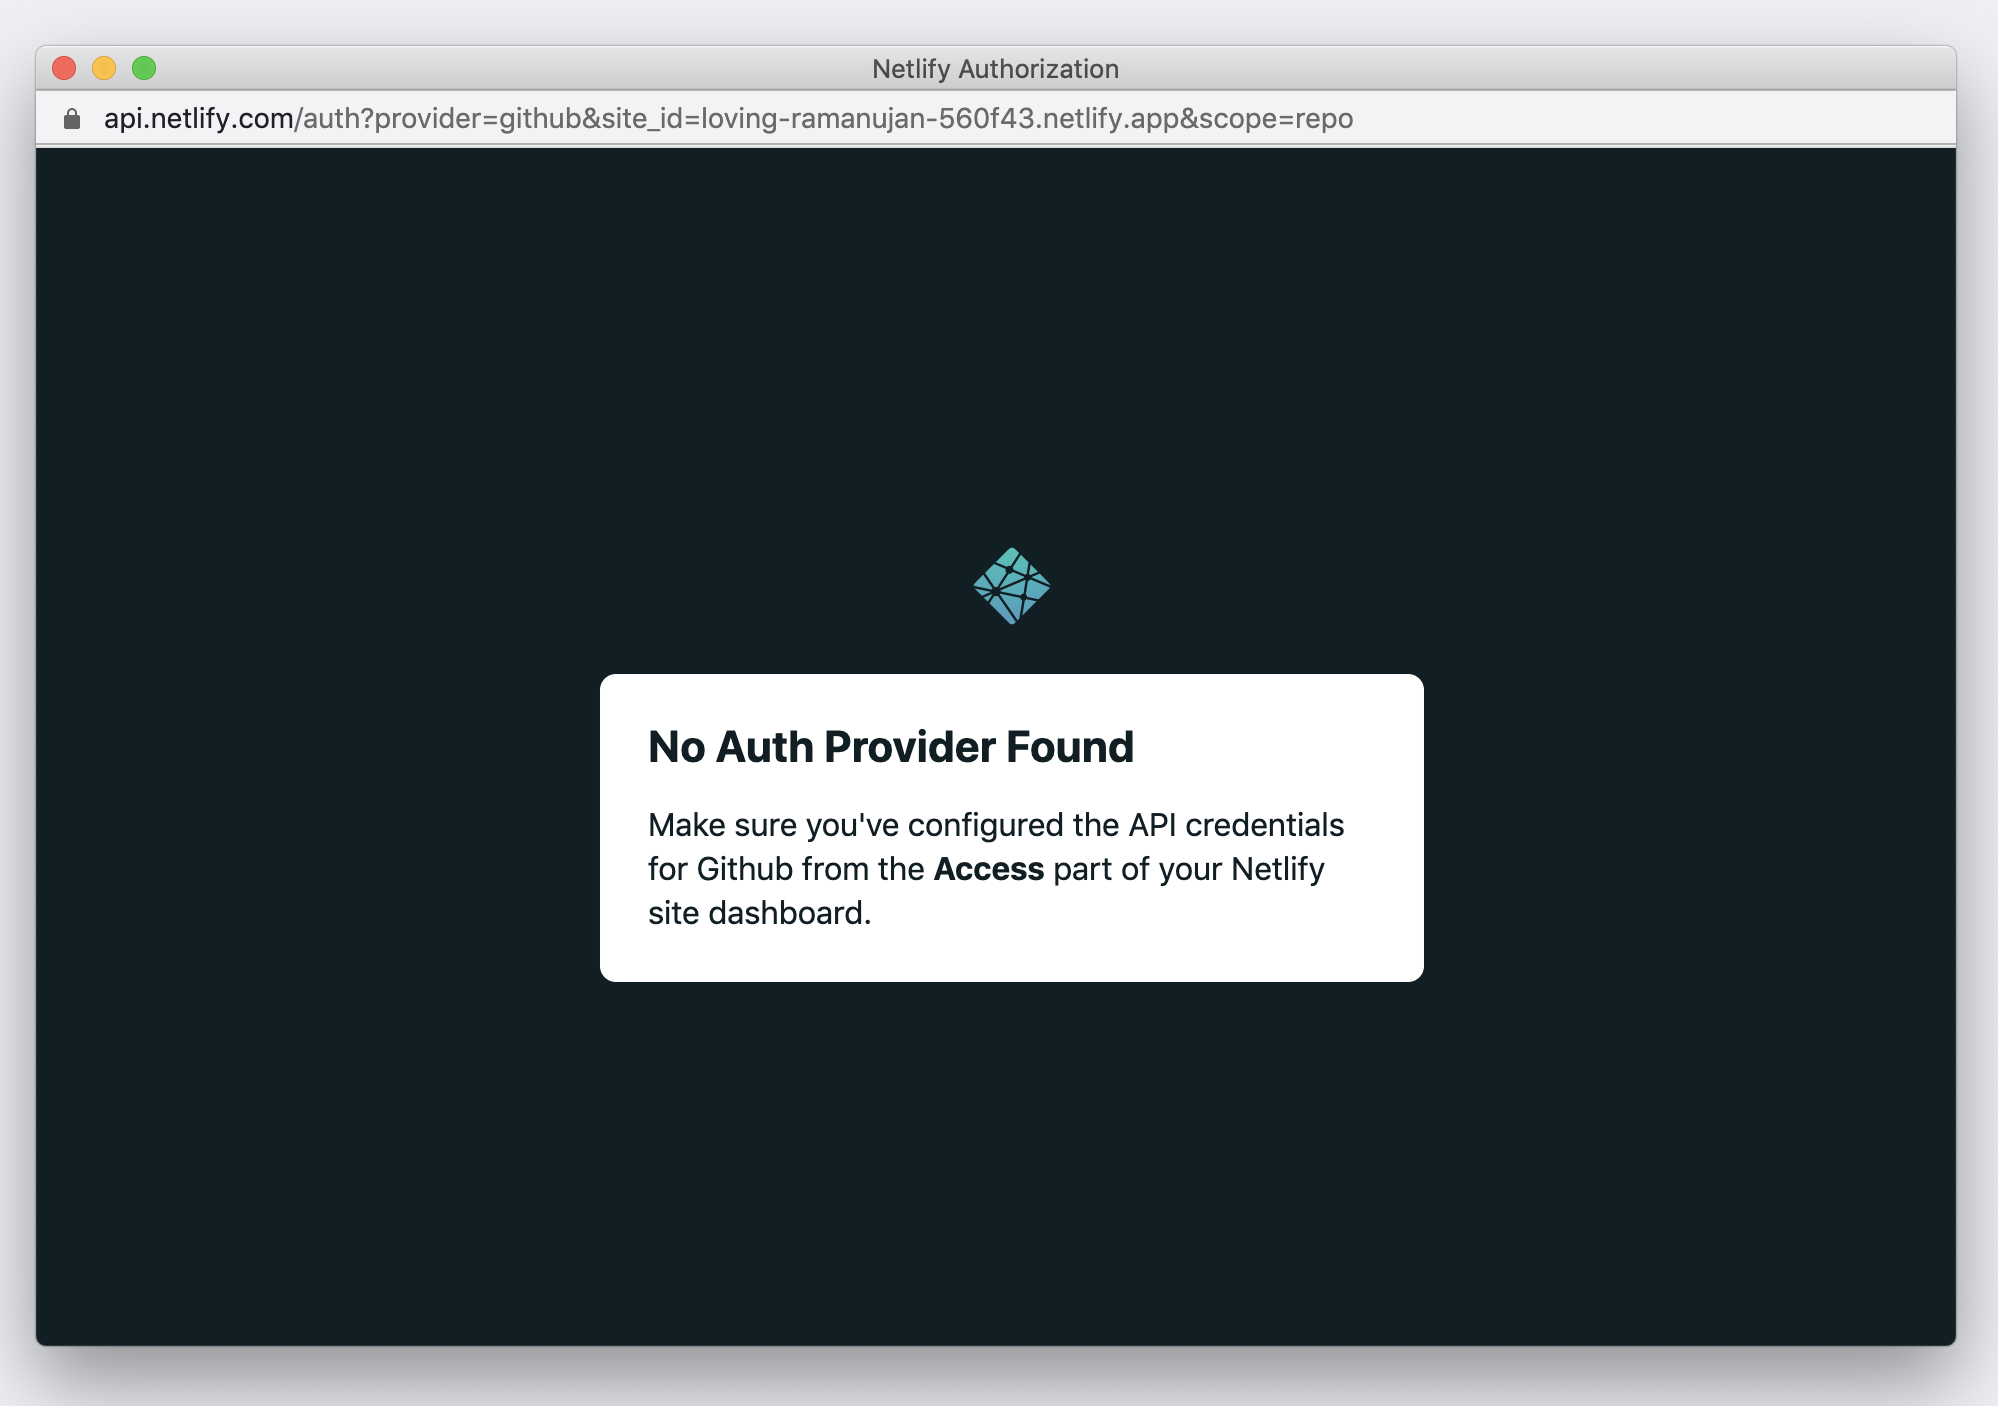
This basically means that you need to add your deployed site as an OAuth application in your GitHub settings:
- In GitHub, go to your account Settings -> Developer Settings -> OAuth Apps
- Click New OAuth App
- Fill out the form (the most important thing - put https://api.netlify.com/auth/done in the Authorization Callback URL field) and click Register Application:
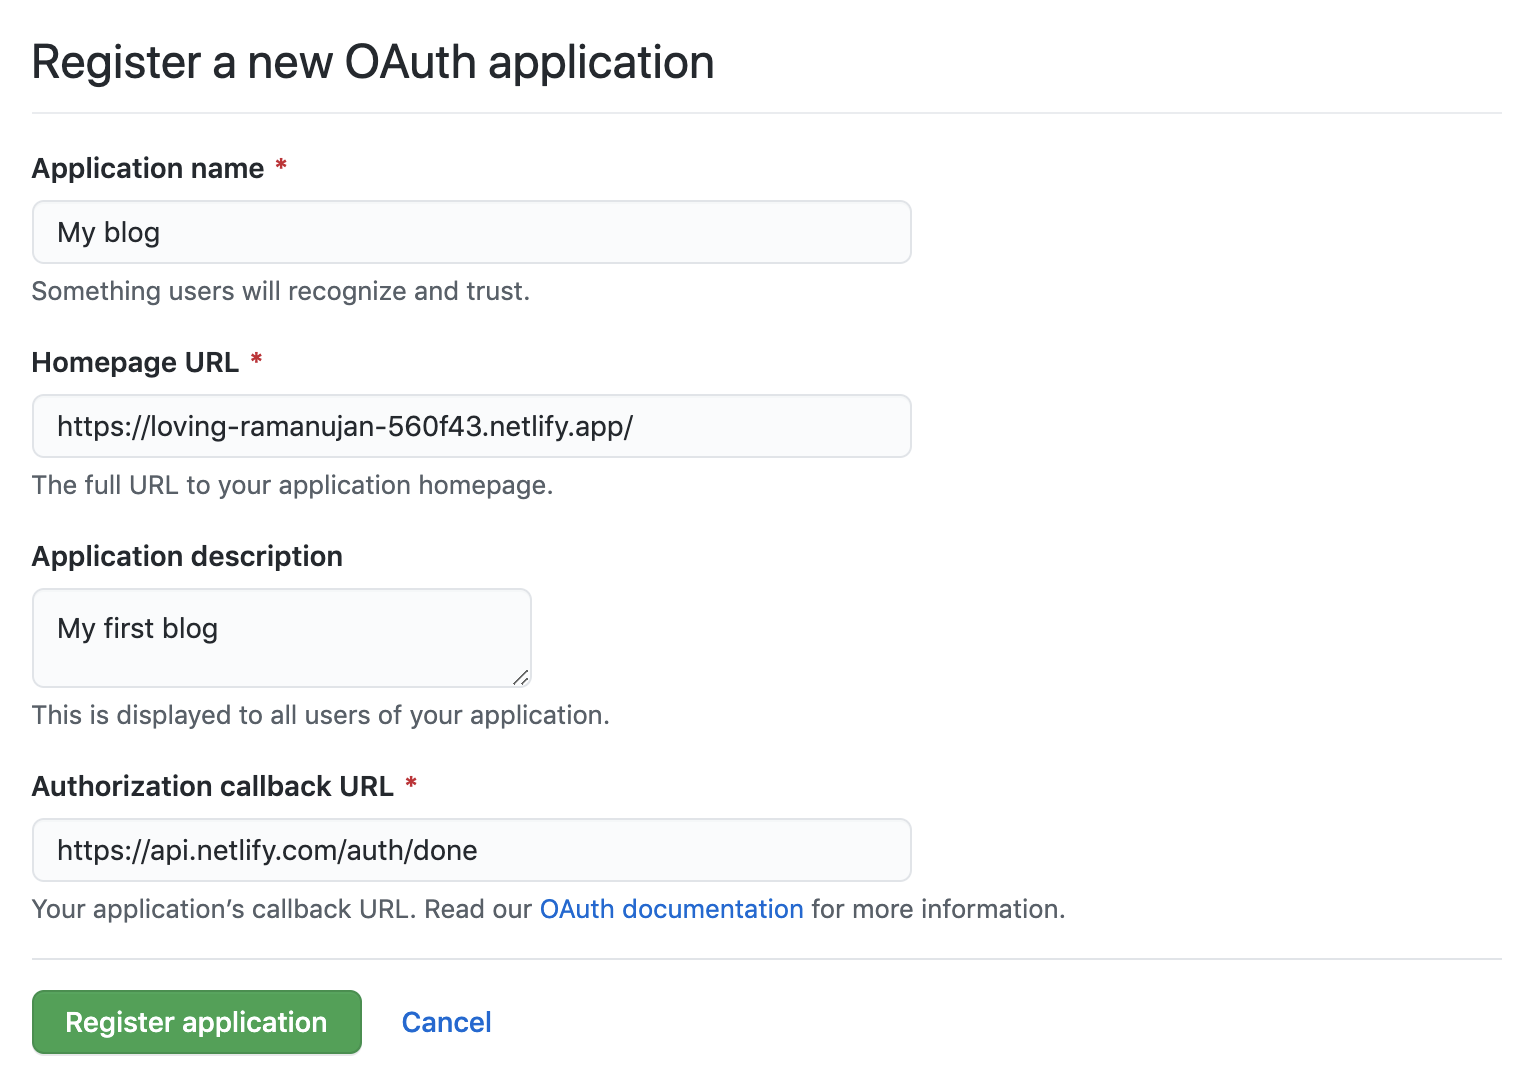
When you complete registration, you will receive a Client ID and a Client Secret for the app:

You need to add these to your Netlify site:
- Go to Site settings > Access control > OAuth
- Under Authentication Providers, select Install Provider
- Select GitHub and enter the Client ID and Client Secret, then save
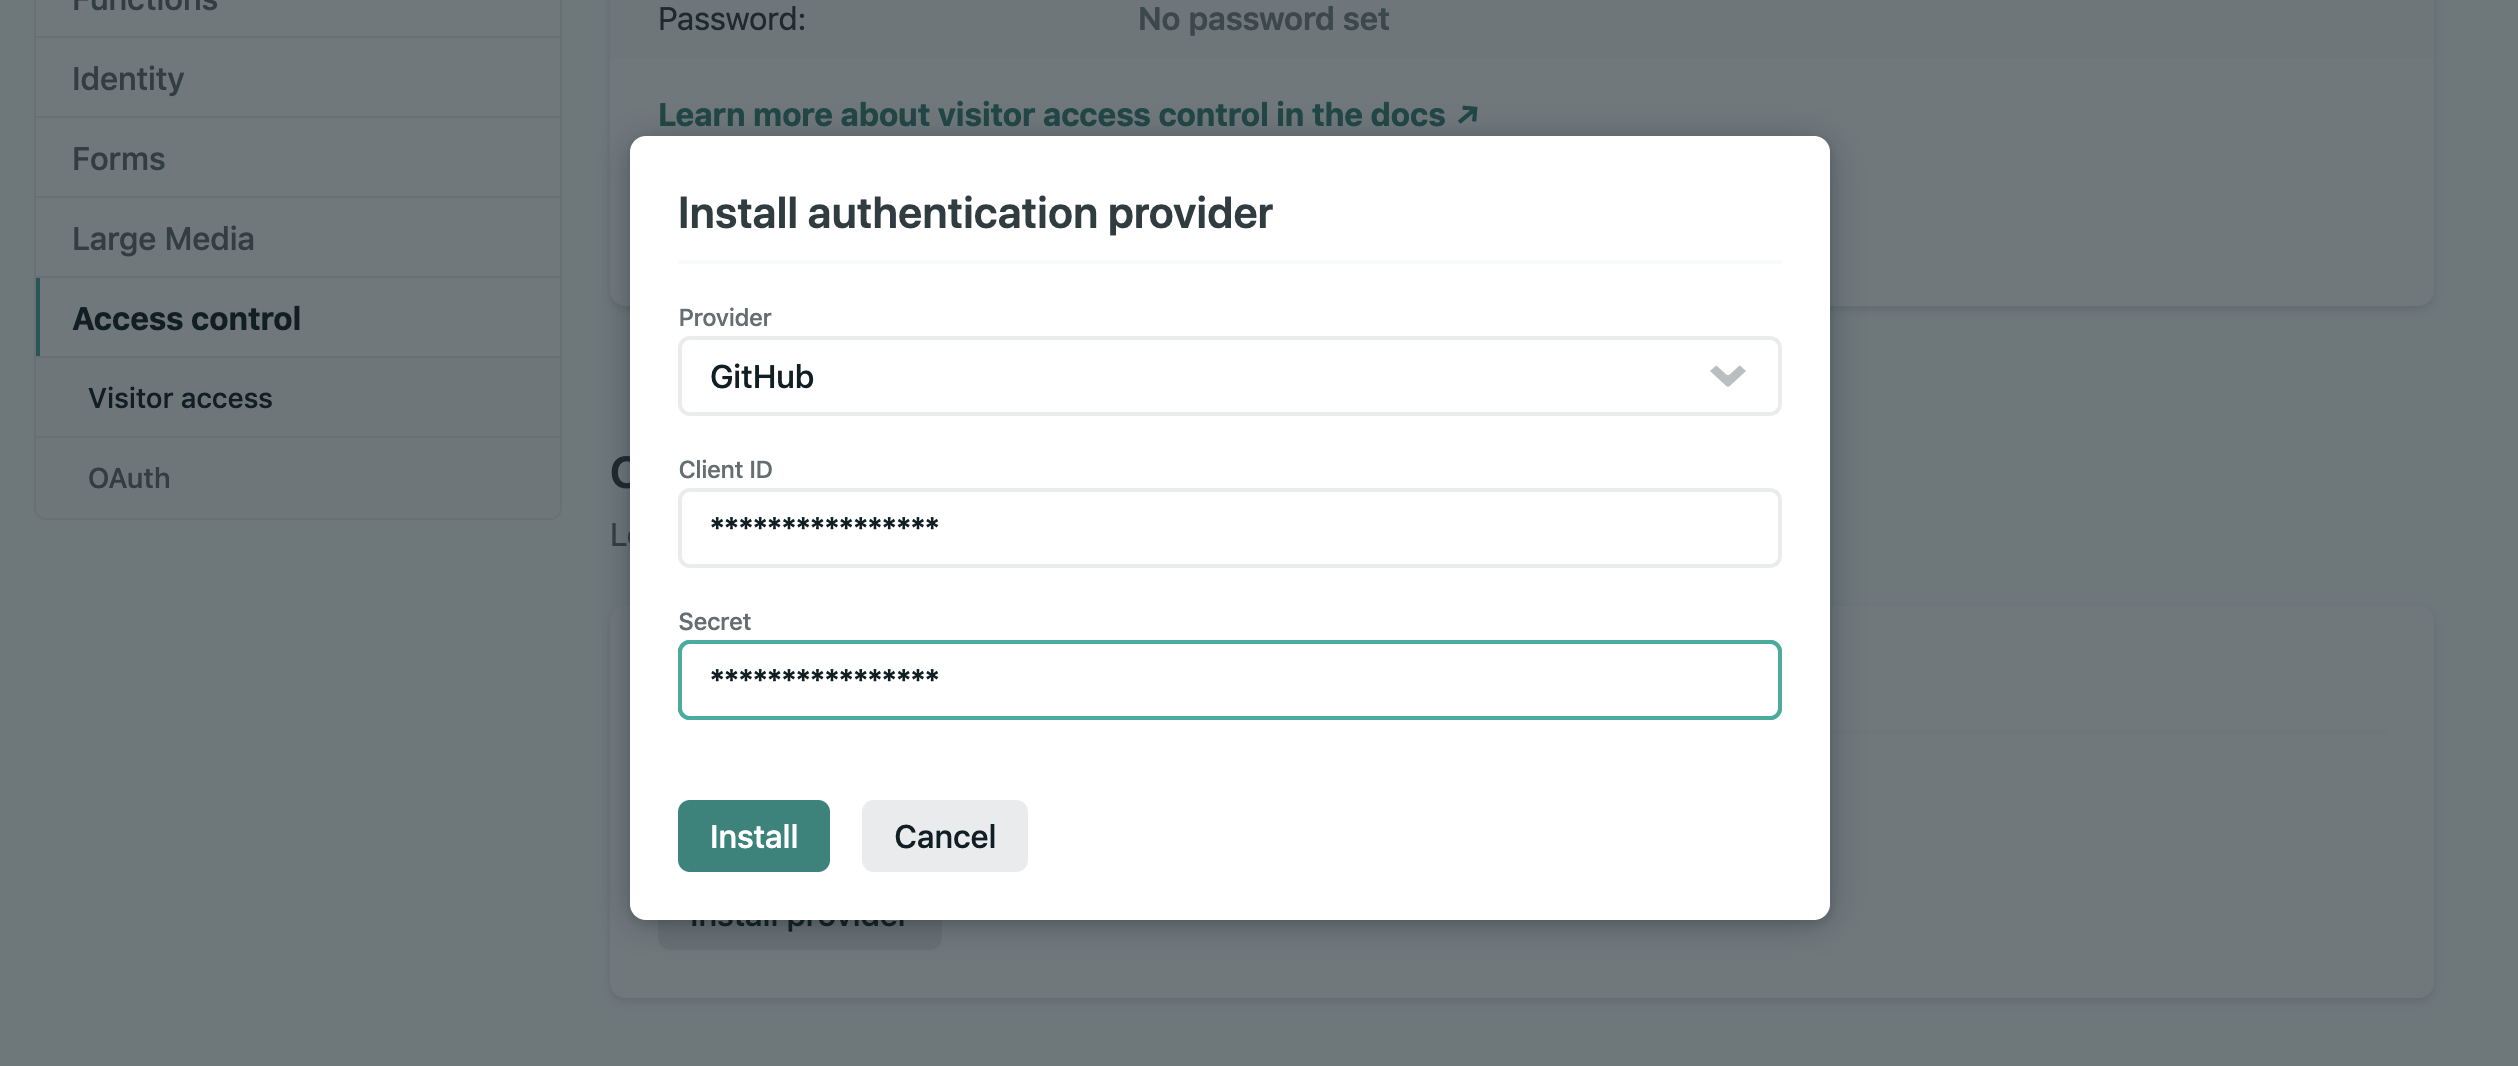
Perfect, now try to log in to the CMS.. authorize an application and see how it works!
Congratulations, your first blog is up and running.
The next steps are: publishing a quality content and purchasing a domain.
Summary
Creating a blog is very easy, even if you have just basic programming skills.
Today we used Gatsby as a Static Site Generator (SSG), Netlify as a service that automates builds and deployments, and Netlify CMS as a Conent Management system that is perfect for SSGs.
I hope this article was useful for you and I'll see you in the next ones where we will dig deeper into Gatsby itself and add some more interesting features that every blog should have (like pagination, search, filtering etc).