Connect Custom GoDaddy Domain To Netlify Website
Table Of Contents
The most fascinating part of creating a website from scratch is coding the technical part - that's what developers usually like the most.
But aside from that, there are a few other important steps that should be taken before your website goes live.
These include hosting with one of the available providers or your own VPS server, buying a domain name and linking the two.
As a hosting provider, I like to use Netlify because of its simplicity and good User Interface.
As a domain registrar (a website where you can purchase a domain), I often use GoDaddy.
It's relatively easy to set up your website on a hosting system and buy a domain, but it can be difficult (especially for inexperienced developers) to connect a purchased domain to a website.
In this article, we will focus exactly on that.
Prerequisites
For the purposes of this tutorial, I:
- Created a new React project (npx create-react-app react-ninja)
- Created a new private Github repository and pushed the code there
- Purchased a domain on GoDaddy (react-ninja.com, expires on 02/10/2022)
- Deployed a simple React application on Netlify (https://optimistic-poincare-0f17ae.netlify.app/)
Read one of my previous articles - Deploy Your React Application To Netlify if you do not know how to do it yet.
The Netlify Part
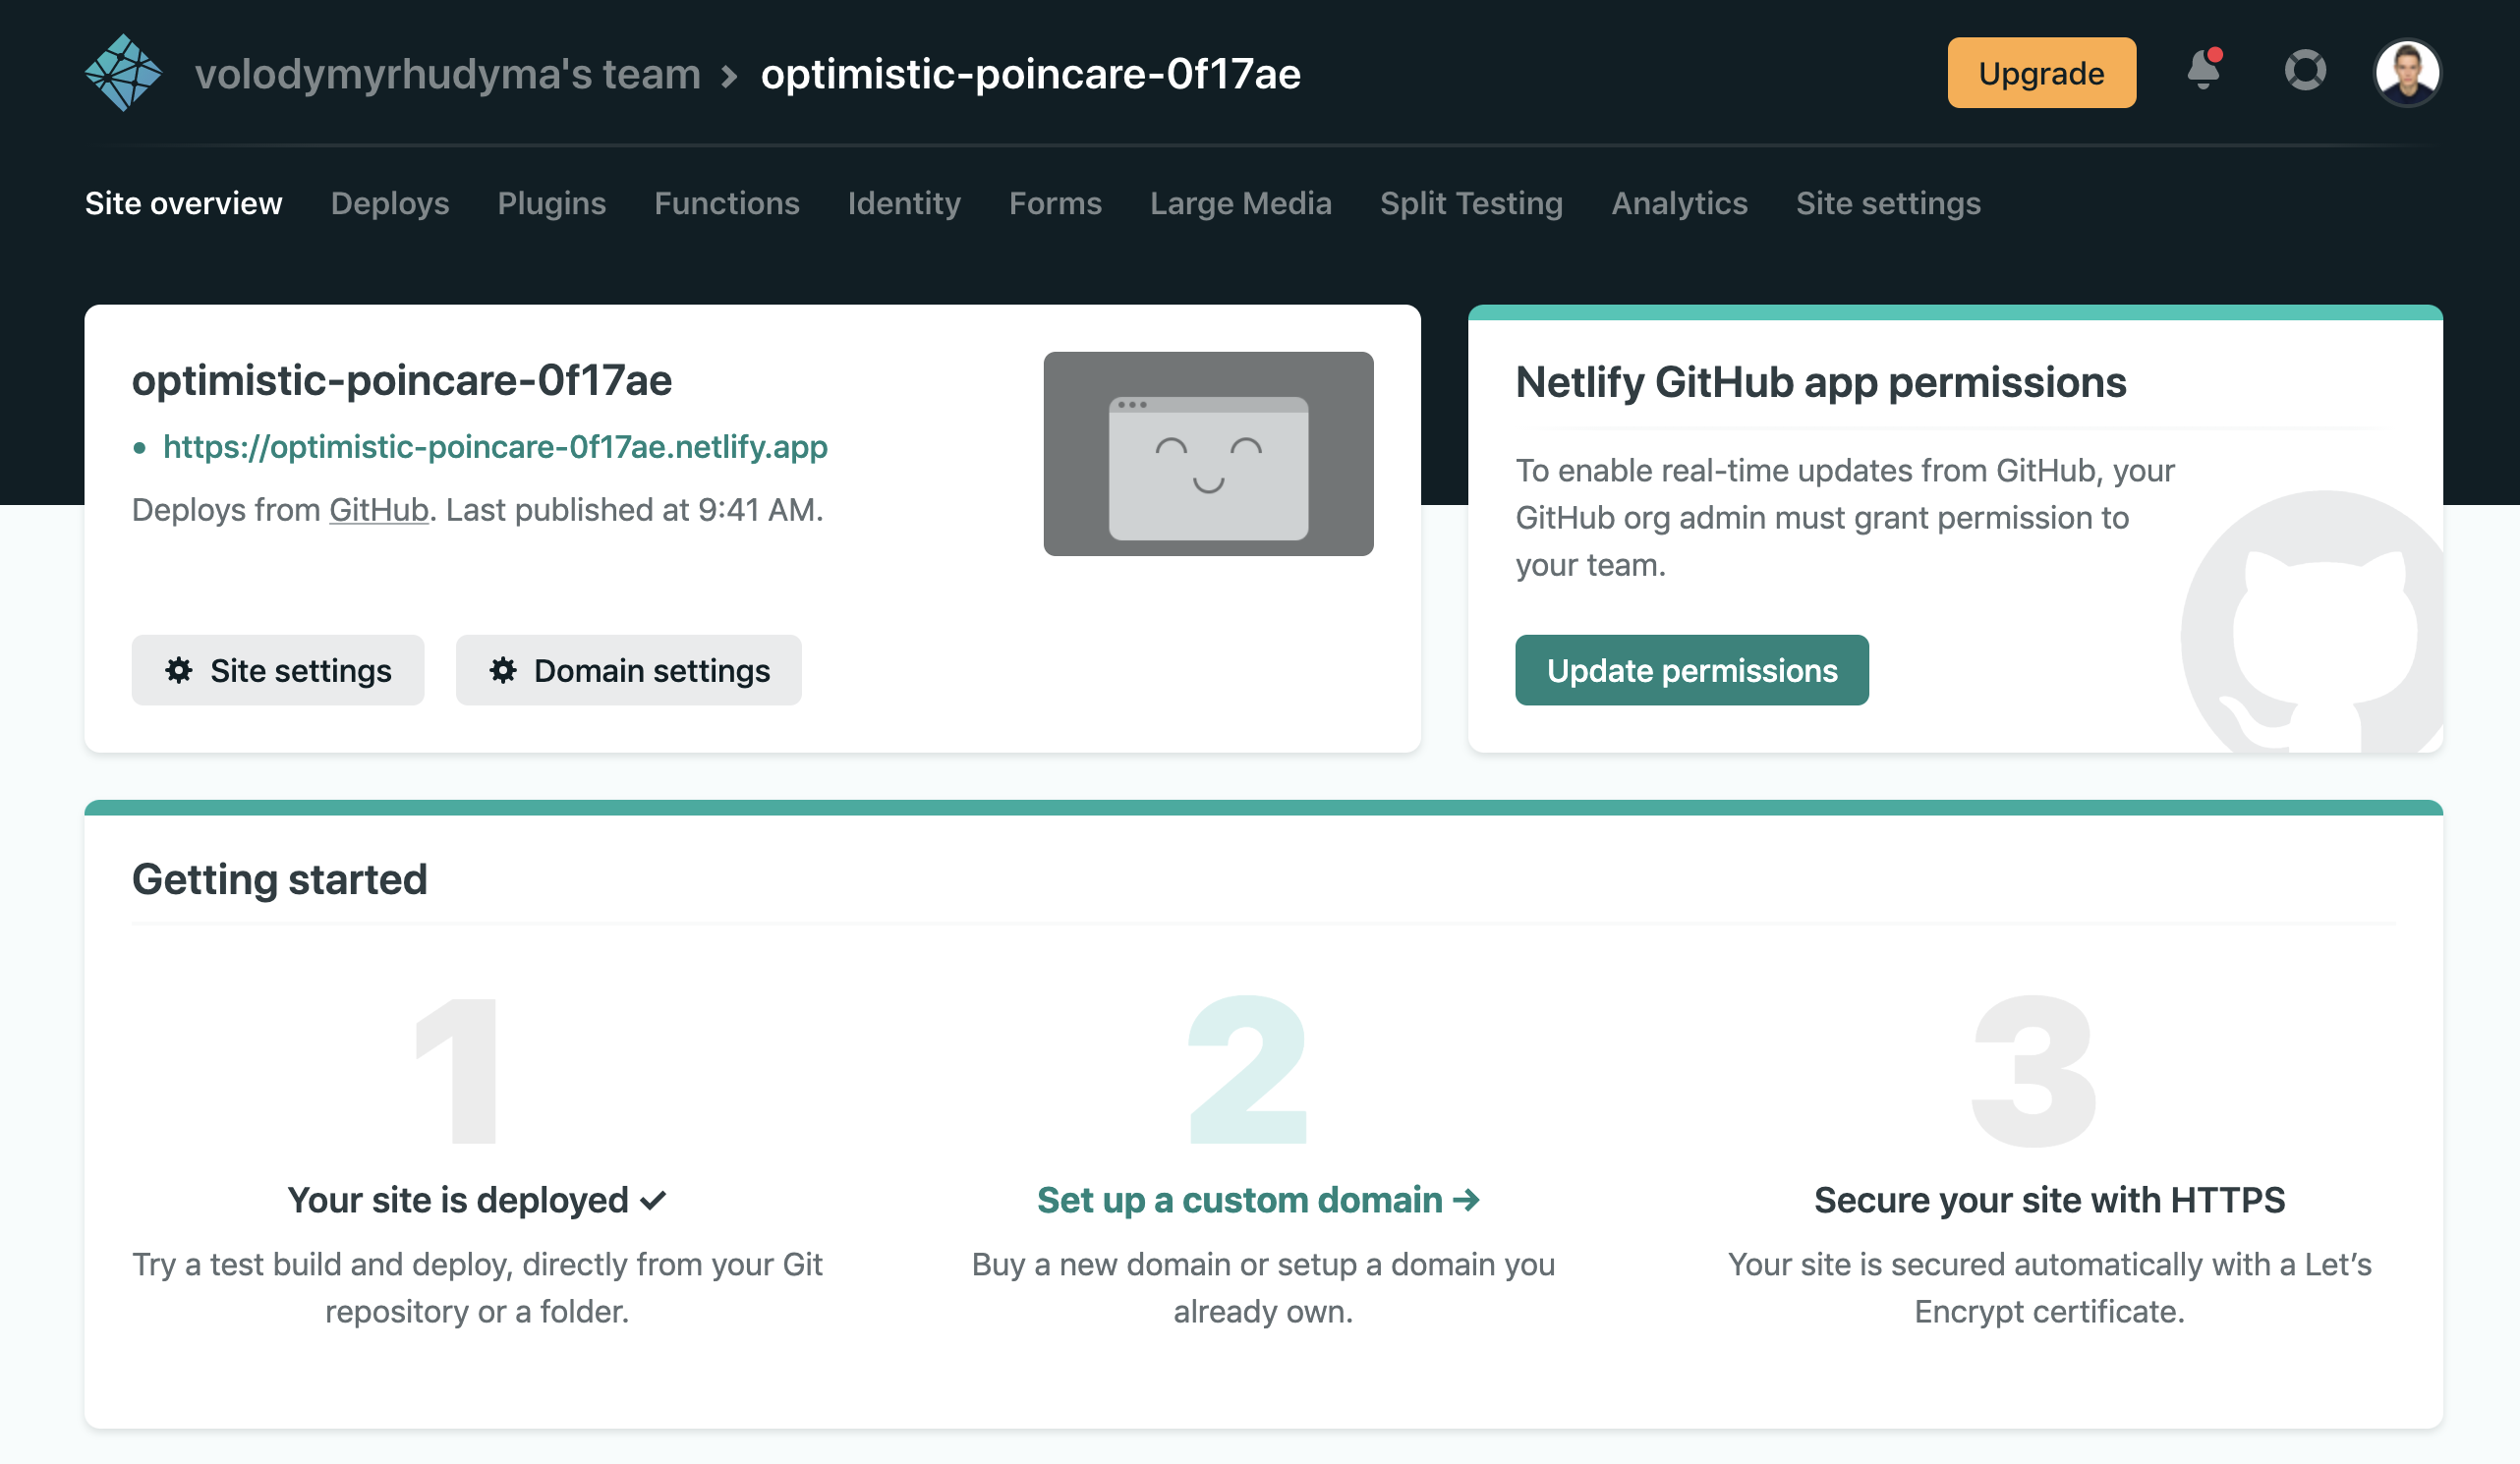
First, we need to figure out what is our default subdomain on Netlify.
It can be seen on the "Site Overview" page, just after the application was deployed:
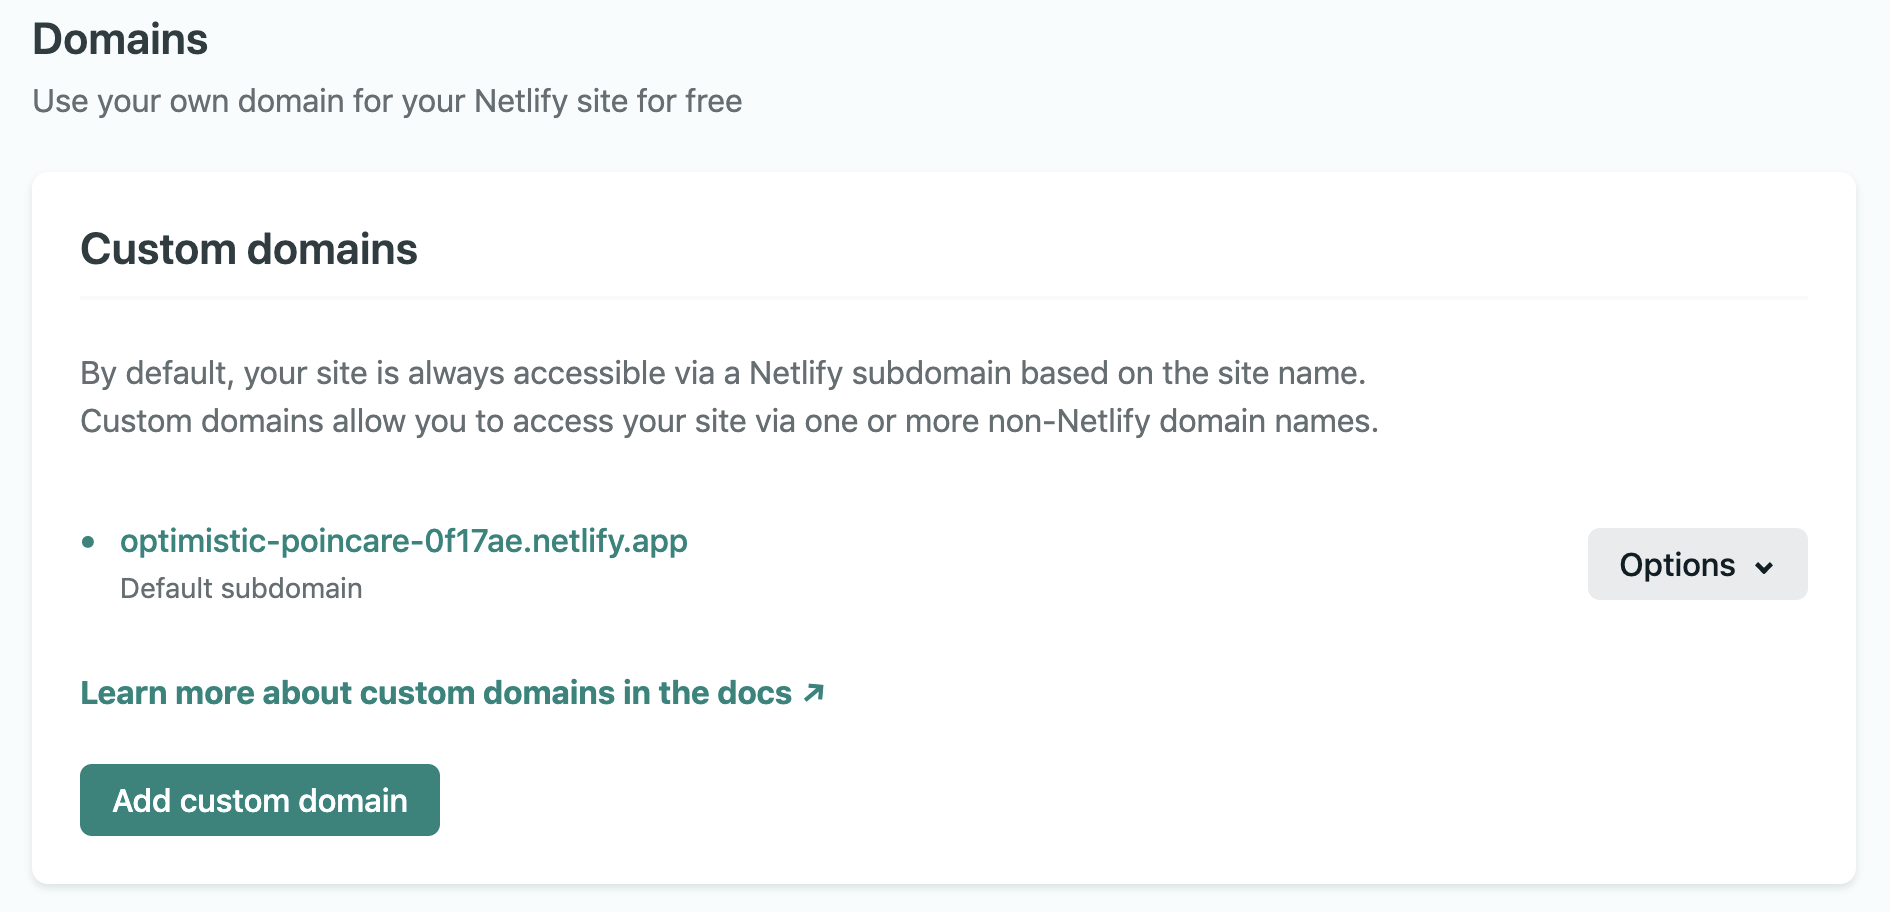
Or you can also open "Site Settings" -> "Domain Management" and find the "Custom Domains" section:
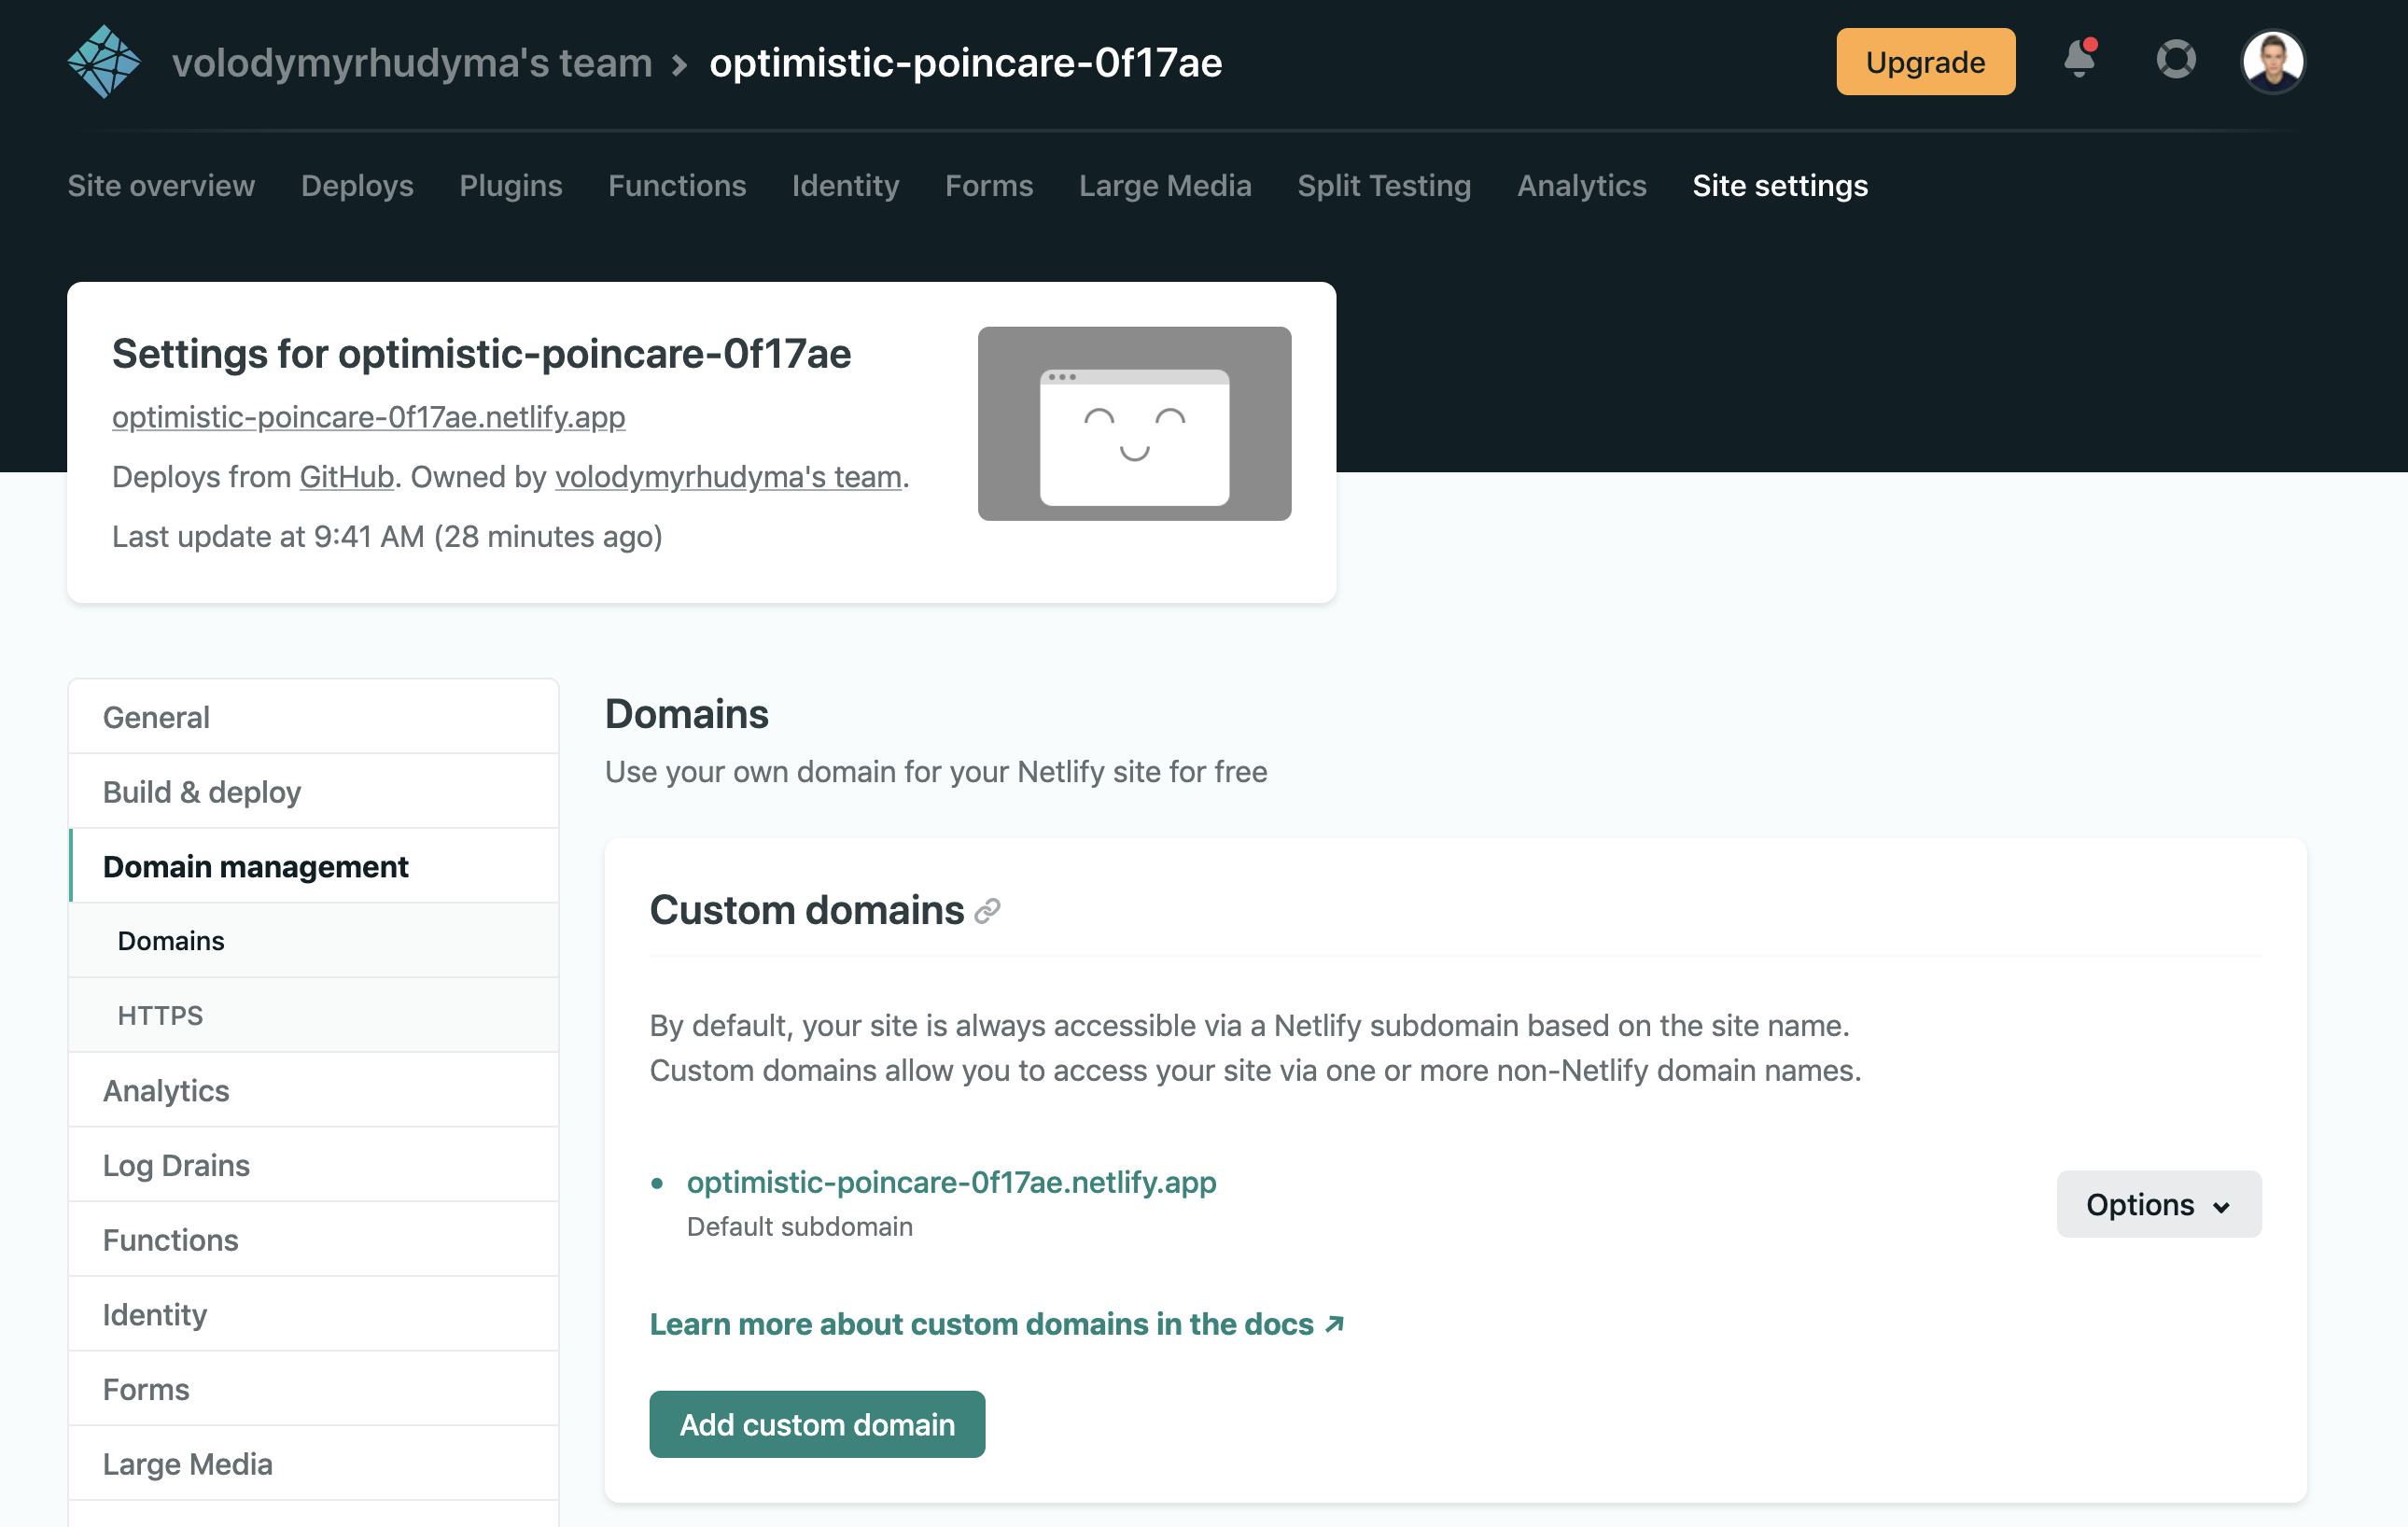
In my case, the default subdomain is: optimistic-poincare-0f17ae.netlify.app.
The GoDaddy Part
Next, log into GoDaddy, click on "My Products" tab, find the domain you want to use, and click on the three dots next to the domain name:
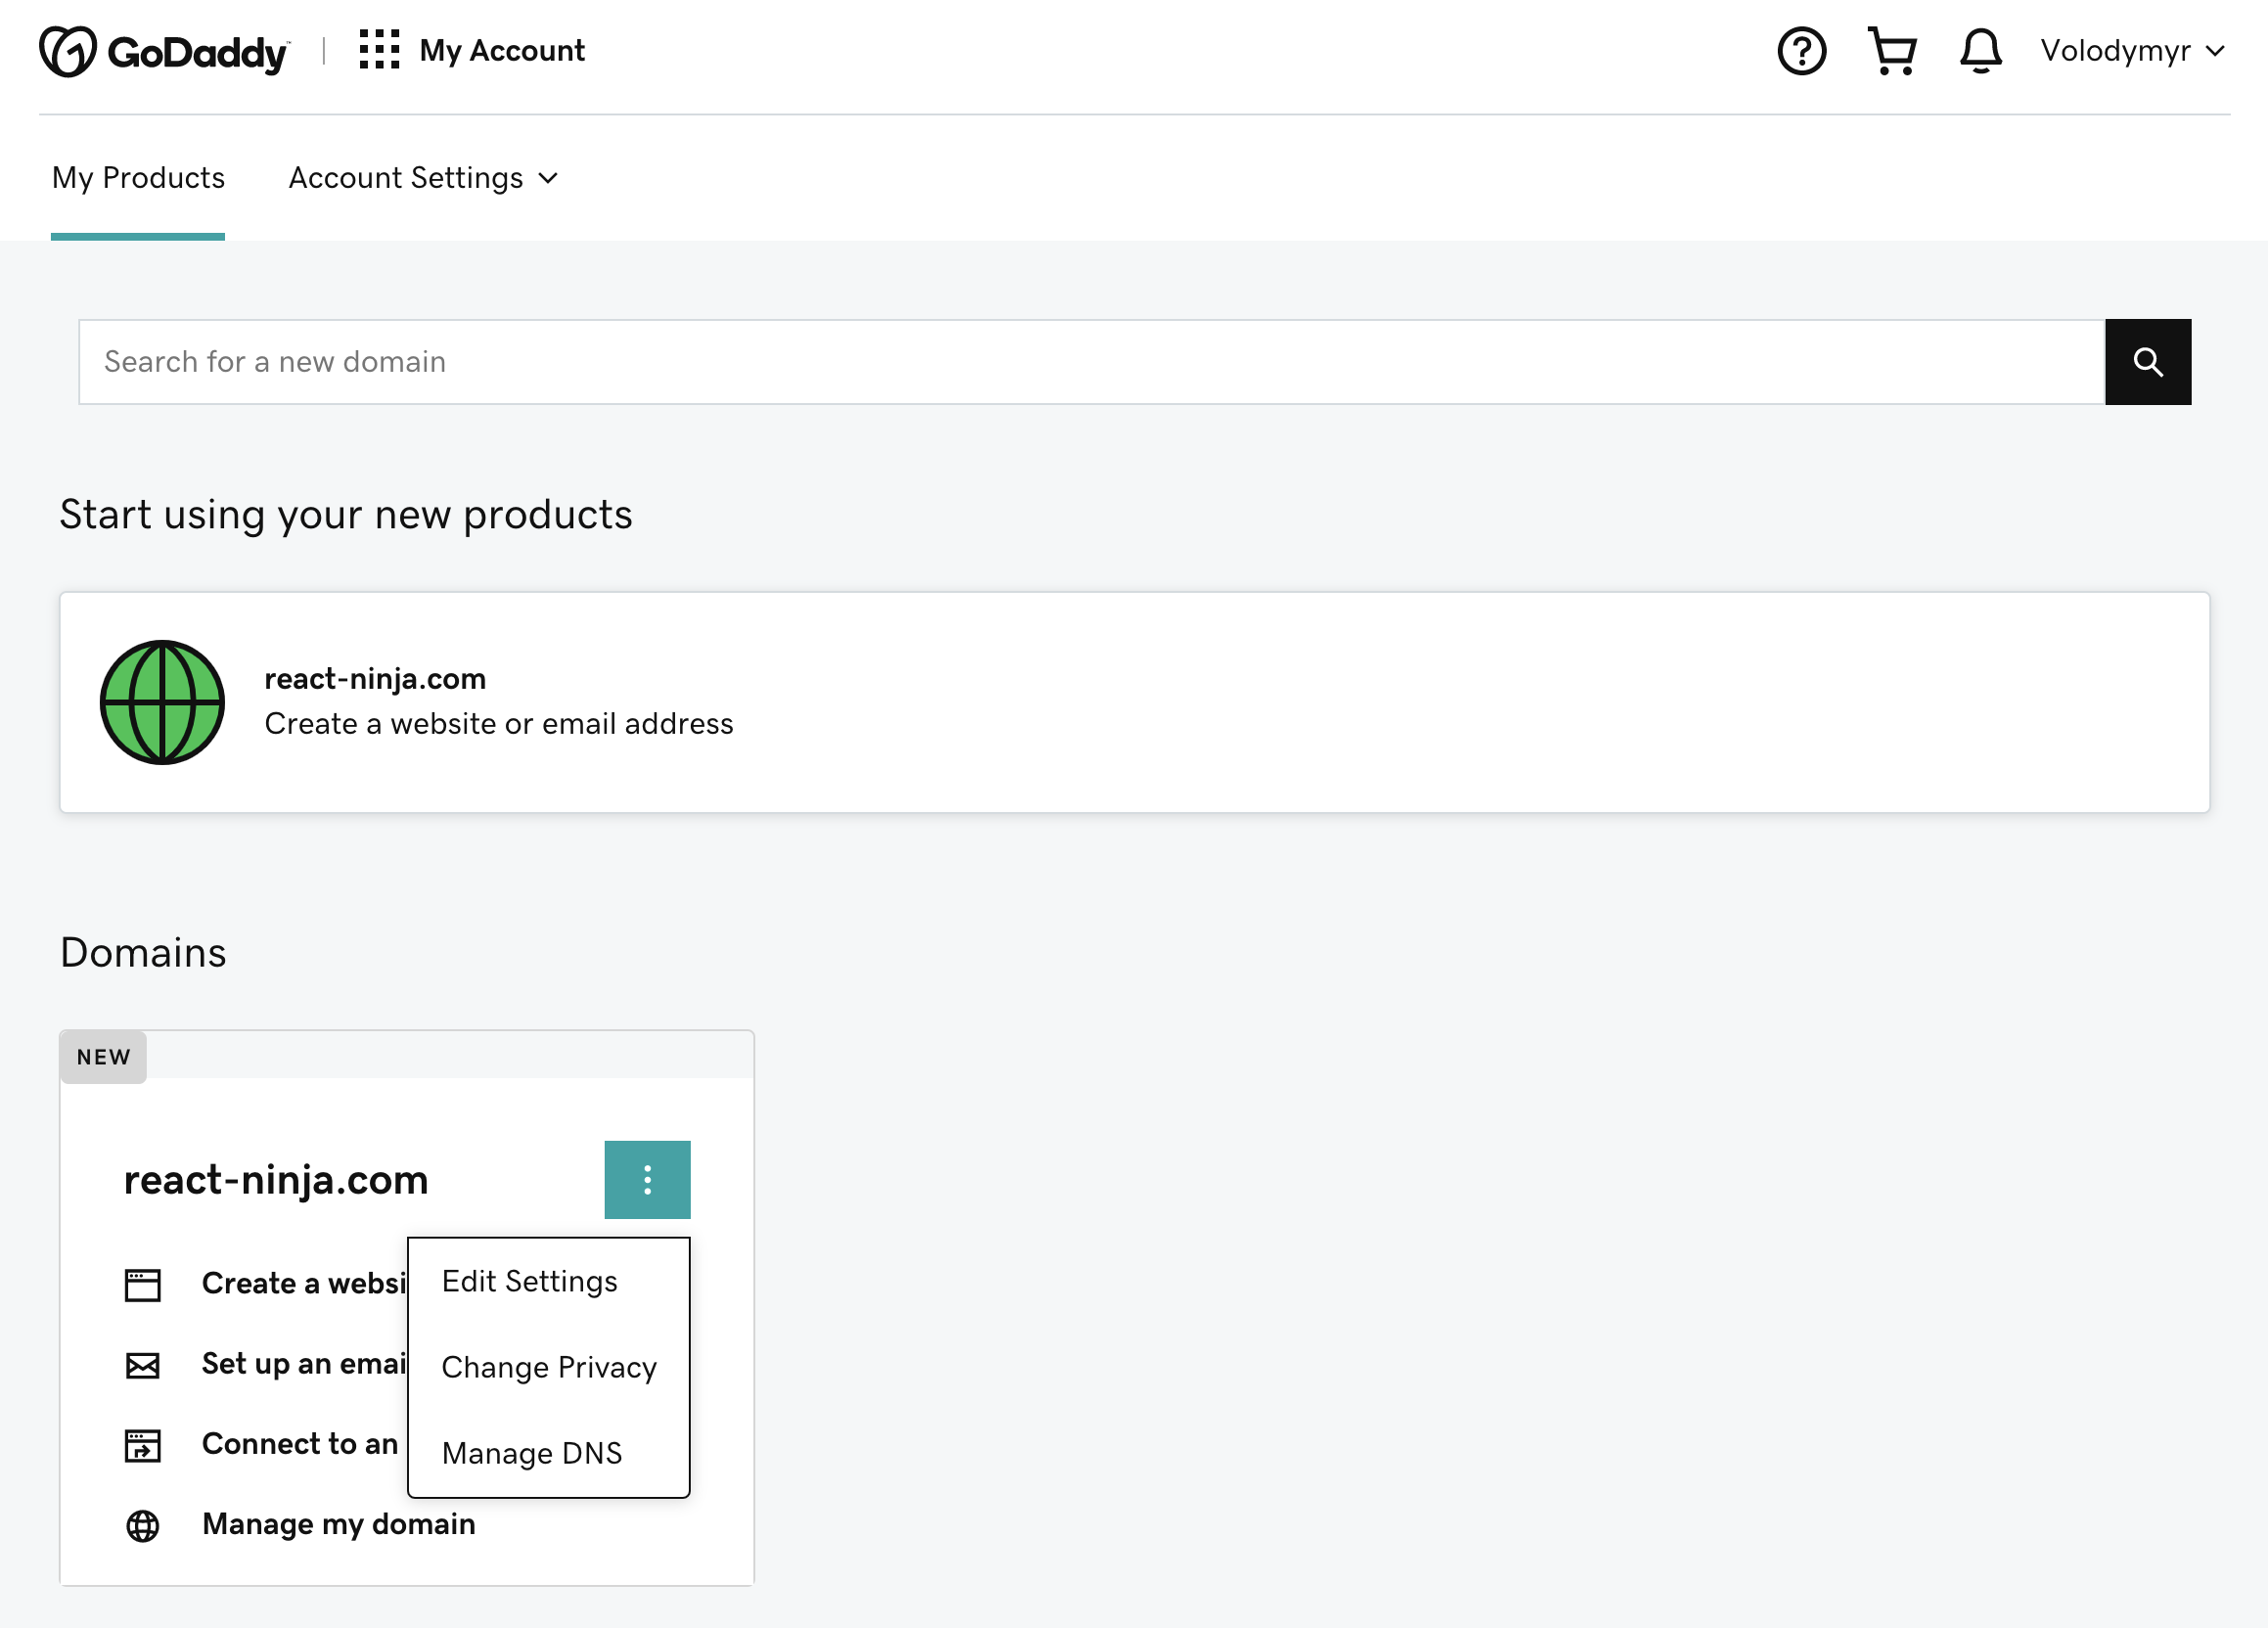
Select "Manage DNS" and you will be taken to the following screen:
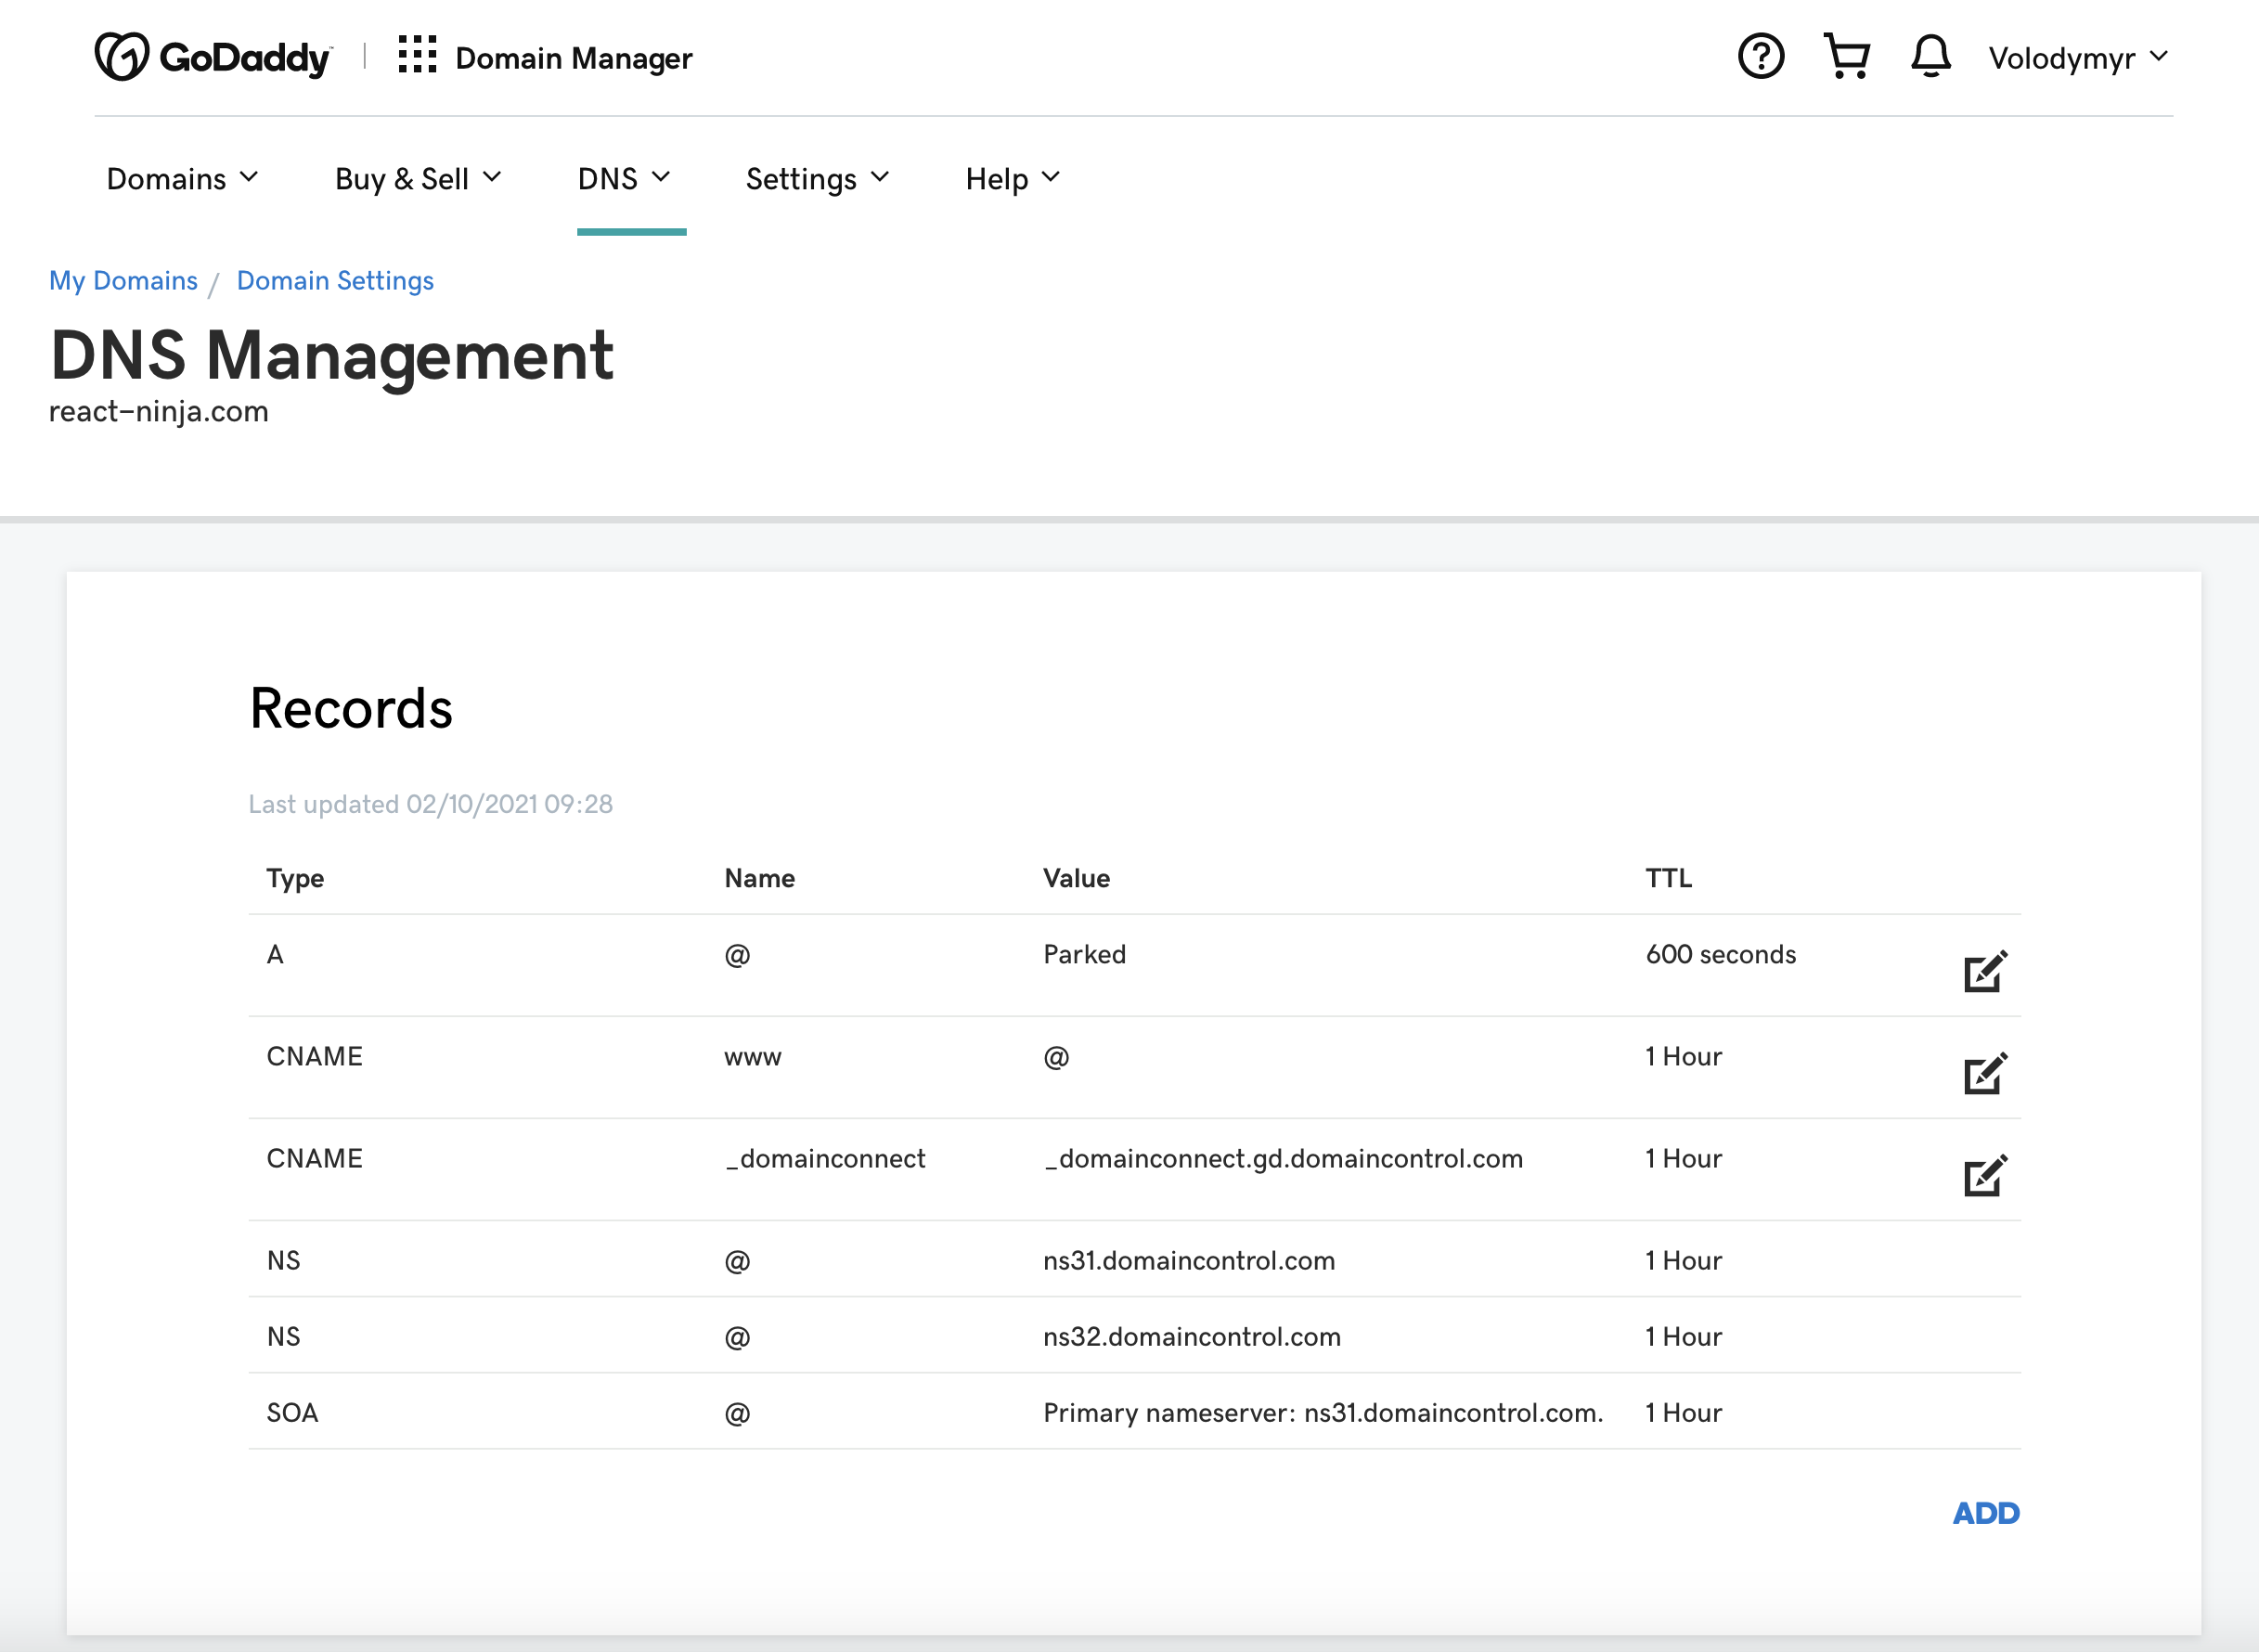
Note that the "Records" table has already been populated with some default values for you.
The only Records we are interested in are:
-
A
The A record (stands for Address) maps a domain name to the IP address (Version 4) of the computer hosting the domain.
-
CNAME
The CNAME records (stands for Canonical Name) is used to create an alias from one domain name to another domain name.
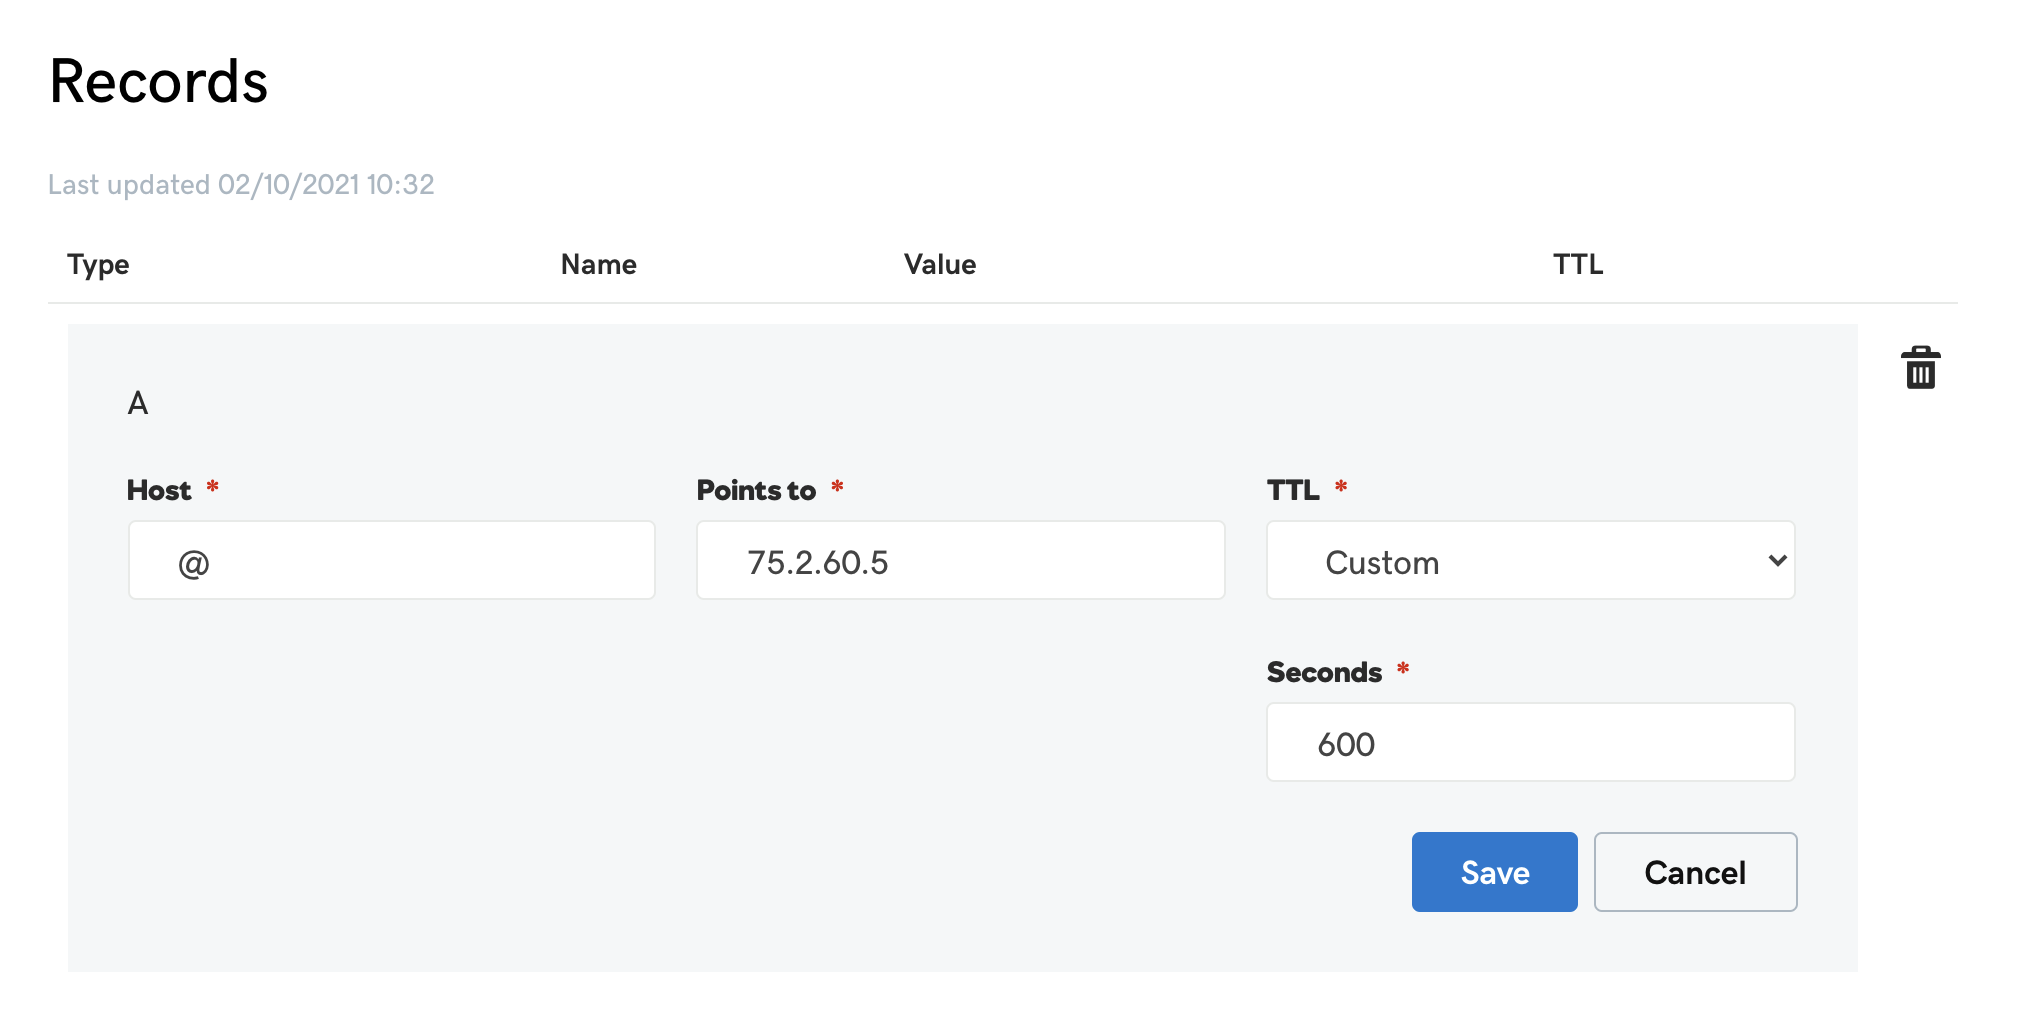
Before we edit the A Record, we need to find out the IP Address of Netlify Servers.
According to the Netlify docs, an IP Address is the following: 75.2.60.5.
Edit the A Record, make it point to the IP above and click "Save":
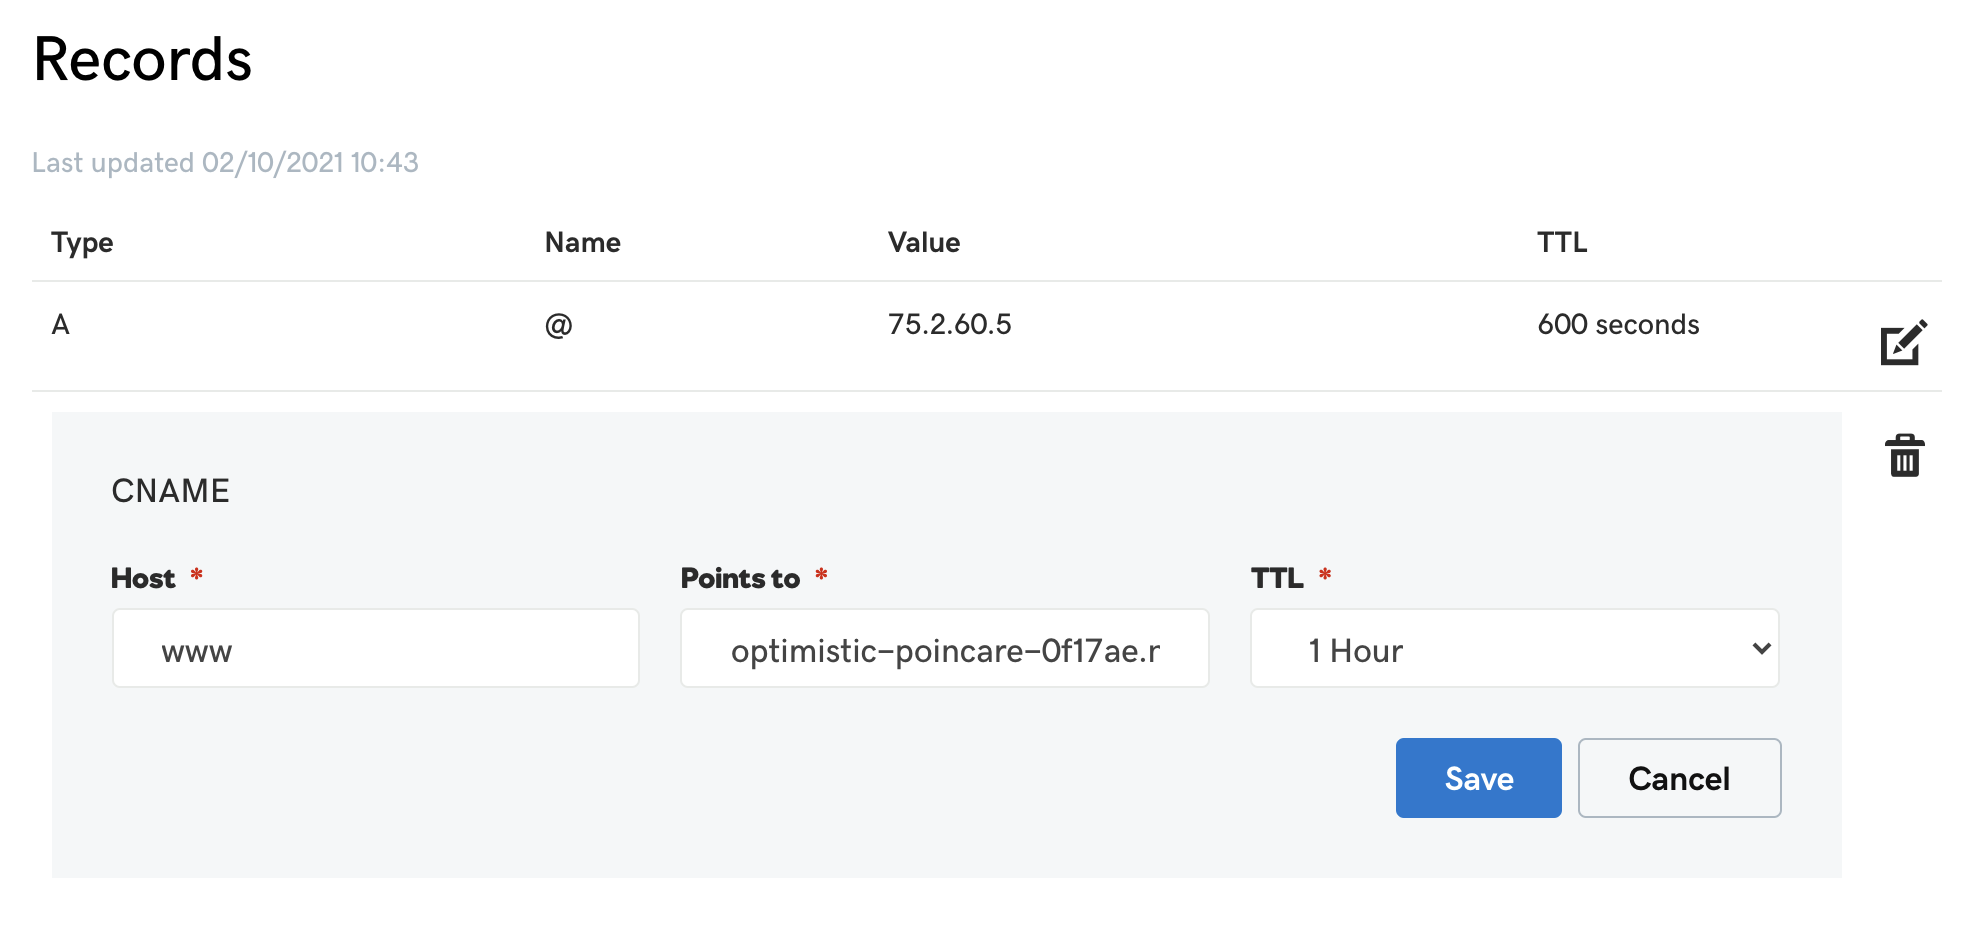
Next, you need to edit the CNAME record and have it point to the default subdomain:
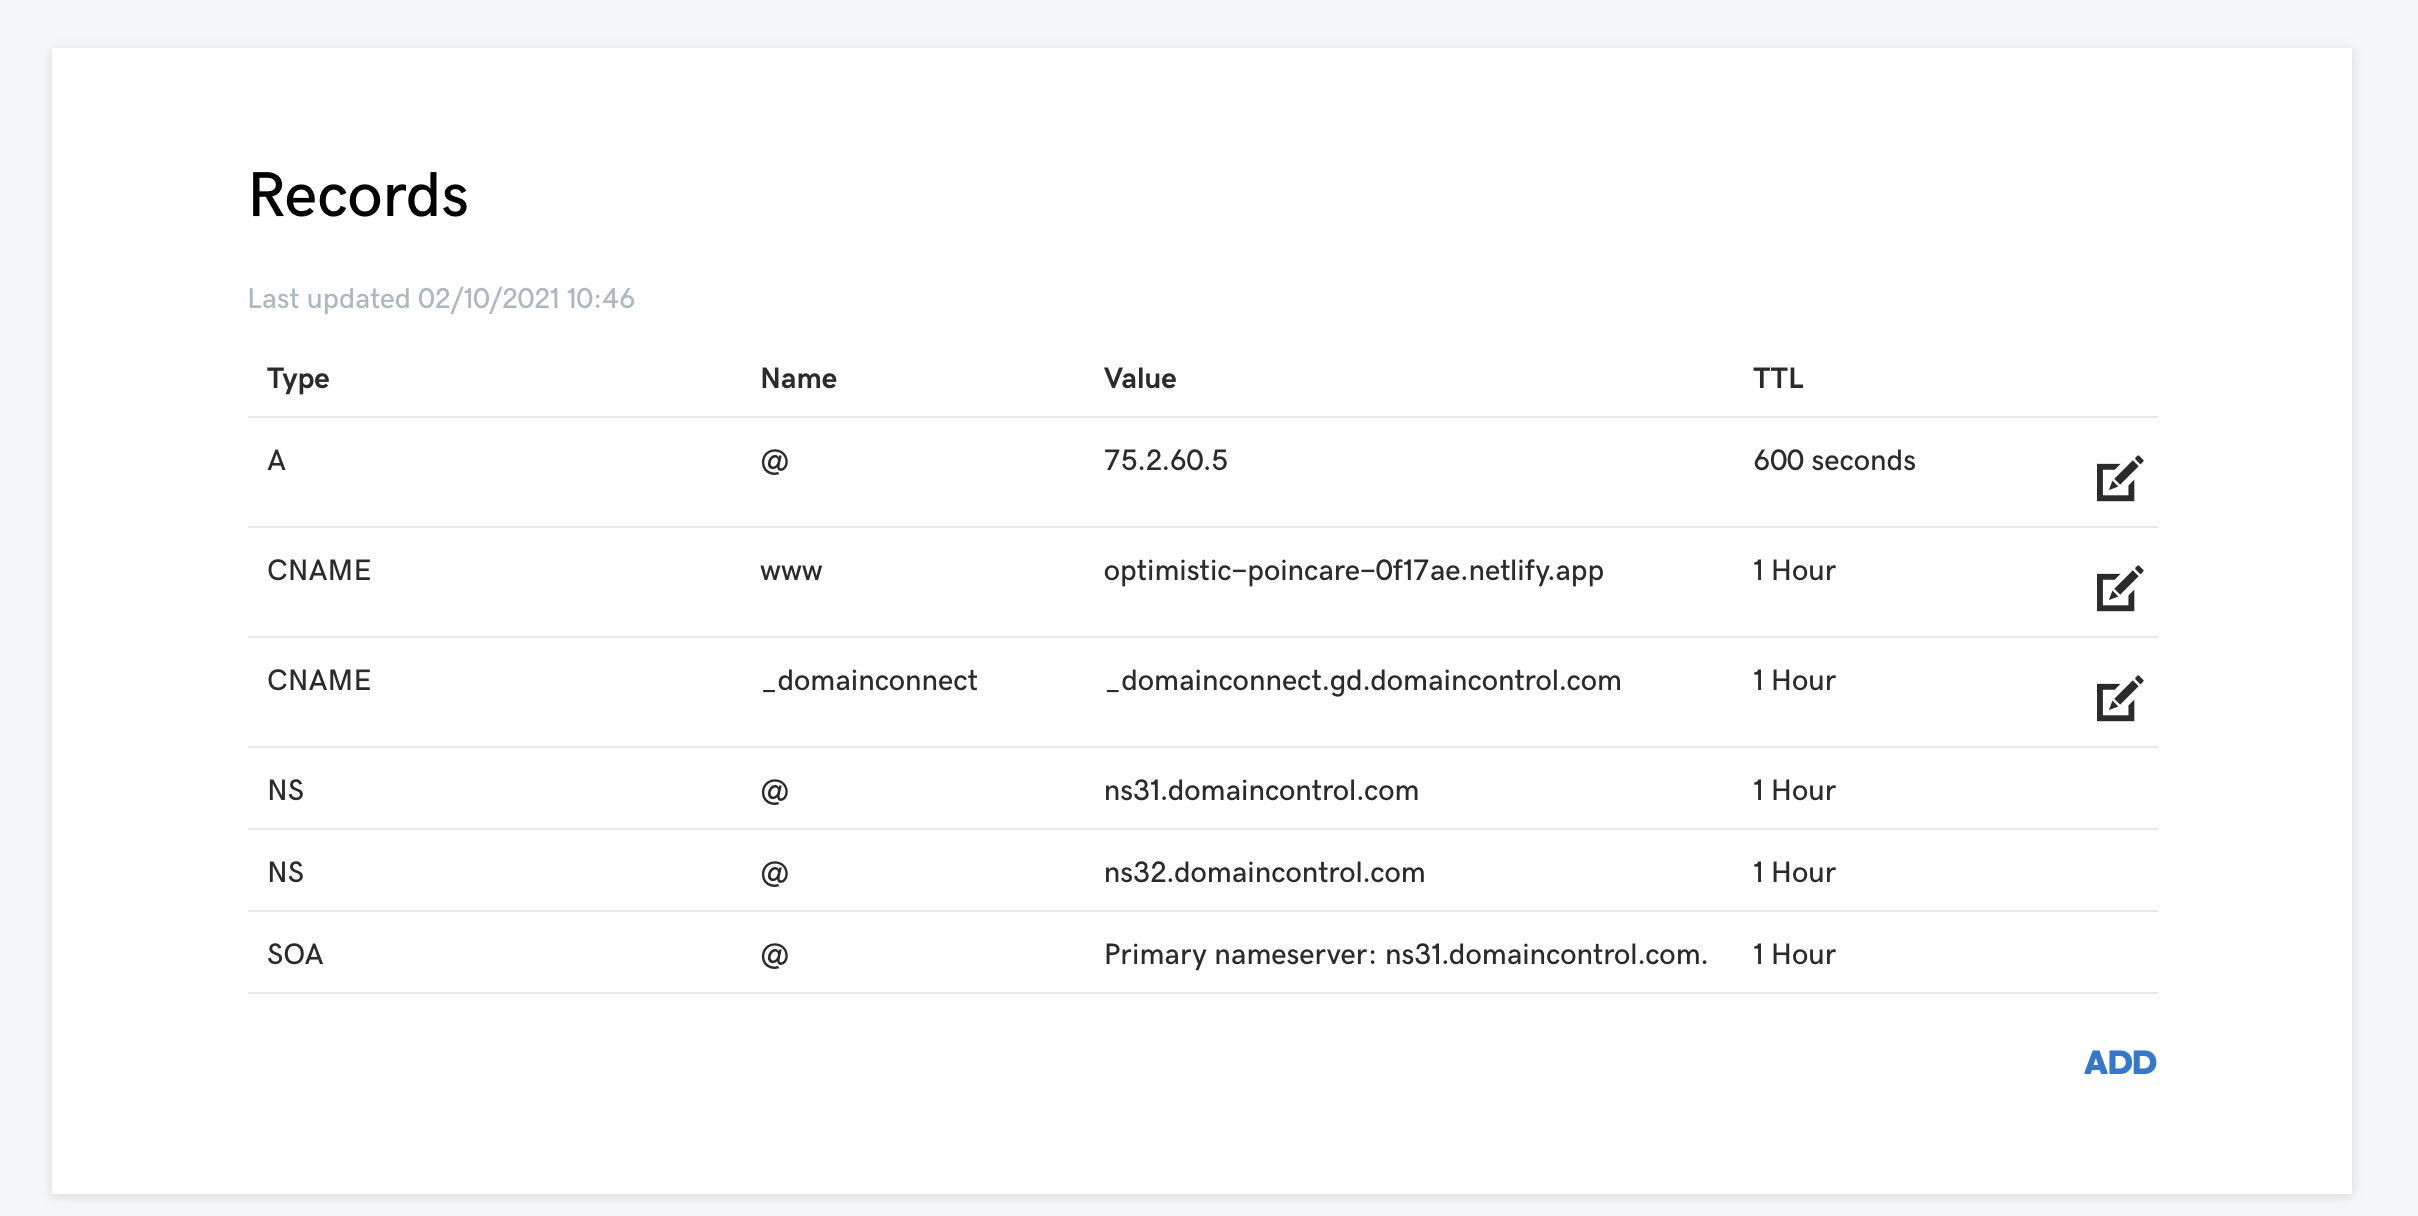
After saving the changes, check your DNS configuration:
Great job, you have just completed the "GoDaddy Part" and we need to switch back to Netlify to finish the configuration.
Back To Netlify
Now we need to add our custom domain in Netlify.
Open "Site Settings" -> "Domain Management", find the "Custom Domains" section and click the "Add Custom Domain" button:
Enter the name of the domain you purchased and click "Verify":
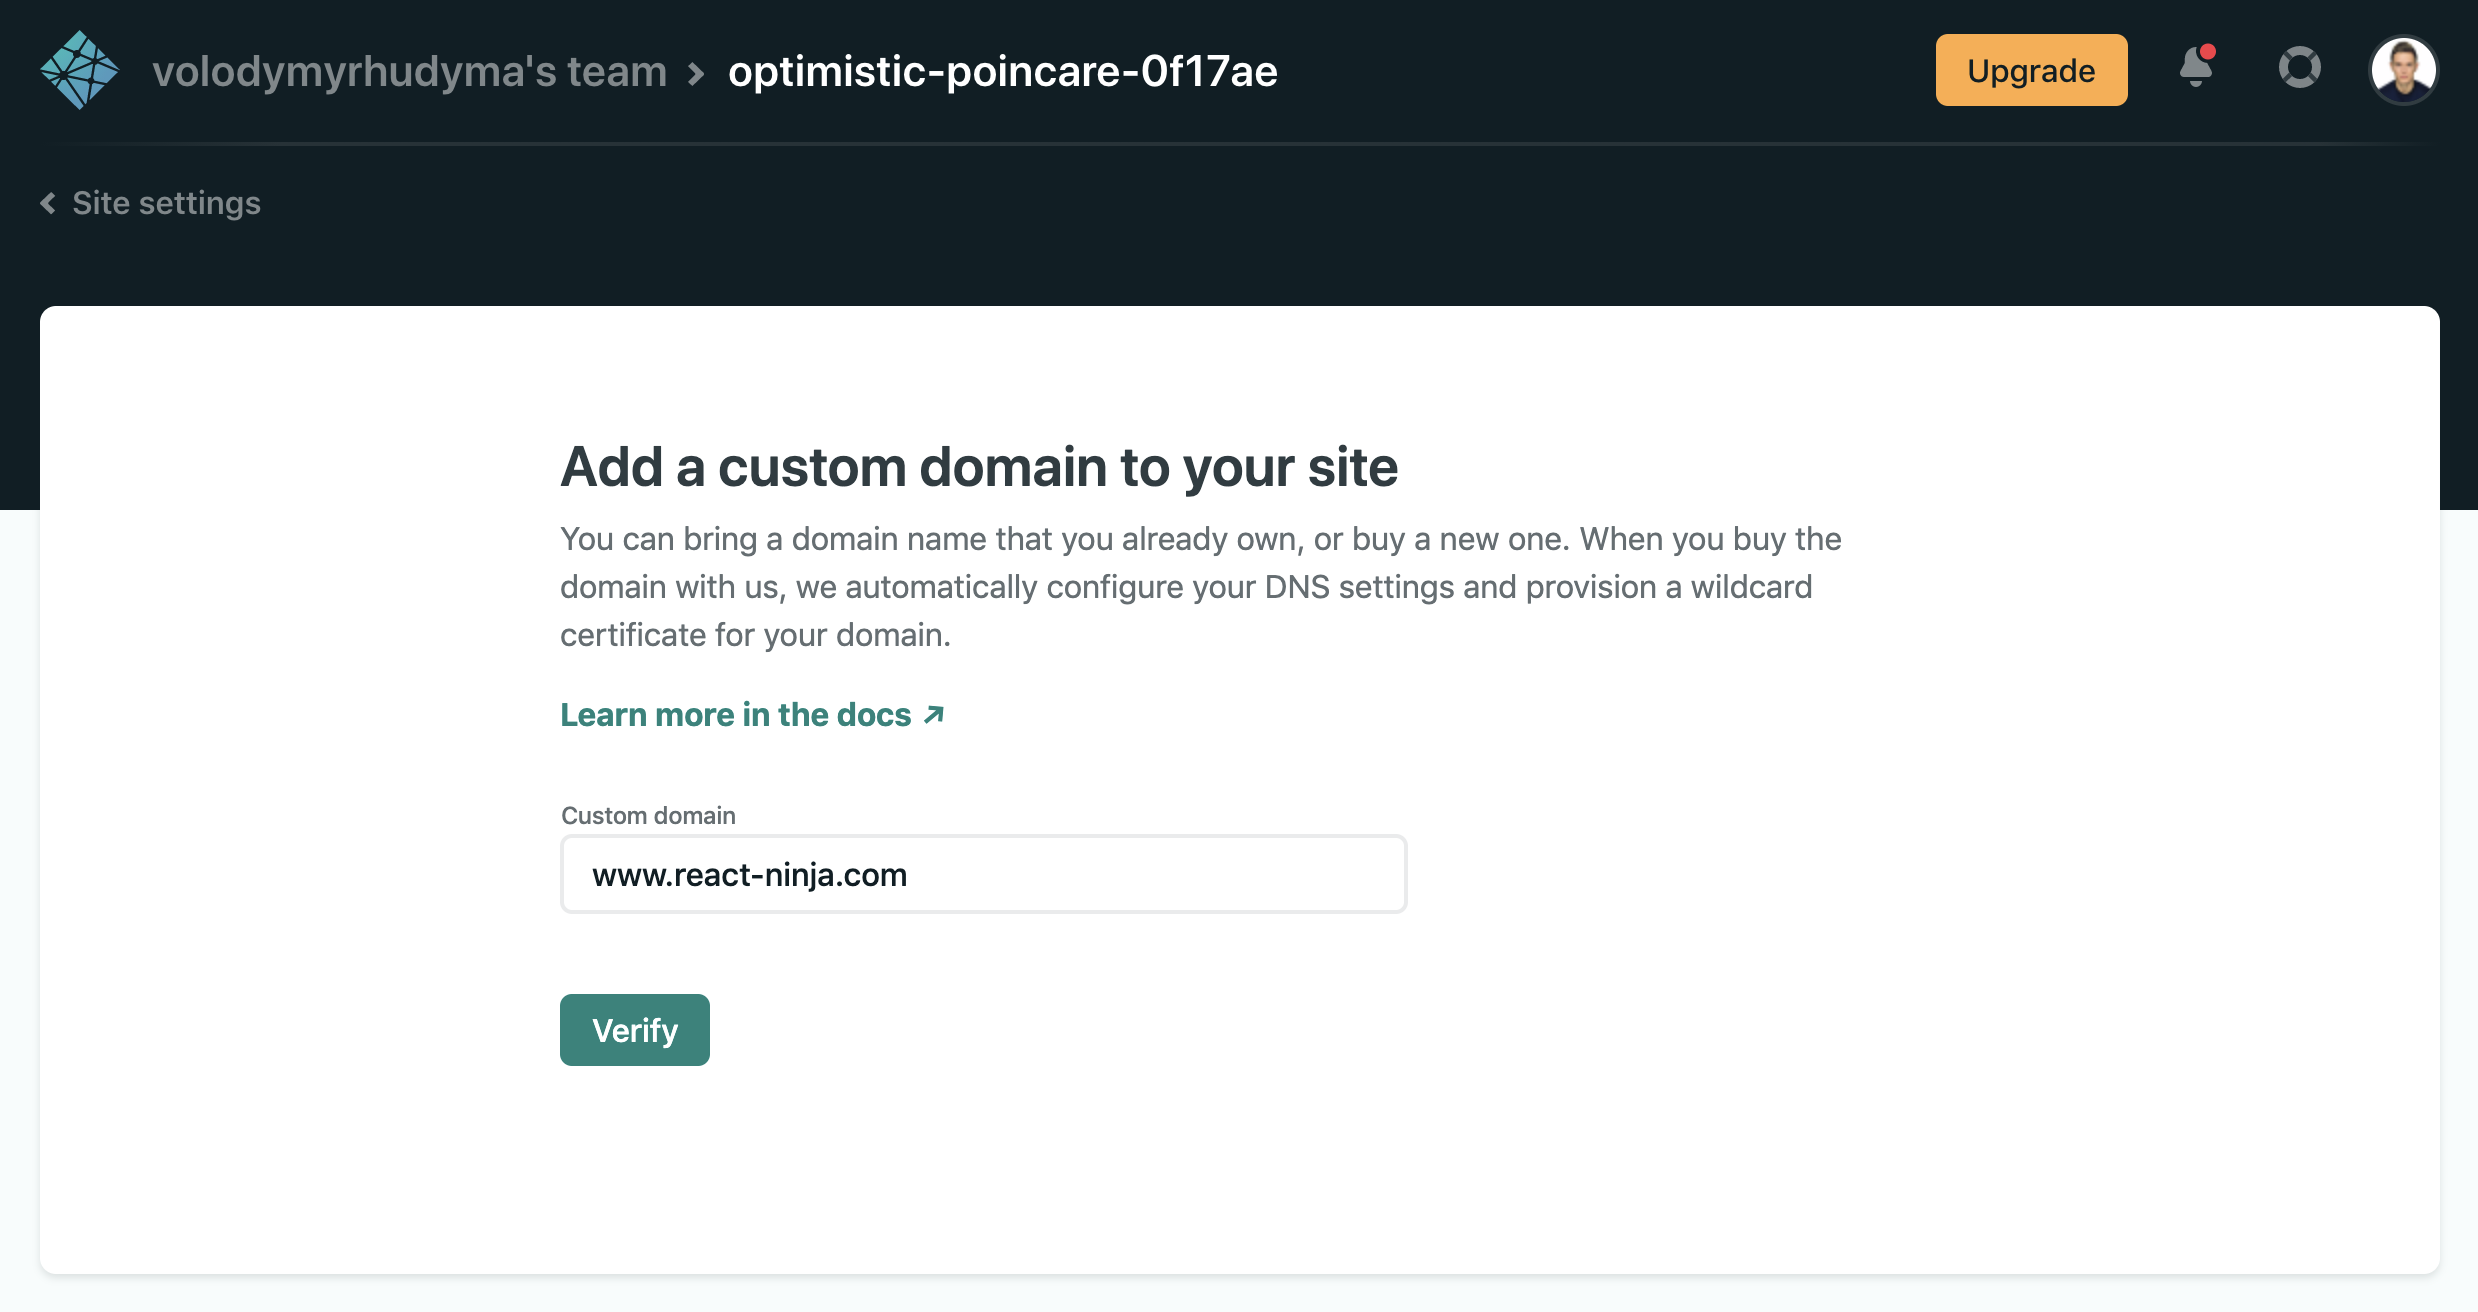
Most likely, you will see an information that the domain you want to add is already registered.
Don't worry, it was us who registered it, so just click the "Add Domain" button:
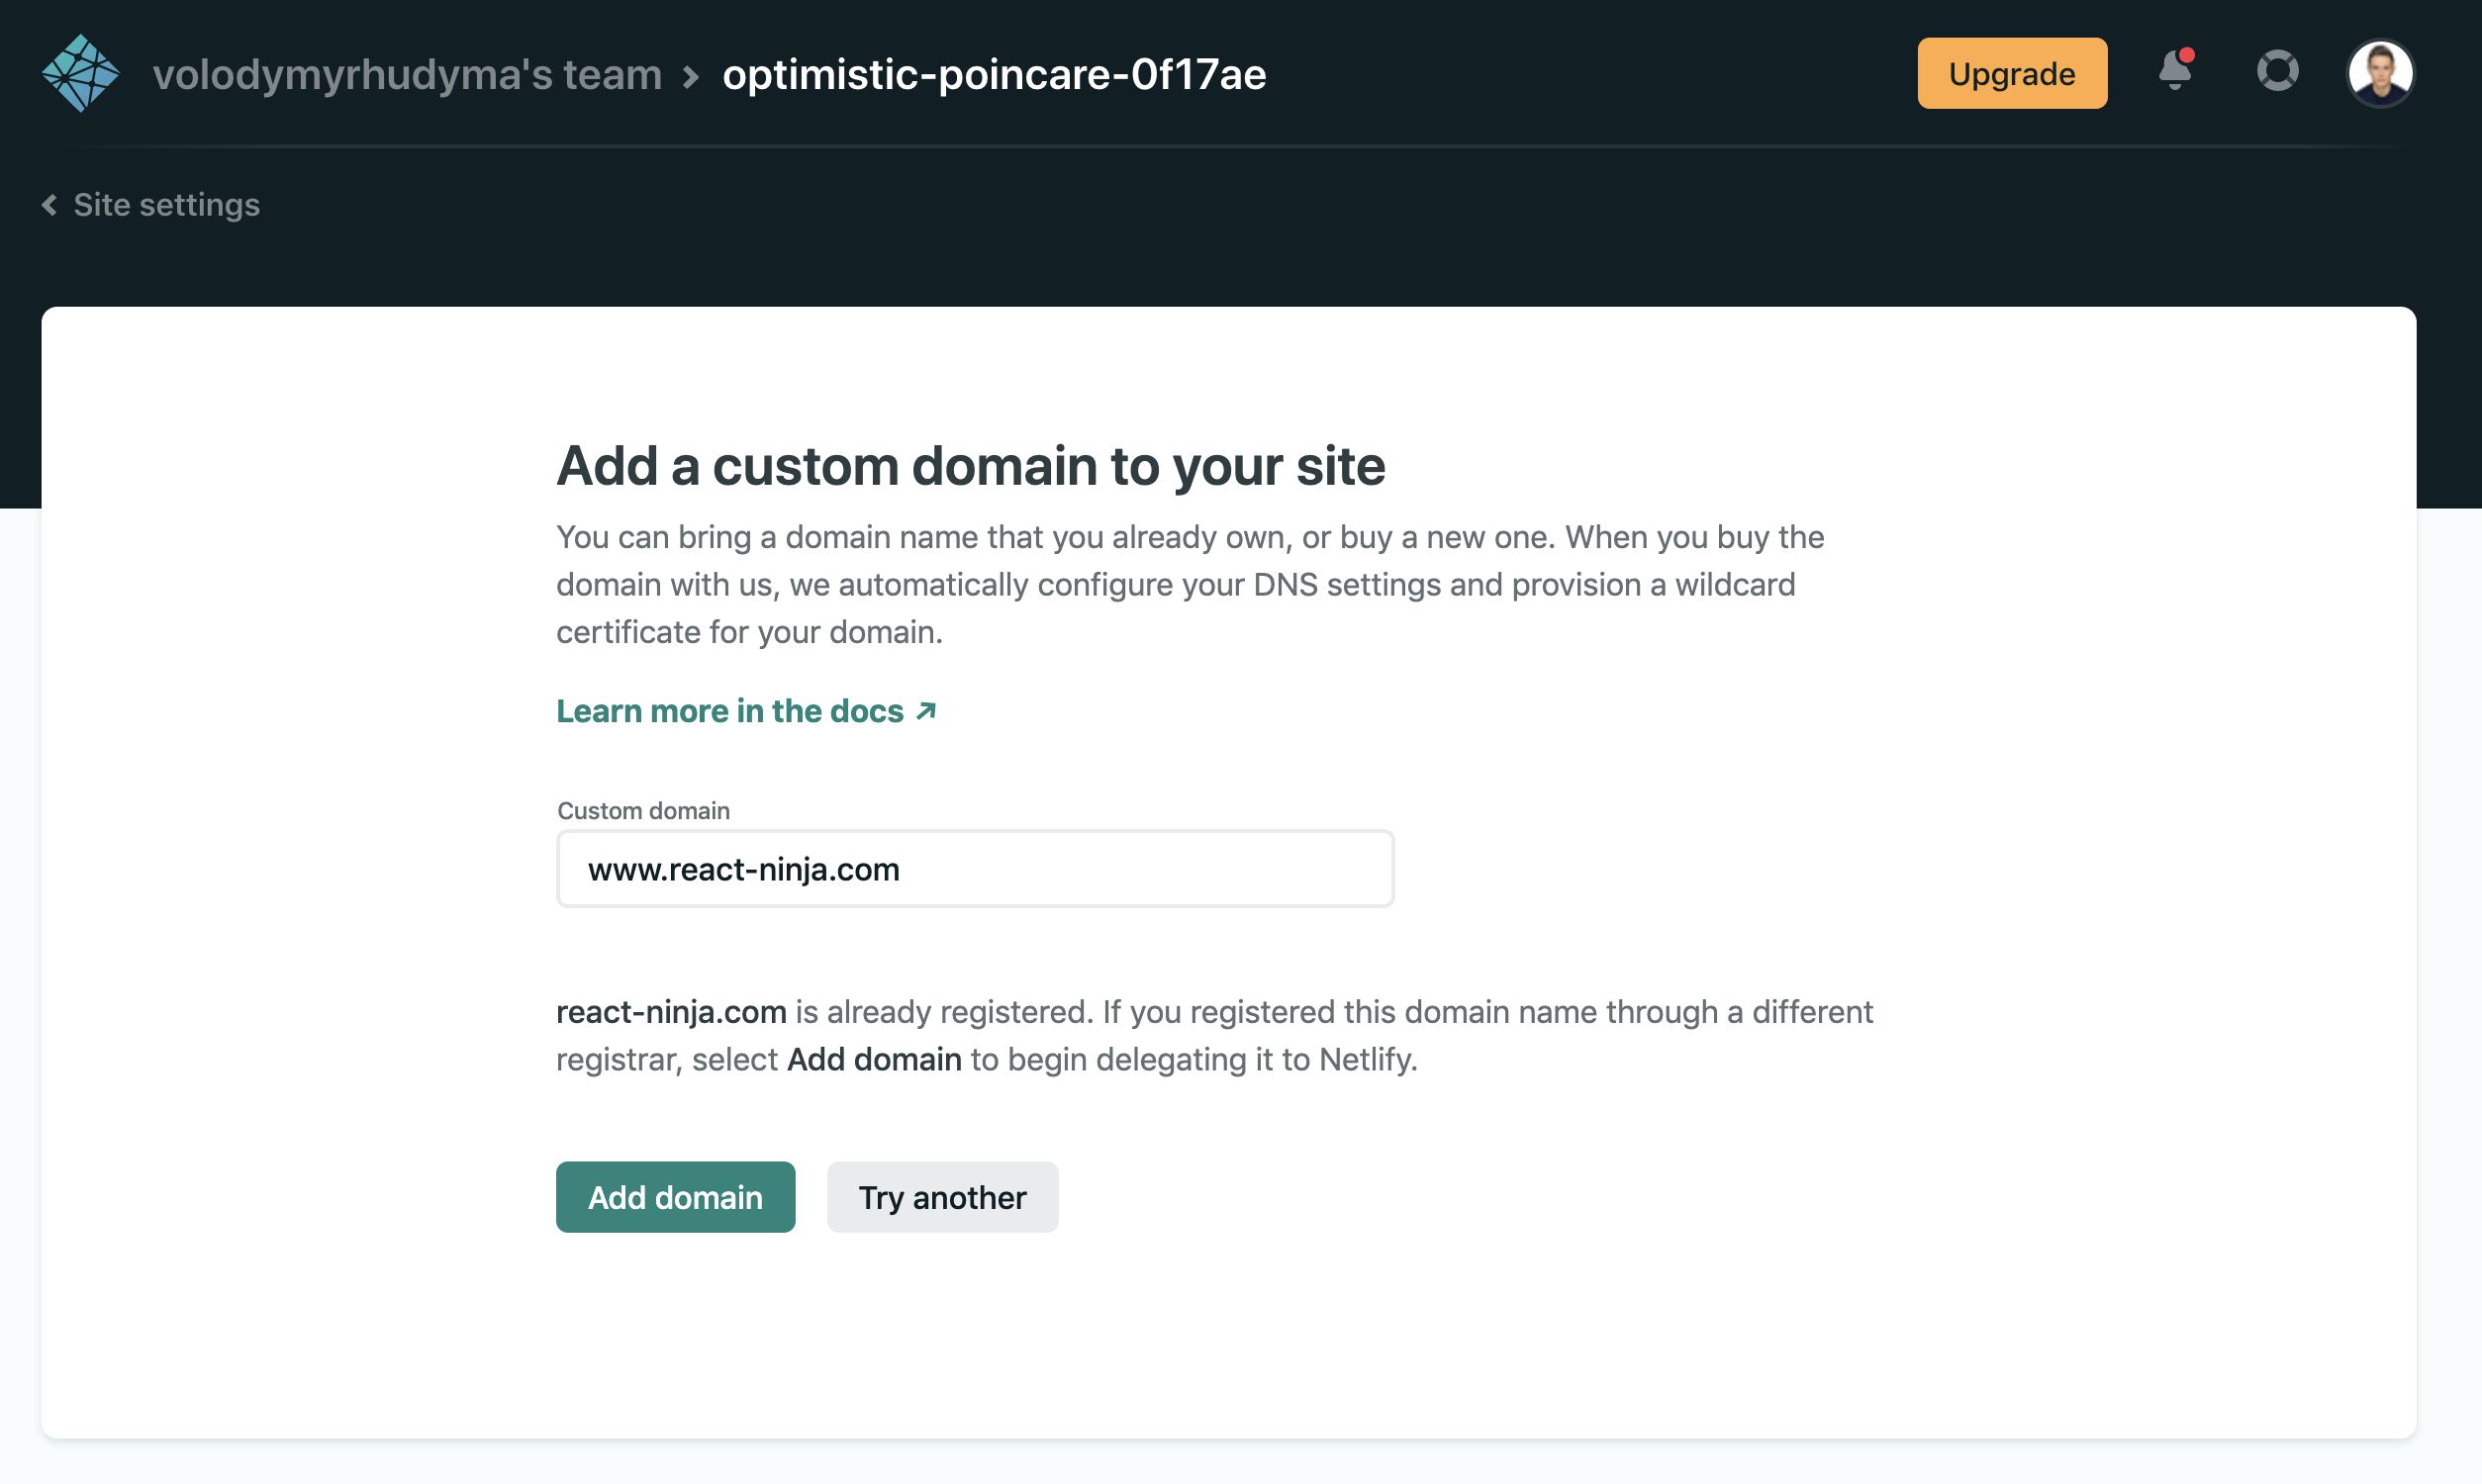
And that's it!
To make sure the domain was added successfully, check the "Custom Domains" section:
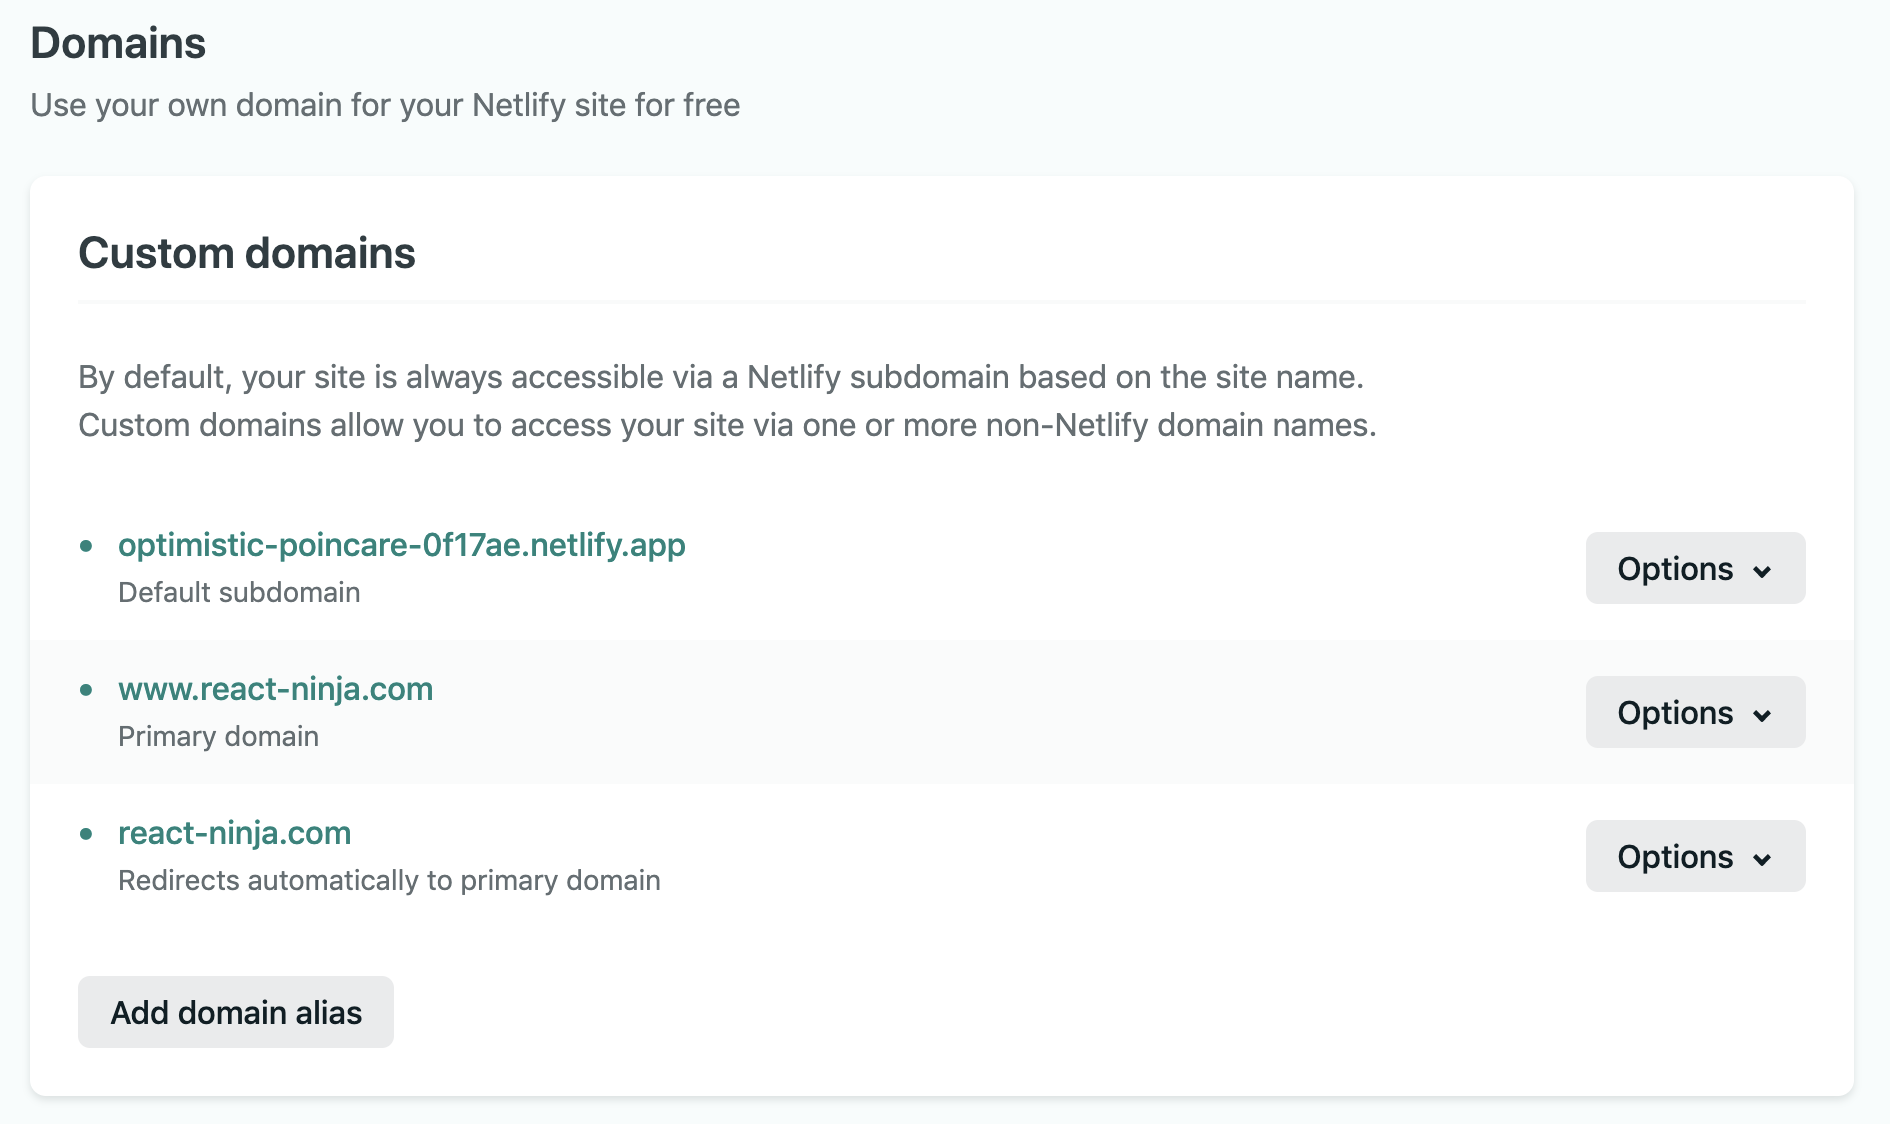
And also the "SSL/TLS certificate" section to make sure Netlify generated the certificate for your website:
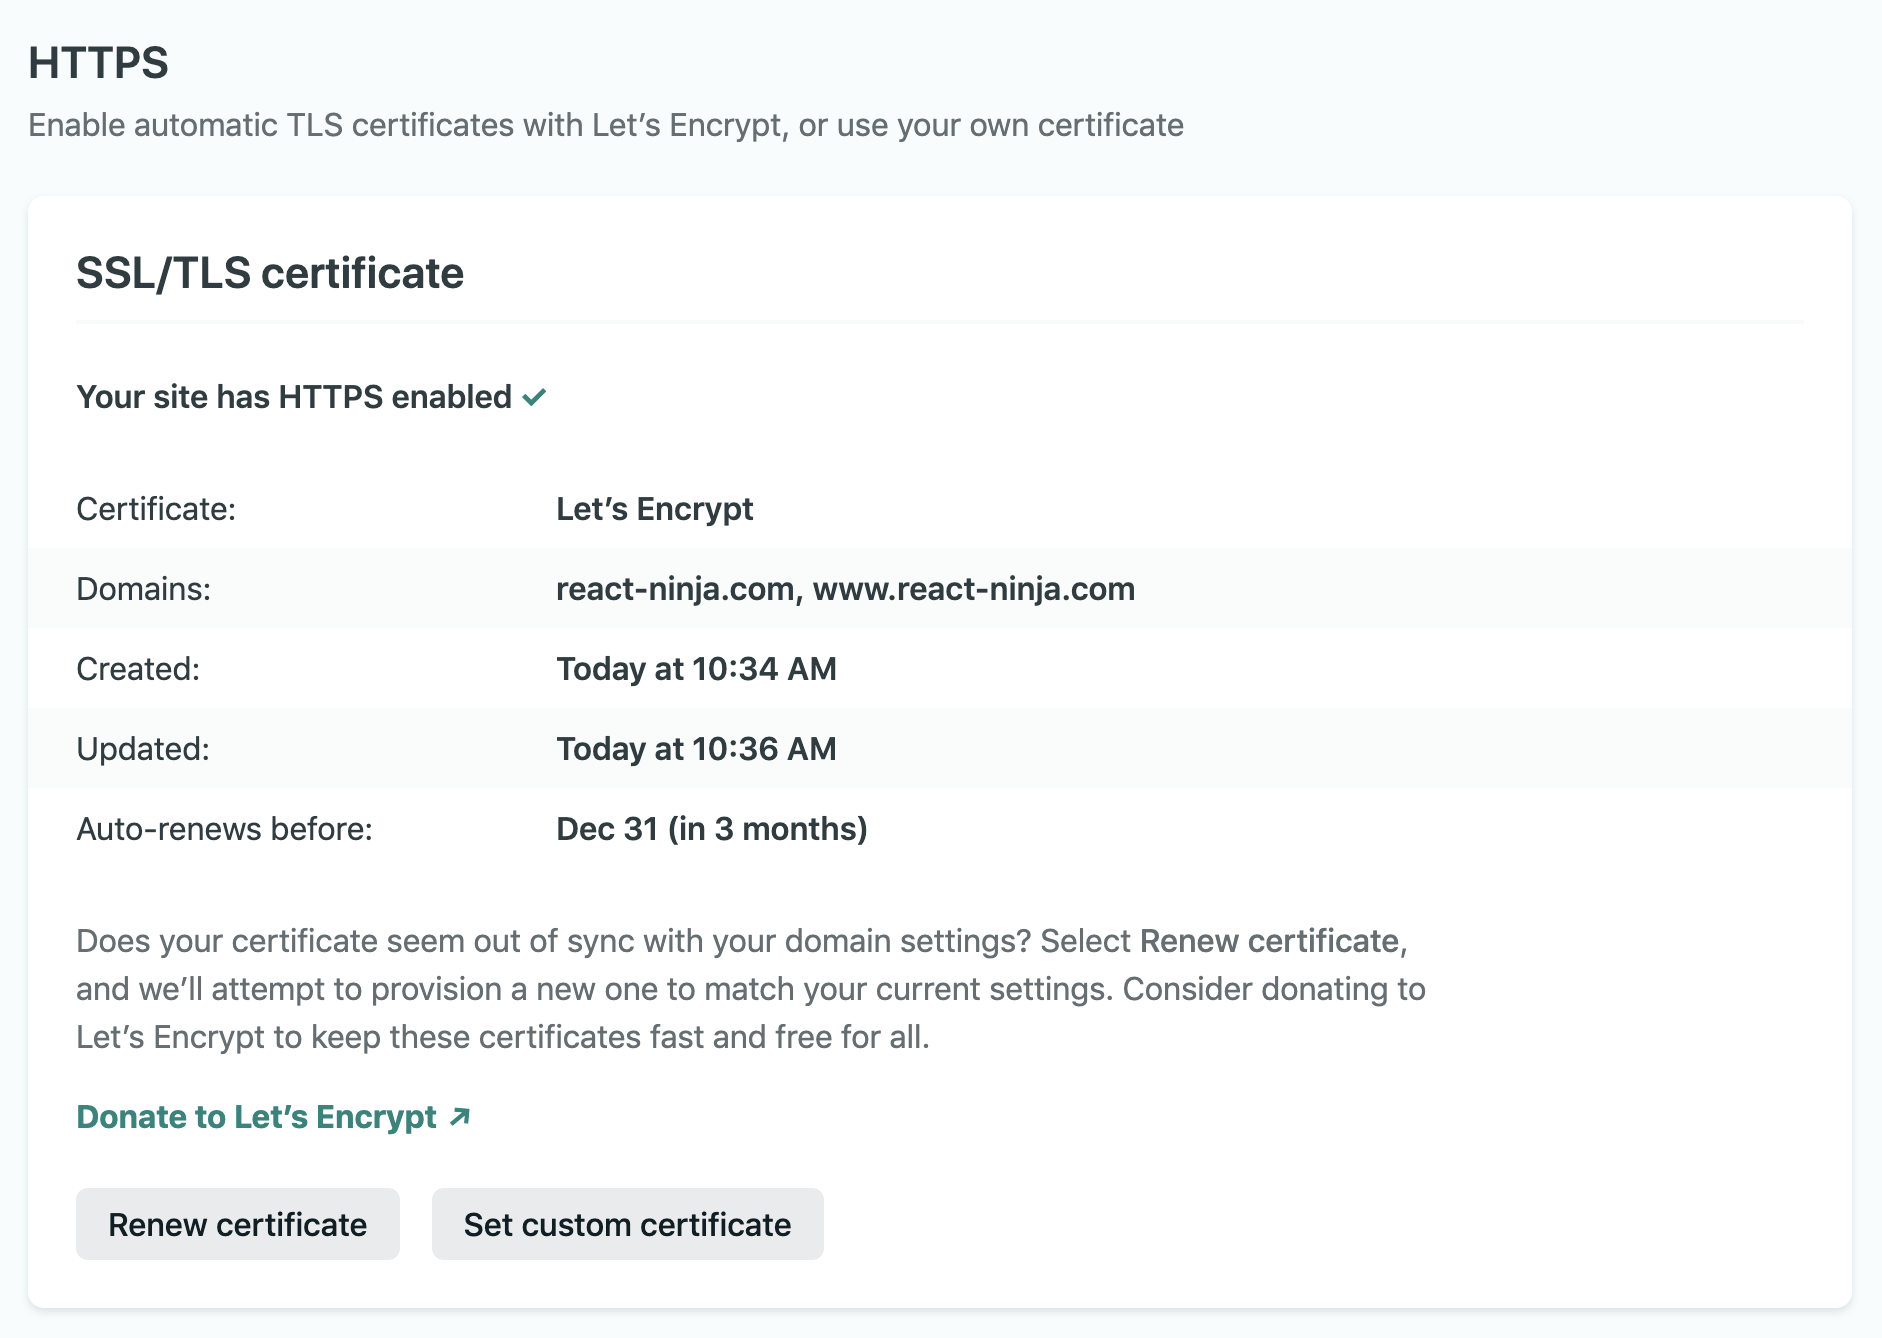
Congratulations on making it to the end and setting up your custom domain with GoDaddy and Netlify.
Bonus: Redirect "www" To "non-www"
You may have noticed that now when you type your domain into the URL, it redirects to "www".
That's perfectly fine, but in some cases we want to get rid of the "www" part.
To do that, we just need to change the primary domain in the "Custom Domains" section in Netlify and confirm our intent to make the change:
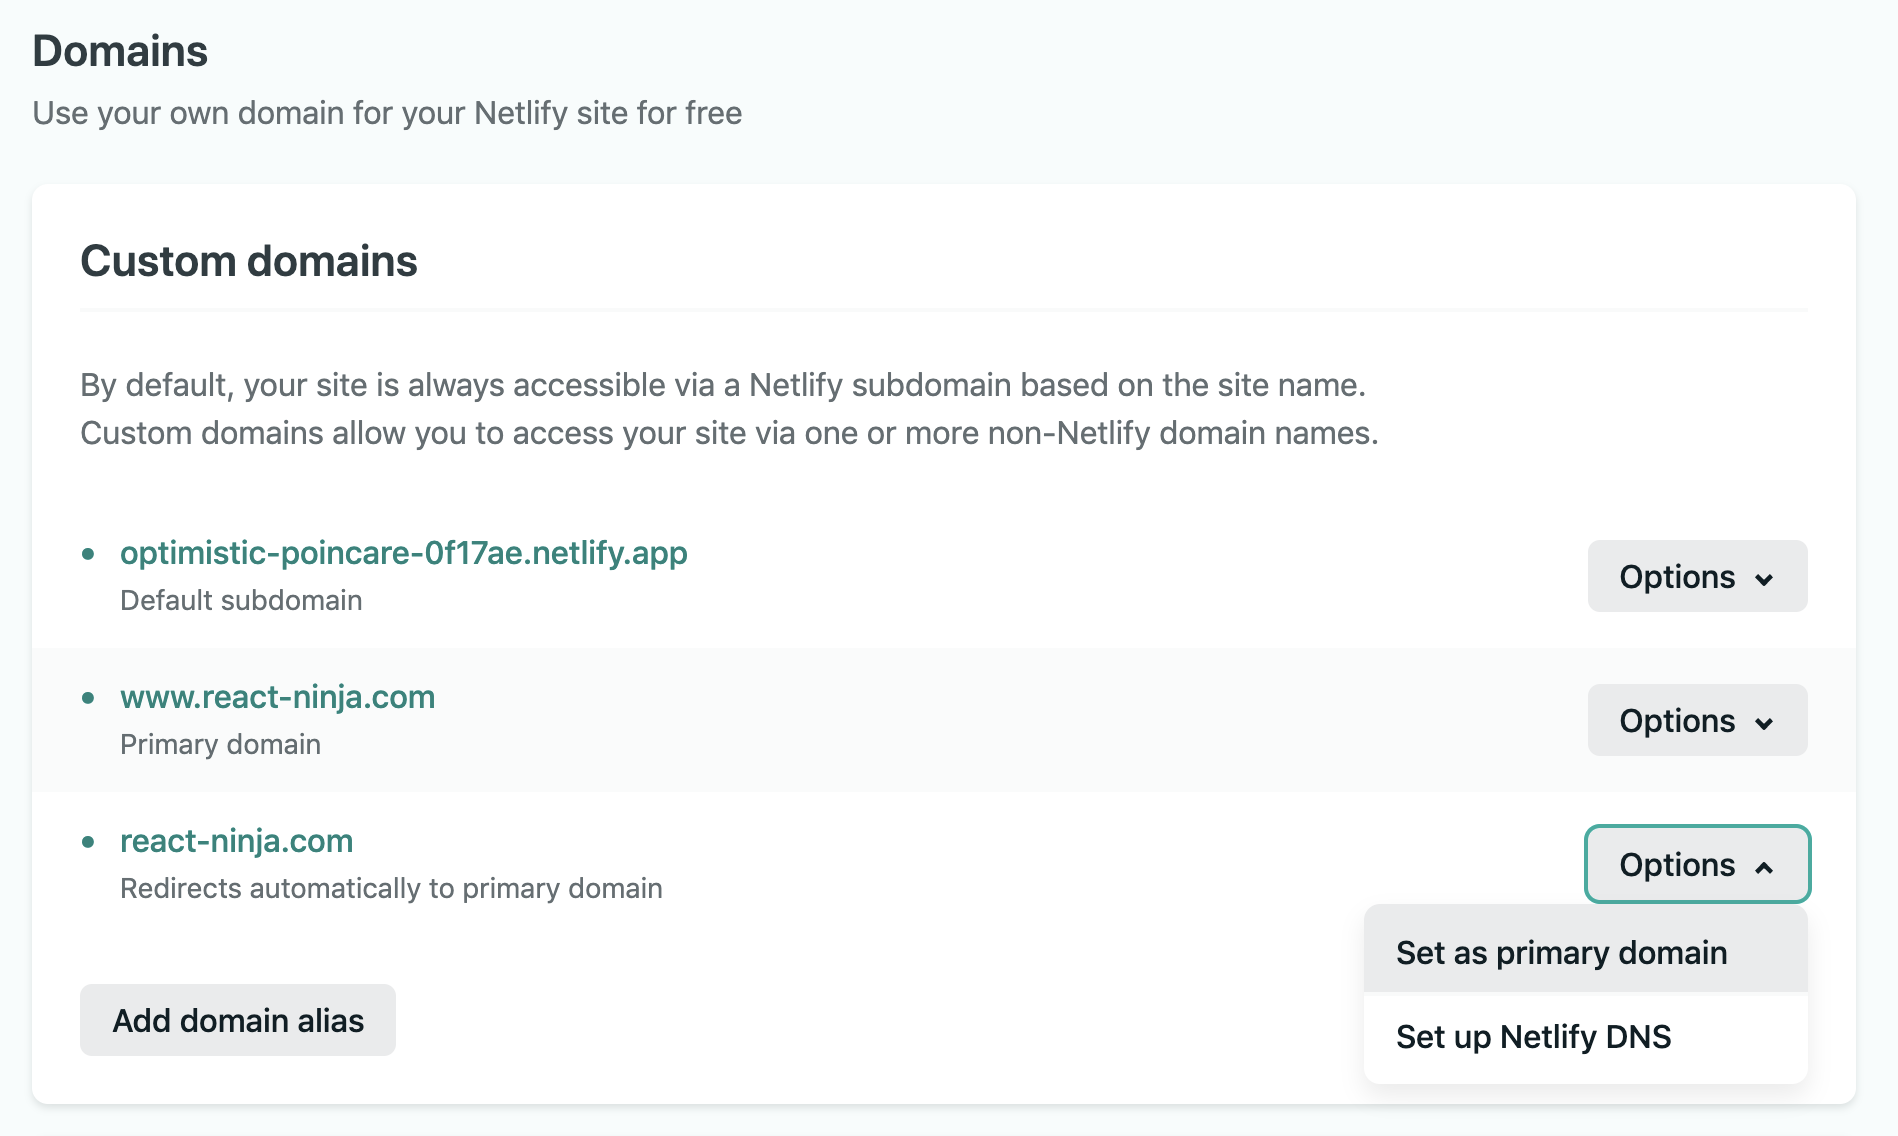
Enter your website and verify that the primary domain does not contain a "www" subdomain.
Summary
In this article, we learned how to connect a custom domain purchased on a GoDaddy domain registrar to a React application hosted on the Netlify service.
Basically, all that needs to be done is:
- Configure A and CNAME records in GoDaddy to point to the Netlify load balancer's IP address and our primary subdomain
- Add a custom domain in "Site Settings" in Netlify
I hope you got it working and congratulations, your website is now live!