Better Form Handling With Formik In React
Table Of Contents
Forms play a crucial role in modern web development by providing a way to collect information from customers.
Handling them well is a must to avoid losing data due to a silly validation mistake or bug in the code, which is not always an easy task, especially when forms are large.
While React makes it easier to work with forms, it's still difficult to build a maintainable, scalable and testable solution without adding any helper libraries.
There are a lot of libraries that improve the handling of forms, like formik, react-hook-form, redux-form, or react-final-form.
Each has its own advantages and disadvantages, but today we will focus on the most commonly used and popular one - Formik.
Step 1: Create A Basic Login Form
Before we start getting into Formik and such, we need a simple form built with raw React:
import { useState } from "react";

const ContactForm = () => {
  const [fullName, setFullName] = useState("");
  const [email, setEmail] = useState("");
  const [message, setMessage] = useState("");
  const [terms, setTerms] = useState(false);

  return (
    <div className="App">
      <form>
        <div className="form-group">
          <label htmlFor="fullName">Full name:</label>
          <input
            type="text"
            id="fullName"
            name="fullName"
            value={fullName}
            onChange={(e) => setFullName(e.target.value)}
          />
        </div>
        <div className="form-group">
          <label htmlFor="email">Email:</label>
          <input
            type="email"
            id="email"
            name="email"
            value={email}
            onChange={(e) => setEmail(e.target.value)}
          />
        </div>
        <div className="form-group">
          <label htmlFor="message">Message:</label>
          <textarea
            id="message"
            name="message"
            value={message}
            onChange={(e) => setMessage(e.target.value)}
          ></textarea>
        </div>
        <div className="form-group">
          <div className="checkbox">
            <input
              id="terms"
              name="terms"
              type="checkbox"
              value={terms}
              onChange={(e) => setTerms(e.target.checked)}
            />
            <label htmlFor="terms">I accept Terms And Conditions</label>
          </div>
        </div>
        <button>Submit</button>
      </form>
    </div>
  );
};

export default ContactForm;
The structure is very simple, we have a wrapper div, then a form that contains 5 elements: text input, email input, textarea, checkbox and a submit button.
Fort simplicity, we will skip the CSS code.
Here's what our code looks like:
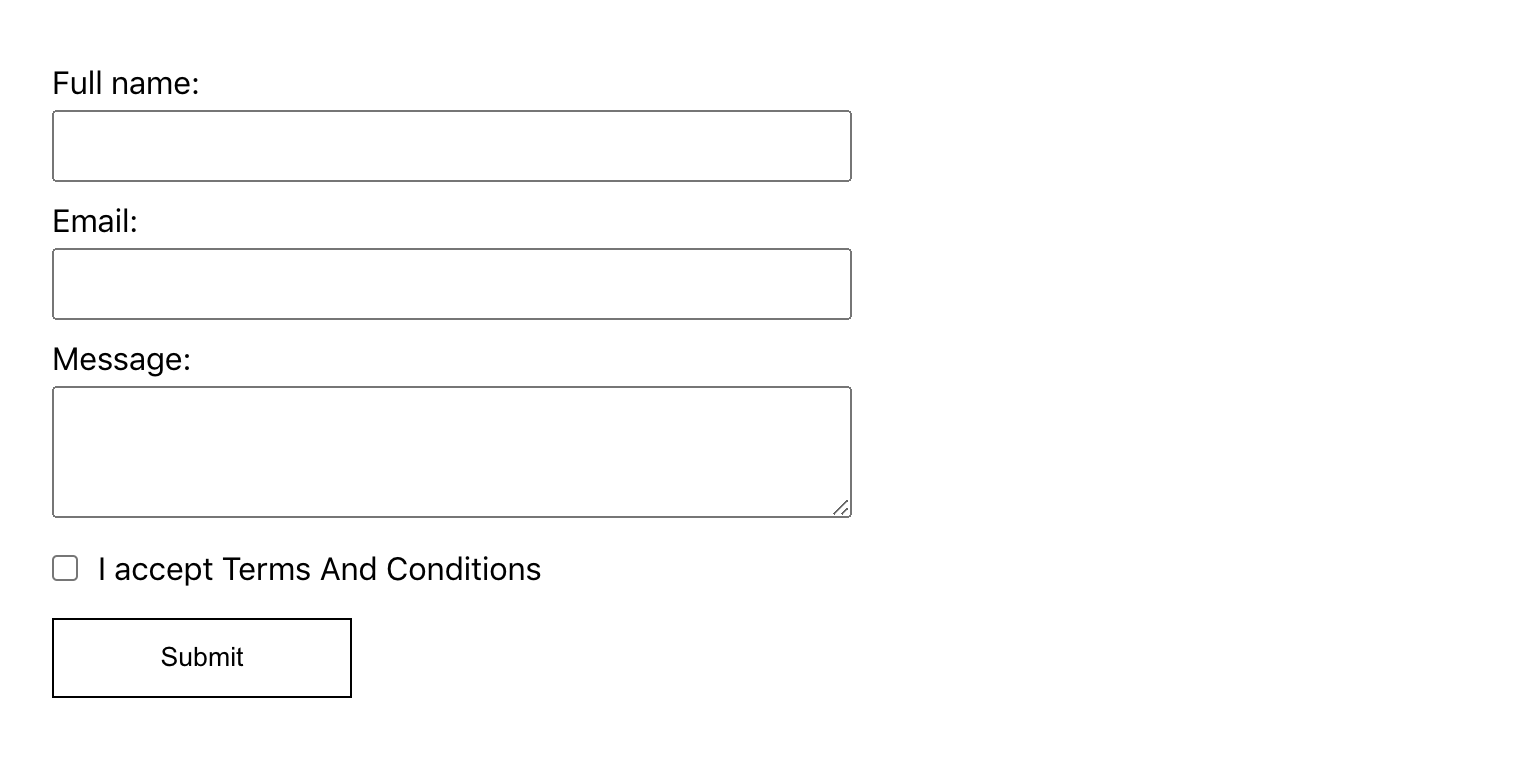
Note that we store the value of inputs in the local state of a React component, which means that inputs are controlled.
If we don't use the value and onChange properties and let inputs keep their state internally, they are called uncontrolled because we don't have control over their state, but DOM.
Read more about Controlled vs. Uncontrolled components here.
Why Formik?
Before adding Formik, let's try to understand why we need it in the first place and what benefits it brings.
If we were to add validation to our form, we might end up with the following code:
// ...
const [fullNameError, setFullNameError] = useState("");

const handleFullNameChange = (e) => {
  const { value } = e.target;

  setFullName(value);

  if (!value) {
    setFullNameError("Full name is required");
  }

  if (/\d/.test(value)) {
    setFullNameError("Full name should not contain numbers");
  }

  if (value.length > 50) {
    setFullNameError("Are you really sure that your full name is that big?");
  }
};

// ...
<div className="form-group">
  <label htmlFor="fullName">Full name:</label>
  <input
    type="text"
    id="fullName"
    name="fullName"
    value={fullName}
    onChange={handleFullNameChange}
  />
  {fullNameError}
</div>

// ..
To store an error message for each field, we would need a separate state entry and the validation logic must be implemented manually (but, we can use some helper libraries, like Yup).
For a simple form, like this one, which contains only 5 fields, we would need to keep 10 state entries (5 for storing values, 5 for validation).
Imagine if the form grew to 15-20 fields? That would cause chaos in the code.
That's where Formik comes in - it manages state and validation for you.
Generally speaking, what is Formik?
As described in the documentation:
Formik is a small set of React components and hooks for creating forms in React and React Native.
It helps with the three parts:
- Getting values in and out of form state
- Validation and error messages
- Handling form submission
By putting all of the above in one place, Formik keeps things organized and makes testing, refactoring, and reasoning about your forms a breeze.
Step 2: Add Formik
First, install the library:
yarn add formik
There are a few ways to integrate Formik into your application:
- useFormik hook
- Formik component
- withFormik higher-order component
In this tutorial, we'll stick with the first and modern method - useFormik hook, as hooks are a great addition to React and I recommend using them whenever possible.
Let's import the hook and use it in our code:
// ..
import { useFormik } from "formik";

// ..
const formik = useFormik({
  initialValues: {
    fullName: "",
    email: "",
    message: "",
    terms: false,
  },
  onSubmit: (values) => {
    console.log(values);
  },
});

console.log(formik);

// ..
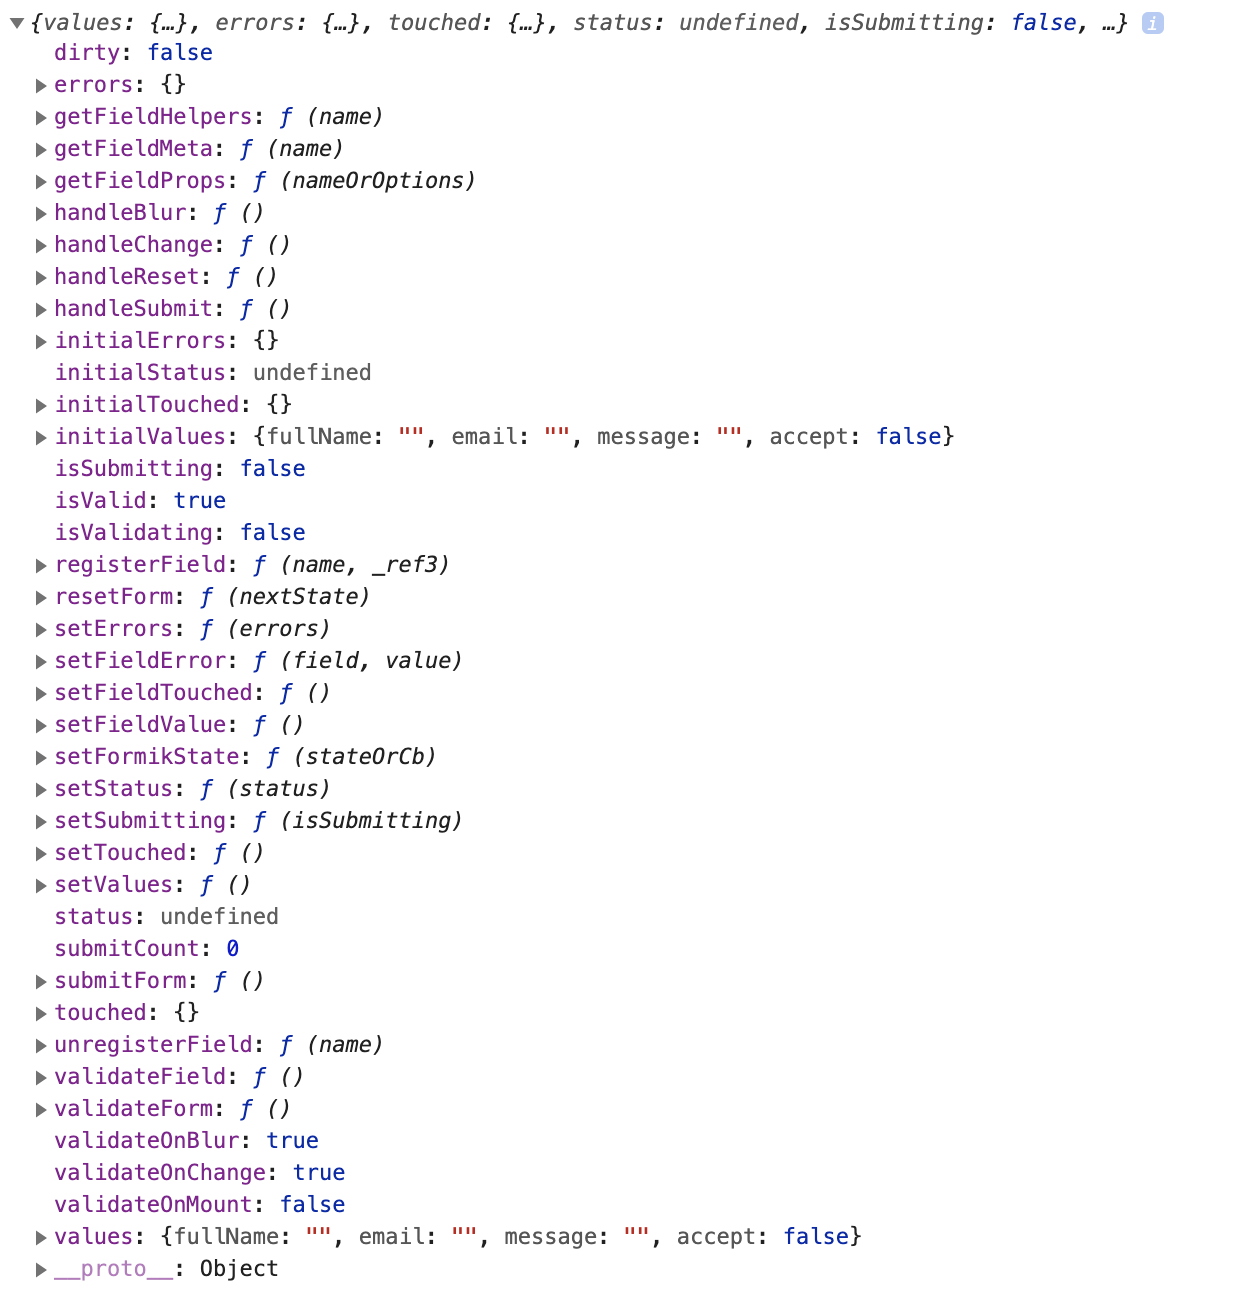
We should pass initialValues and a submission function onSubmit to the useFormik hook.
The hook will return us all available properties (at the moment we are interested only in handleSubmit - function fired when user clicks on a submit button, handleChange - function fired when a field is changed, values - an object containing current values of a form):
The next step is to pass each of these elements to our form:
// ..
<form onSubmit={formik.handleSubmit}>
  <div className="form-group">
    <label htmlFor="fullName">Full name:</label>
    <input
      type="text"
      id="fullName"
      name="fullName"
      value={formik.values.fullName}
      onChange={formik.handleChange}
    />
  </div>
  <div className="form-group">
    <label htmlFor="email">Email:</label>
    <input
      type="email"
      id="email"
      name="email"
      value={formik.values.email}
      onChange={formik.handleChange}
    />
  </div>
  <div className="form-group">
    <label htmlFor="message">Message:</label>
    <textarea
      id="message"
      name="message"
      value={formik.values.message}
      onChange={formik.handleChange}
    />
  </div>
  <div className="form-group">
    <div className="checkbox">
      <input
        id="terms"
        name="terms"
        type="checkbox"
        value={formik.values.terms}
        onChange={formik.handleChange}
      />
      <label htmlFor="terms">I accept Terms And Conditions</label>
    </div>
  </div>
  <button>Submit</button>
</form>

// ..
And that's it, our form, powered by the Formik, works!
Now take a close look at the code and notice that:
-
The exact same handleChange function is passed for each input
So to let Formik know which input we are changing, we need to pass the id or name properties. If we don't pass either of them, the following warning will be triggered and an input field would not be updated with the value provided:

- id and name should match the field name defined in initialValues
- The field value is accessed with formik.values.
Step 3: Validate Form
Let's add validation with Formik, since it doesn't make sense to allow users to submit a blank form.
To add validation, we define a custom validation function and pass it to the validate field in the useFormik hook.
If an error is to be displayed, this custom function should return an object with the property names that were also passed to initialValues:
const customValidator = (values) => {
  const errors = {};

  // Validate firstName
  if (!values.fullName) {
    errors.fullName = "Full name is required";
  } else if (values.fullName.length > 50) {
    errors.firstName = "Are you really sure that your full name is that big?";
  }

  // Validate email
  if (!values.email) {
    errors.email = "Email is required";
  } else if (values.lastName.length > 50) {
    errors.email = "Are you really sure that your email is that big?";
  }

  // Validate terms
  if (!values.terms) {
    errors.terms = "You should accept terms and conditions";
  }

  return errors;
};
Then pass it to the useFormik hook:
// ..
const formik = useFormik({
  initialValues: {
    fullName: "",
    email: "",
    message: "",
    terms: false,
  },
  validate: customValidator,
  onSubmit: (values) => {
    console.log(values);
  },
});

// ..
And display an error message under each input (read it from formik.errors.
// ..
<form onSubmit={formik.handleSubmit}>
  <div className="form-group">
    <label htmlFor="fullName">Full name:</label>
    <input
      type="text"
      id="fullName"
      name="fullName"
      value={formik.values.fullName}
      onChange={formik.handleChange}
    />
    {/* Show fullName error if exists */}
    {formik.errors.fullName}
  </div>
  <div className="form-group">
    <label htmlFor="email">Email:</label>
    <input
      type="email"
      id="email"
      name="email"
      value={formik.values.email}
      onChange={formik.handleChange}
    />
    {/* Show email error if exists */}
    {formik.errors.email}
  </div>
  <div className="form-group">
    <label htmlFor="message">Message:</label>
    <textarea
      id="message"
      name="message"
      value={formik.values.message}
      onChange={formik.handleChange}
    />
  </div>
  <div className="form-group">
    <div className="checkbox">
      <input
        id="terms"
        name="terms"
        type="checkbox"
        value={formik.values.terms}
        onChange={formik.handleChange}
      />
      <label htmlFor="terms">I accept Terms And Conditions</label>
    </div>
    {/* Show terms error if exists */}
    {formik.errors.terms}
  </div>
  <button>Submit</button>
</form>

// ..
As you may have noticed, we've made all the fields required except for message. Let it be optional.
By default, Formik validates the entire form after each change event, on blur and before submission, which negatively impacts the user experience because showing an error for the email field if user types the fullName is not correct:
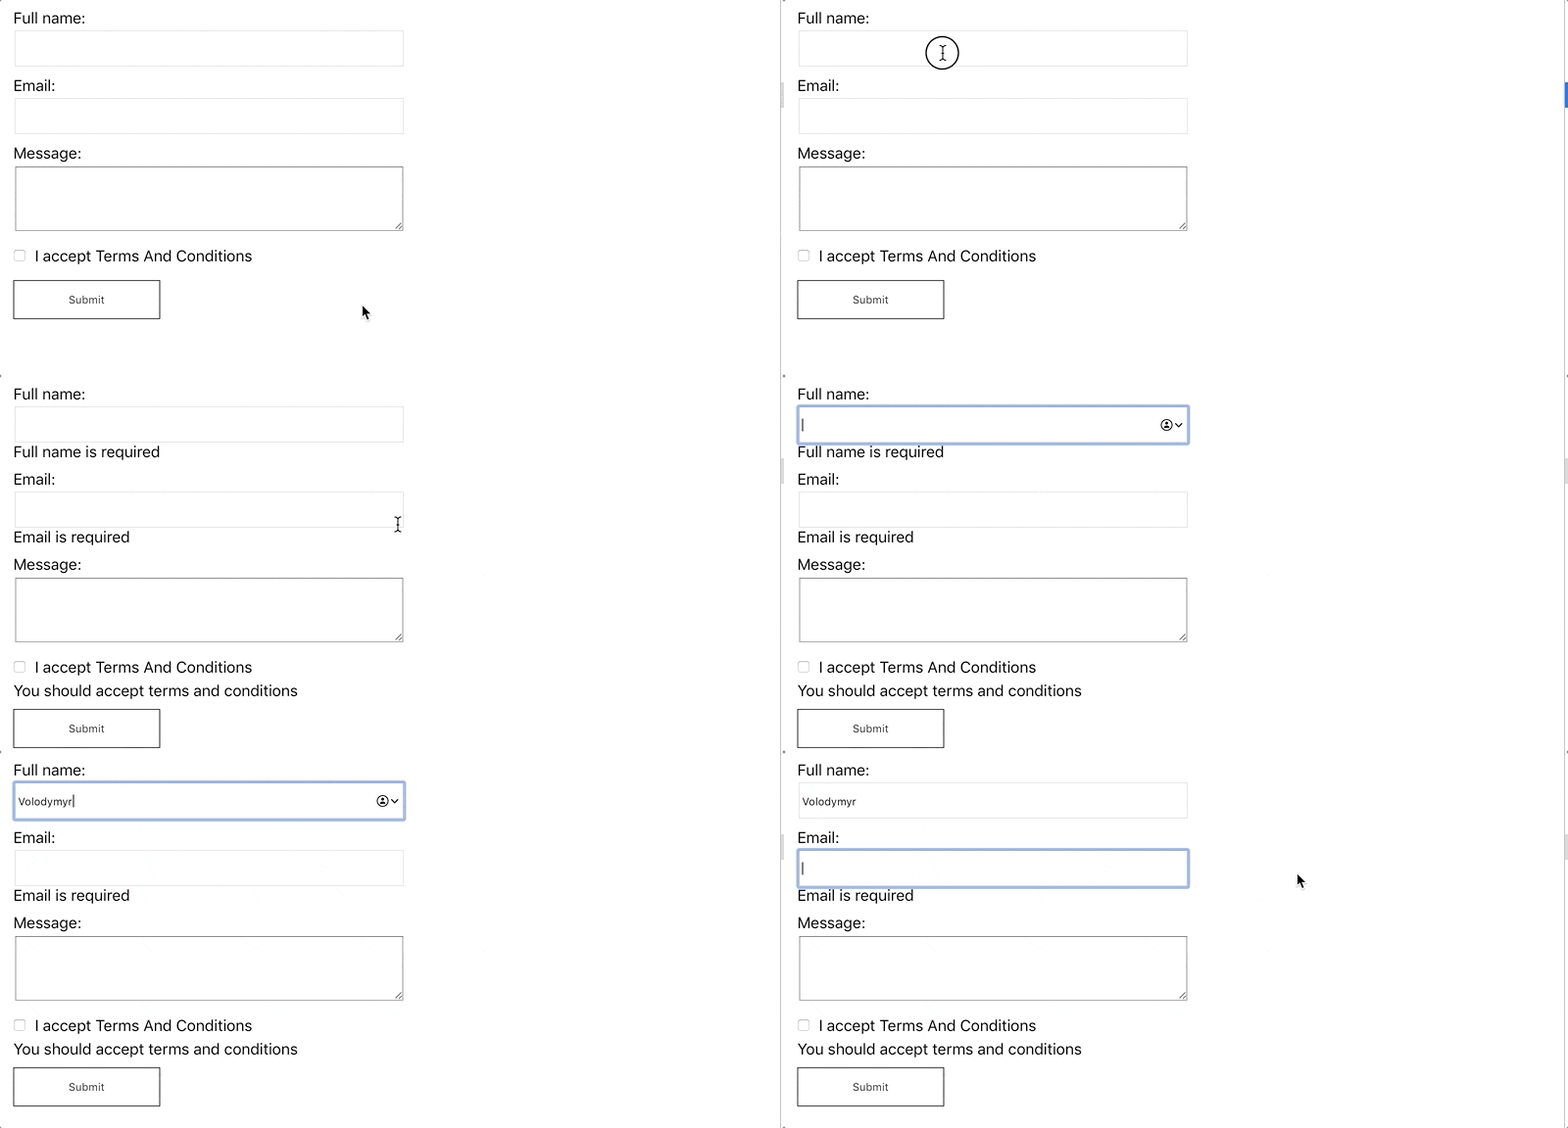
One more note: the handleSubmit function can only be executed if the form contains no errors, if there is at least one, the form cannot be submitted unless an error is fixed.
Step 4: Show errors for "touched" fields only
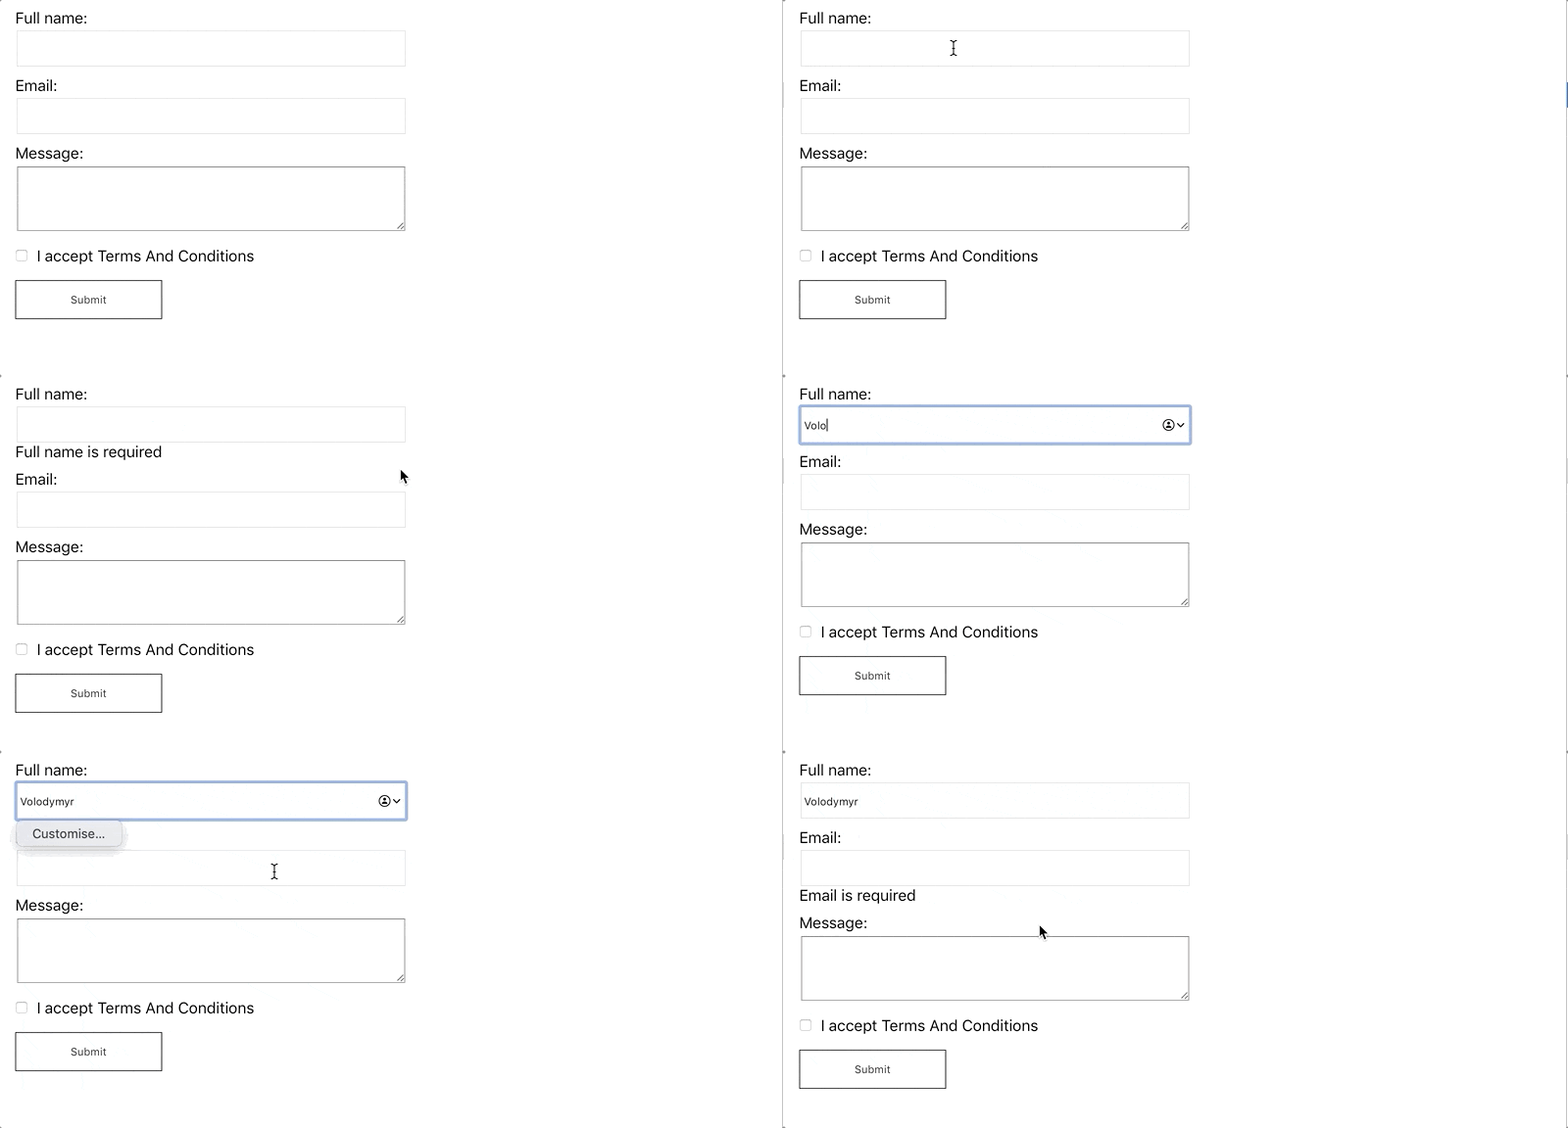
Showing the entire error list for the form when data is only entered for the first input is not good at all.
Let's change it to show only the errors related to the current field after the user has stopped typing.
Formik keeps track of the "touched" fields, just like the "errors" or "values".
To use this field, we need to pass the formik.handleBlur function to each input (this function works similarly to formik.handleChange):
// ..
<div className="form-group">
  <label htmlFor="fullName">Full name:</label>
  <input
    type="text"
    id="fullName"
    name="fullName"
    value={formik.values.fullName}
    onChange={formik.handleChange}
    {/* Pass "formik.handleBlur" to use "touched" field */}
    onBlur={formik.handleBlur}
  />
  {formik.errors.fullName}
</div>

// ..
And let's use formik.touched.
// ..
<div className="form-group">
  <label htmlFor="fullName">Full name:</label>
  <input
    type="text"
    id="fullName"
    name="fullName"
    value={formik.values.fullName}
    onChange={formik.handleChange}
    onBlur={formik.handleBlur}
  />
  {/* Display an error only if the field was "touched" */}
  {formik.touched.fullName && formik.errors.fullName}
</div>

// ..
Works perfectly fine:
Step 5: Maybe A Better Validation?
The validation is up to you, so you have a lot of space to do whatever is needed, either use a popular library or create validators yourself.
However, Formik authors love Yup - JavaScript schema builder for parsing and validating values, so integration between two libraries is great.
The useFormik hook allows us to pass validationSchema, a special Yup-related property that allows us to pass the Yup validation schema to Formik.
Let's install Yup first:
yarn add yup
Then we define a Yup validation schema for our form:
const validationSchema = Yup.object({
  fullName: Yup.string()
    .max(50, "Are you really sure that your full name is that big?")
    .required("Full name is required"),
  email: Yup.string()
    .email("Invalid email address")
    .required("Email is required")
    .max(50, "Are you really sure that your email is that big?"),
  terms: Yup.bool().oneOf([true], "You should accept terms and conditions"),
});
And pass it to the useFormik hook:
// ..
const formik = useFormik({
  initialValues: {
    fullName: "",
    email: "",
    message: "",
    terms: false,
  },
  // Pass schema as "validationSchema"
  validationSchema,
  onSubmit: (values) => {
    console.log("Submitted!");
  },
});

// ..
Looks much cleaner and better.
Step 6: Reduce Some Boilerplate Code
Notice how we duplicated many things in the code above, such as explicitly passing onChange, onBlur, etc.
Formik provides us with a getFieldProps() method that makes wiring up inputs much faster.
With some field-level information, it returns you the exact group of onChange, onBlur, value, name.
We can replace this:
// ..
<div className="form-group">
  <label htmlFor="fullName">Full name:</label>
  <input
    type="text"
    id="fullName"
    name="fullName"
    value={formik.values.fullName}
    onChange={formik.handleChange}
    onBlur={formik.handleBlur}
  />
  {formik.errors.fullName}
</div>

// ..
With this:
// ..
<div className="form-group">
  <label htmlFor="fullName">Full name:</label>
  <input
    type="text"
    id="fullName"
    {...formik.getFieldProps('fullName')}
  />
  {formik.errors.fullName}
</div>

// ..
Step 7: Use A Bit Of React Context
In the code above, we need to manually pass formikProps to the inputs (even if we use getFieldProps, it still needs to be there).
This leads to a lot of code repetition, which can be avoided if we use React Context.
Fortunately, Formik uses it internally and exposes components, like Formik, Form, Field, ErrorMessage.
All of them use React Context, to connect to the Formik state and methods:
import * as Yup from "yup";
import { Formik, Field, Form, ErrorMessage } from "formik";

const validationSchema = Yup.object({
  fullName: Yup.string()
    .max(50, "Are you really sure that your full name is that big?")
    .required("Full name is required"),
  email: Yup.string()
    .email("Invalid email address")
    .required("Email is required")
    .max(50, "Are you really sure that your email is that big?"),
  terms: Yup.bool().oneOf([true], "You should accept terms and conditions"),
});

const ContactForm = () => (
  <div className="App">
    <Formik
      initialValues={{
        fullName: "",
        email: "",
        message: "",
        terms: false,
      }}
      validationSchema={validationSchema}
      onSubmit={(values) => {
        console.log(values);
      }}
    >
      <Form>
        <div className="form-group">
          <label htmlFor="fullName">Full name:</label>
          <Field type="text" name="fullName" />
          <ErrorMessage name="fullName" />
        </div>
        <div className="form-group">
          <label htmlFor="email">Email:</label>
          <Field type="text" name="email" />
          <ErrorMessage name="email" />
        </div>
        <div className="form-group">
          <label htmlFor="message">Message:</label>
          <Field as="textarea" name="message" />
        </div>
        <div className="form-group">
          <div className="checkbox">
            <Field type="checkbox" name="terms" />
            <label htmlFor="terms">I accept Terms And Conditions</label>
          </div>
          <ErrorMessage name="terms" />
        </div>
        <button>Submit</button>
      </Form>
    </Formik>
  </div>
);

export default ContactForm;
Note that by default, the Field component renders an input with the specified name and implicitly grabs handleChange, handleBlur and value and passes them to the input along with your custom props.
If you want to render textarea, pass as prop to the Field component.
Step 8: Pre-Populate Initial State
Some forms are pre-populated with data coming from an external APIs, so let's see how to add it to our form.
First, the data needs to be fetched:
// ..
const [initialValues, setInitialValues] = useState({
  fullName: "",
  email: "",
  message: "",
  terms: false,
});

useEffect(() => {
  // Simulate call to an external API
  setTimeout(() => {
    setInitialValues({
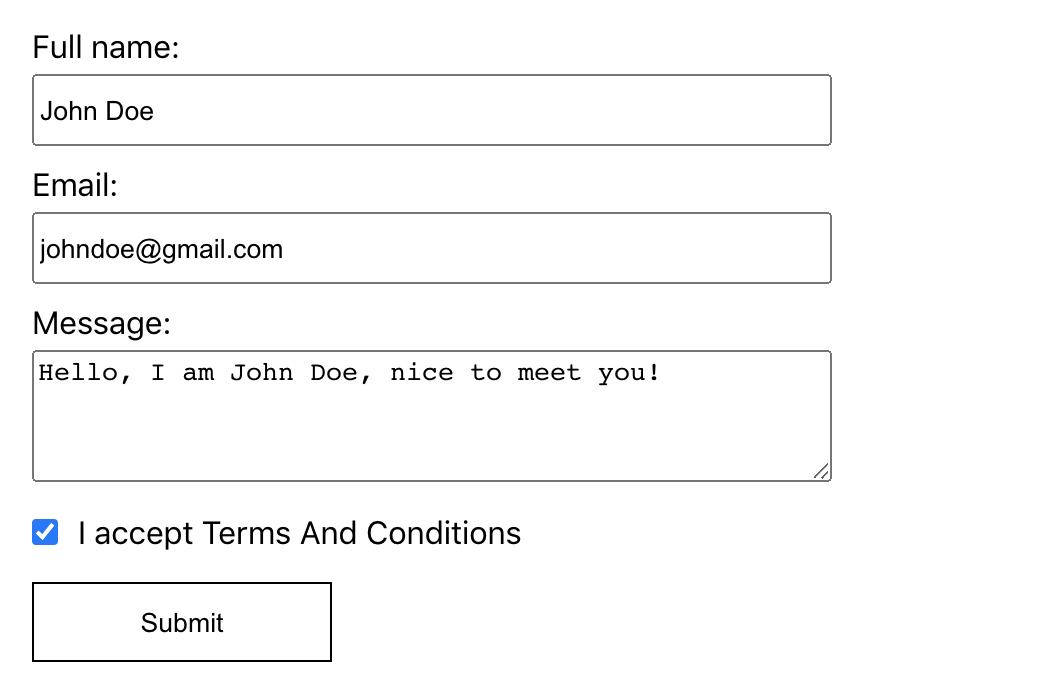
      fullName: "John Doe",
      email: "johndoe@gmail.com",
      message: "Hello, I am John Doe, nice to meet you!",
      terms: true,
    });
  }, 1000);
}, []);

// ..
We keep the initial state of the form in the local component's state and update it with values fetched from an external API.
Next, we need to pass initialValues to Formik:
<Formik
  initialValues={initialValues}
  validationSchema={validationSchema}
  onSubmit={(values) => {
    console.log(values);
  }}
>
  {/* ... */}
</Formik>
Try it and see that it ... doesn't work! Can you guess why?
By default, Formik does not reset the form when initialValues prop changes, but we can force it to reset the values by passing enableReinitialize={true}.
The default value for this prop is false.
It controls whether Formik should reset the form when initialValues changes (using Deep Equality):
<Formik
  initialValues={initialValues}
  // Equals to "false" by default
  enableReinitialize={true}
  validationSchema={validationSchema}
  onSubmit={(values) => {
    console.log(values);
  }}
>
And see the form pre-filled with the data, well done!
Bonus Step: Submit Form Outside Of Formik
A common use case when working with forms is the need to submit them by clicking a button placed outside the form element.
In this section, we will see some ways to do this with and without Formik.
#1 - Use "form" Attribute
Probably the easiest solution, if you don't need to support IE11 and below (caniuse link), is to use the form attribute on a submit button (it must match the id of the form you want to submit):
<>
  <Formik
    // ..
  >
    <Form id="contact-form">
      {/* ... */}
    </Form>
  </Formik>
  <button form="contact-form">Submit</button>
</>
#2 - Use A Reference To The Formik Component
This is a good solution that works well on all browsers.
Just save the reference to Formik and call handleSubmit on it:
const ContactForm = () => {
  const formRef = useRef(null);

  // ..
  const handleSubmit = () => {
    if (formRef.current) {
      formRef.current.handleSubmit();
    }
  };

   return (
      <Formik
        // ..
        innerRef={formRef}
      >
        {/* ... */}
      </Formik>
   );
};
#3 - Bind Submit Form In Parent Component
If the submit button is placed in the parent component, you can bind submitForm and trigger submission from the parent:
const ParentComponent = () => {
  let submitForm = null;

  const bindSubmitForm = (form) => {
    submitForm = form;
  };

  const handleSubmit = (e) => {
    if (submitForm) {
      submitForm(e);
    }
  };

  return (
    <>
      <button onClick={handleSubmit}>Submit</button>
      <ContactForm bindSubmitForm={bindSubmitForm} />
    </>
  );
};

const ContactForm = ({ bindSubmitForm }) => {
  return (
    <Formik
      initialValues={initialValues}
      enableReinitialize={true}
      validationSchema={validationSchema}
      onSubmit={(values) => {
        console.log(values);
      }}
    >
      {(formikProps) => {
        bindSubmitForm(formikProps.submitForm);
        return (
          // ...
        );
      }}
    </Formik>
  );
};
Summary
In this article, we created a simple Contact Form using React, Formik and Yup libraries.
Hope you enjoyed this awesome library and will try it in your next project.
However, keep in mind that we've only touched on a small portion of all the features Formik offers.
So be sure to check out the documentation to learn more.